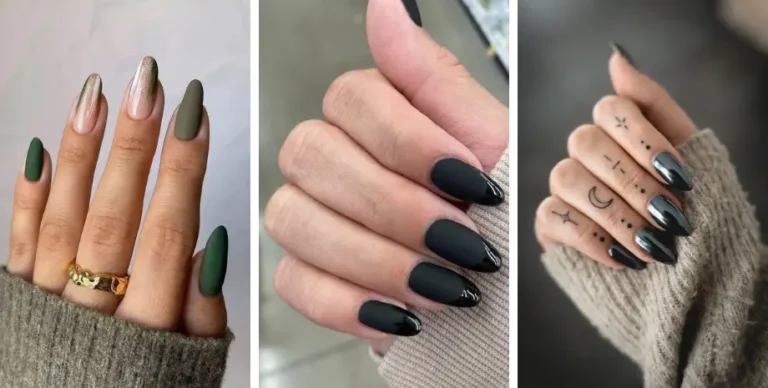
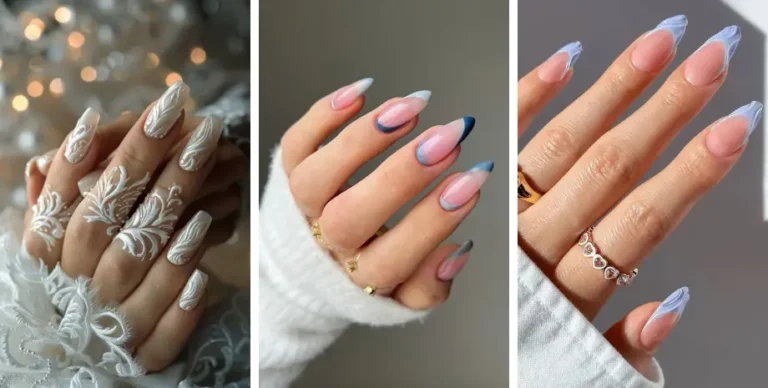
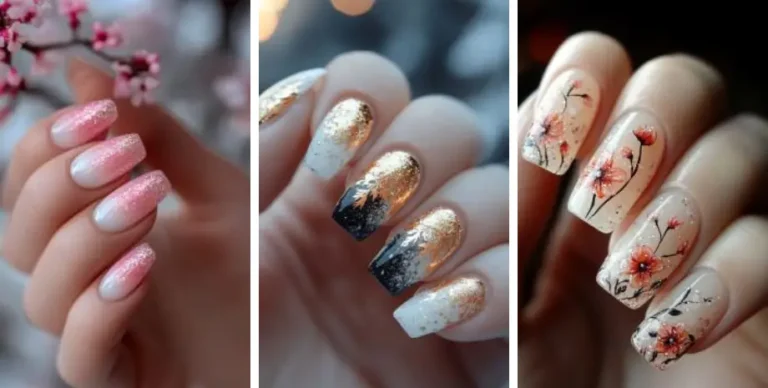
Discover the bold and captivating world of snake nail designs, where artistry meets a touch of the wild. These designs not only embody the allure and mystery of snakes but also offer a unique way to express your personal style. Each design, from minimalist outlines to intricate textures, provides a distinct statement, allowing you to showcase your individuality with confidence.
As a man who appreciates both creativity and sophistication, you might find these snake nail ideas resonate deeply with your aesthetic sensibilities. The blend of edgy motifs and refined details captures a sense of adventure while maintaining a sleek and polished appearance. Whether you’re drawn to the subtle elegance of a gold snake accent or the dramatic flair of a coiled design, there’s a snake nail design that speaks to your inner style.
Embracing these designs can transform your nails into a canvas of self-expression, merging the fierce beauty of serpents with the nuances of modern fashion. With every glance at your nails, you’ll feel a surge of confidence and a connection to a design that’s both fierce and refined. Dive into these innovative nail art ideas and let your nails become a true reflection of your bold personality.
1. Minimalist Snake Outline Nails
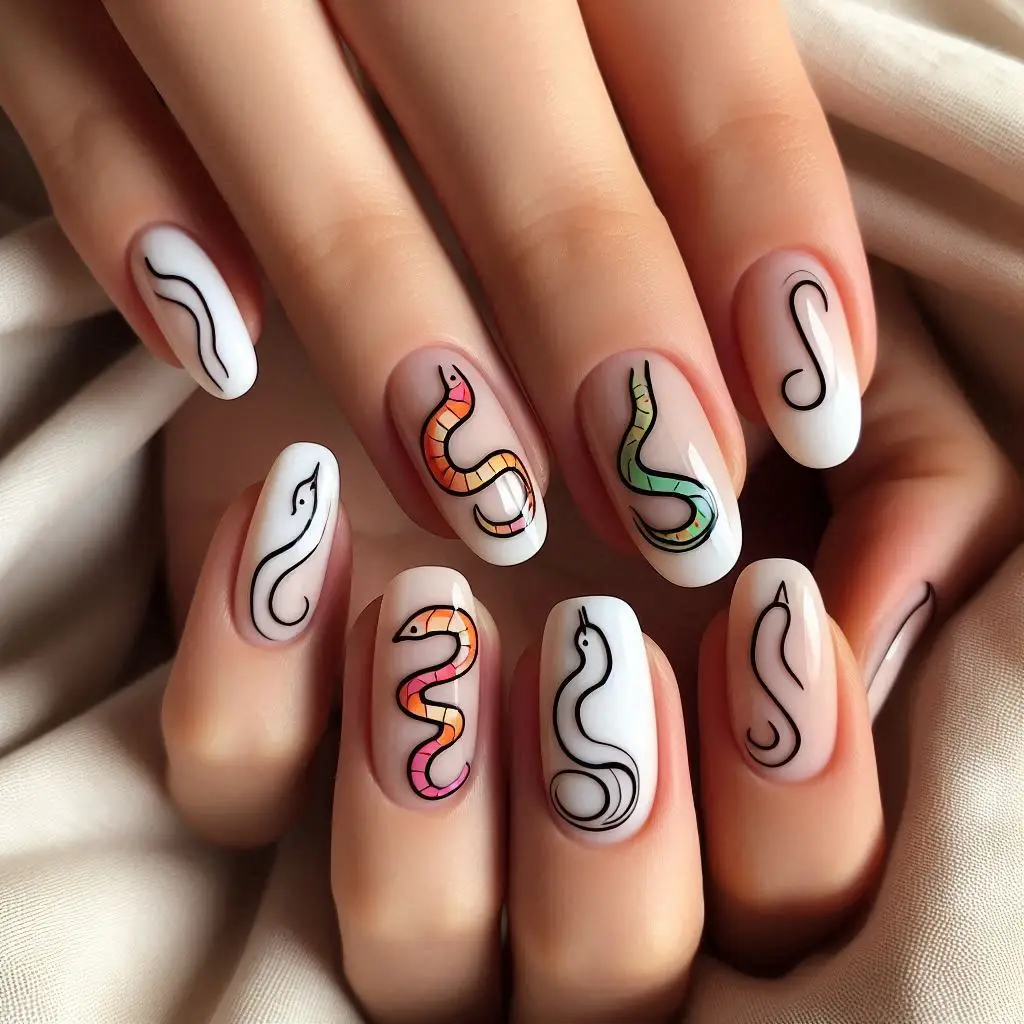
Minimalist Snake Outline Nails combine the elegance of nude or pastel nails with the edgy appeal of a simple black snake outline. This design is perfect for those who appreciate minimalist aesthetics with a touch of boldness. Here’s how to achieve this sophisticated and edgy look:
Materials Needed:
- Nude or Pastel Nail Polishes: Choose a soft nude or pastel shade for the base color.
- Black Nail Polish: For creating the snake outline.
- Base Coat: To protect your natural nails.
- Top Coat: To seal the design and add shine.
- Nail Art Brushes: For creating the snake outline.
- Dotting Tools or Fine Detail Brushes: For precision in drawing the outline.
- Cuticle Oil: To keep your cuticles healthy.
Steps to Achieve the Look:
- Prepare Your Nails:
- Clean and shape your nails into your desired shape, such as square, oval, or almond.
- Apply a base coat to protect your natural nails and let it dry completely.
- Apply the Base Color:
- Nude or Pastel Base: Paint your nails with the chosen nude or pastel polish. Apply one or two coats for full coverage and a smooth finish. Allow the polish to dry completely.
- Create the Snake Outline:
- Draw the Outline: Use a fine detail brush or a dotting tool to carefully draw a minimalist snake outline on each nail. Start by drawing a simple, smooth curve or wavy line to represent the snake’s body.
- Shape: The snake outline can be a simple, continuous line or slightly more detailed with small loops or curves to mimic the snake’s shape.
- Placement: You can place the snake outline along the center of the nail or as a diagonal accent. The design can be drawn in varying positions depending on your preference.
- Draw the Outline: Use a fine detail brush or a dotting tool to carefully draw a minimalist snake outline on each nail. Start by drawing a simple, smooth curve or wavy line to represent the snake’s body.
- Add Final Touches:
- Top Coat: Apply a top coat over the entire design to seal in the snake outline and add a glossy finish. This will help to protect your manicure and keep it looking fresh.
- Drying: Allow your nails to dry completely before touching anything to avoid smudging or denting the design.
- Final Touches:
- Cuticle Care: Apply cuticle oil around your nails to keep your cuticles healthy and moisturized. This will enhance the overall look of your manicure and keep your nails looking neat.
Tips:
- Precision: For a clean and minimalist look, use a fine detail brush and take your time to draw the snake outline with precision.
- Contrast: The black outline should stand out against the nude or pastel base color. Ensure that the lines are fine and clean to maintain the minimalist aesthetic.
- Design Variation: You can experiment with different snake designs, such as a single coiled snake or a more abstract representation, depending on your personal style.
Minimalist Snake Outline Nails offer a chic and edgy look with their combination of soft base colors and striking black outlines. This design adds a touch of sophistication and modernity, perfect for those who want to make a subtle yet bold statement.
2. Gold Snake Accent Nails
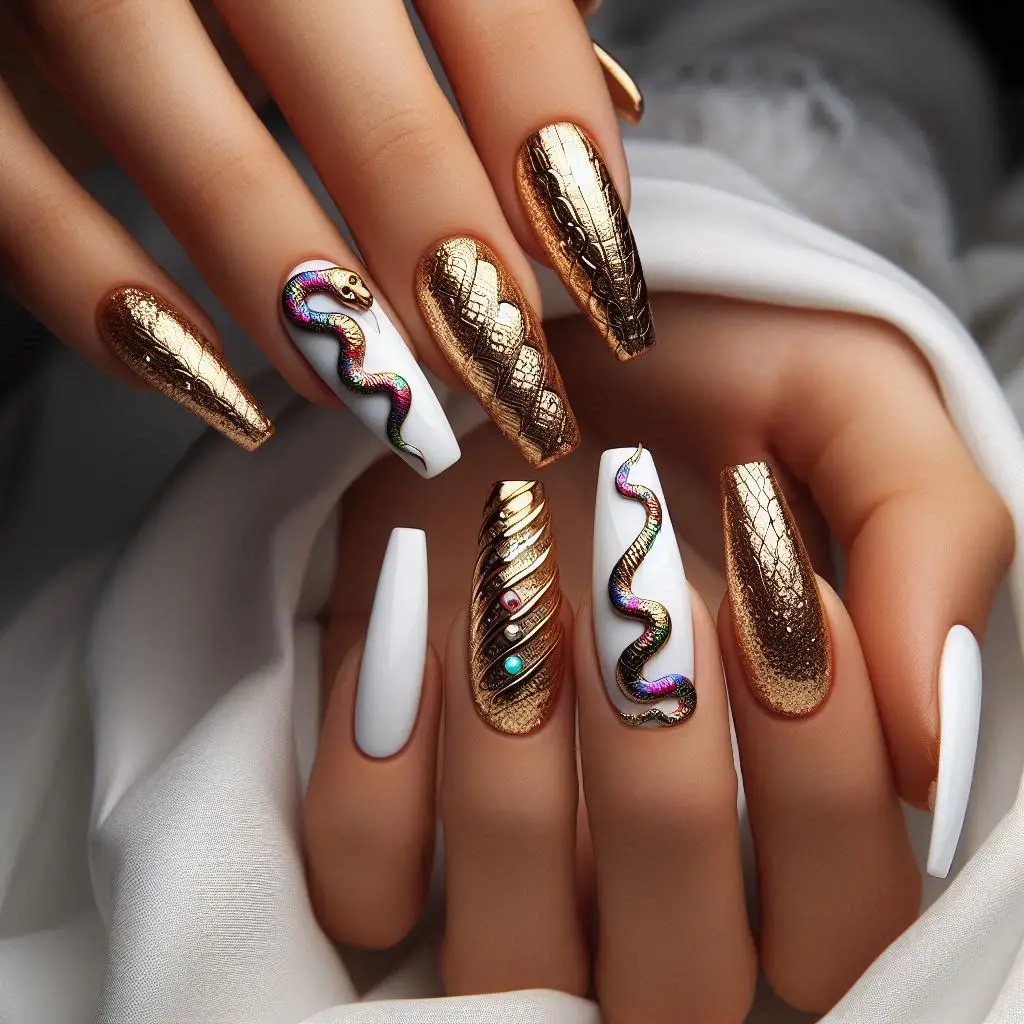
Gold Snake Accent Nails create a striking and luxurious manicure by combining matte black nails with metallic gold snake accents. This design is both bold and sophisticated, perfect for making a statement with a touch of opulence. Here’s how to achieve this glamorous look:
Materials Needed:
- Matte Black Nail Polish: For the base color.
- Metallic Gold Nail Polish or Gold Foil: For the snake accents.
- Base Coat: To protect your natural nails.
- Top Coat: To seal the design and add shine.
- Nail Art Brushes or Striping Tape: For creating the snake design.
- Dotting Tools: For adding small details.
- Cuticle Oil: To keep your cuticles healthy.
Steps to Achieve the Look:
- Prepare Your Nails:
- Clean and shape your nails into your desired shape, such as square, oval, or almond.
- Apply a base coat to protect your natural nails and let it dry completely.
- Apply the Base Color:
- Matte Black Base: Paint all your nails with the matte black nail polish. Apply one or two coats for full coverage and a smooth, matte finish. Allow the polish to dry completely.
- Create the Gold Snake Accents:
- Metallic Gold Snakes: Use a fine nail art brush to draw or paint metallic gold snakes on some of your nails. You can also use gold foil for a more textured effect.
- Design: Create snake designs that wrap around the nail or wind in a coiled pattern. For a luxurious look, make sure the lines are clean and the snakes are detailed.
- Placement: Choose one or two accent nails per hand to feature the gold snake design, while keeping the other nails in solid matte black. This creates a striking contrast and emphasizes the gold accents.
- Metallic Gold Snakes: Use a fine nail art brush to draw or paint metallic gold snakes on some of your nails. You can also use gold foil for a more textured effect.
- Add Final Touches:
- Top Coat: Apply a top coat over the entire design to seal in the gold accents and add a glossy finish. This will help to protect your manicure and ensure the design lasts.
- Drying: Allow your nails to dry completely before touching anything to avoid smudging or denting the design.
- Final Touches:
- Cuticle Care: Apply cuticle oil around your nails to keep your cuticles healthy and moisturized. This will enhance the overall look of your manicure and keep your nails looking neat.
Tips:
- Precision: For a clean and luxurious look, use a fine brush and take your time to draw or apply the gold snake accents with precision.
- Contrast: The matte black base provides a dramatic contrast to the metallic gold snakes, making the design stand out. Ensure that the gold accents are vibrant and well-defined against the black background.
- Gold Foil Application: If using gold foil, gently press the foil onto your nails after applying a clear or tacky base coat to ensure it adheres well.
Gold Snake Accent Nails offer a blend of sophistication and boldness with their matte black base and luxurious metallic gold accents. This design makes a dramatic statement while maintaining an elegant and high-fashion appearance.
3. Snake Print Tip Nails
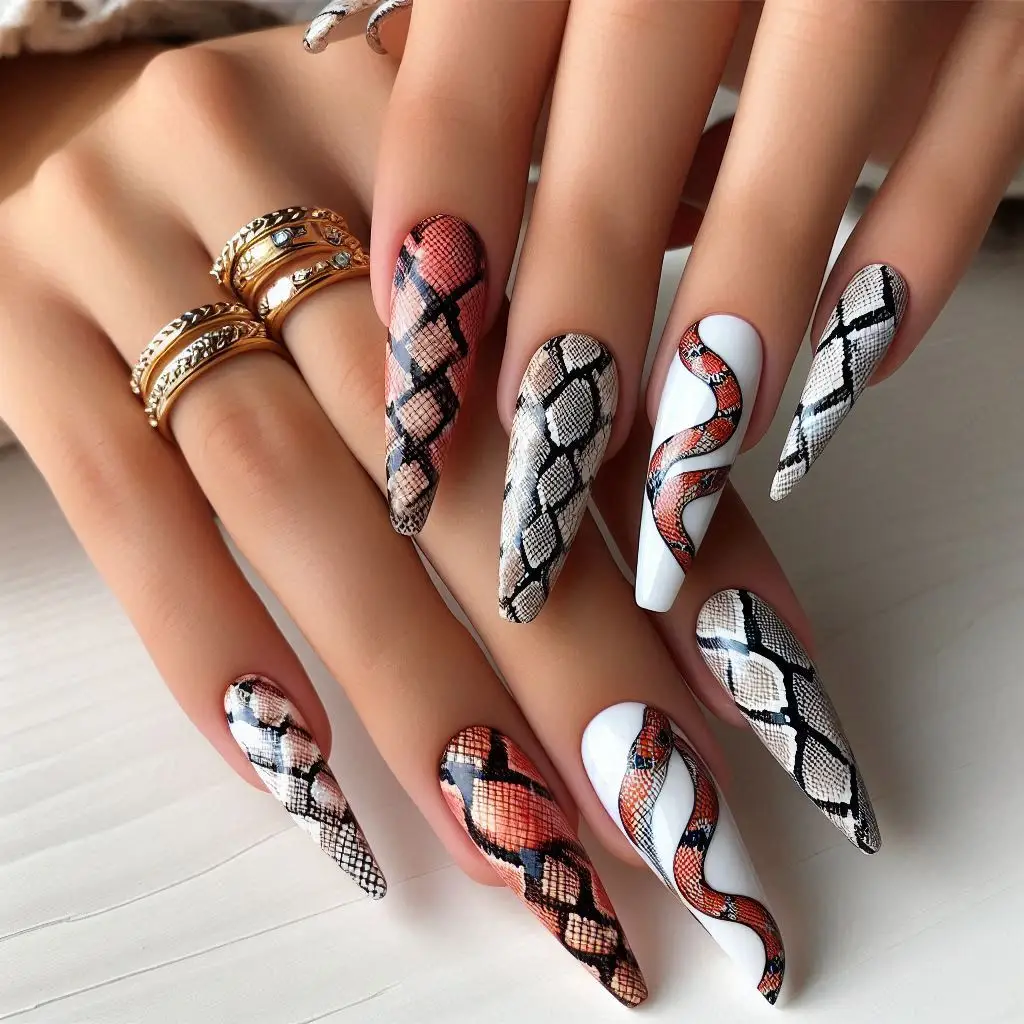
Snake Print Tip Nails offer a chic and edgy twist on the classic French manicure by incorporating a stylish snake skin pattern at the tips. This design combines the elegance of a traditional French manicure with a bold, modern touch. Here’s how to achieve this trendy look:
Materials Needed:
- Base Nail Polish: Choose a glossy, neutral color like nude or soft pink.
- Snake Skin Pattern Nail Stickers or Stencils: For creating the snake print tips.
- Black Nail Polish or Gel: For the snake skin pattern.
- Top Coat: To seal the design and add shine.
- Base Coat: To protect your natural nails.
- Nail Art Brushes: For painting the snake skin pattern if not using stickers.
- Cuticle Oil: To keep your cuticles healthy.
Steps to Achieve the Look:
- Prepare Your Nails:
- Clean and shape your nails into your desired shape, such as square, oval, or almond.
- Apply a base coat to protect your natural nails and let it dry completely.
- Apply the Base Color:
- Glossy Base: Paint all your nails with the chosen glossy base color. This could be a nude, pink, or any neutral shade that complements your skin tone. Apply one or two coats for full coverage and a smooth finish. Allow the polish to dry completely.
- Create the Snake Print Tips:
- Using Stickers or Stencils: Apply snake print nail stickers or use stencils to create the snake skin pattern on the tips of your nails. Press the stickers or stencils firmly to ensure they adhere well.
- Using Nail Polish:
- Snake Print Design: If you’re hand-painting the snake print, use a fine nail art brush to draw the snake skin pattern on the tips of your nails. The pattern can include scales and subtle details that mimic real snake skin.
- Black Accent: Apply a black polish or gel to create the snake print pattern. Let it dry completely before moving on.
- Add Final Touches:
- Top Coat: Apply a top coat over the entire design to seal in the snake print tips and add a glossy finish. This will protect your manicure and keep it looking fresh.
- Drying: Allow your nails to dry completely before touching anything to avoid smudging or denting the design.
- Final Touches:
- Cuticle Care: Apply cuticle oil around your nails to keep your cuticles healthy and moisturized. This will enhance the overall look of your manicure and keep your nails looking neat.
Tips:
- Precision: Whether you’re using stickers, stencils, or hand-painting, ensure that the snake print pattern is applied precisely for a clean and chic look.
- Color Contrast: Choose a base color that contrasts well with the snake print pattern to make the design stand out. Glossy finishes will enhance the overall look of the snake print.
- Pattern Variations: Experiment with different snake skin patterns or scales to create a unique twist on the classic French manicure.
Snake Print Tip Nails offer a fashionable update to the classic French manicure by incorporating a bold snake skin pattern at the tips. This design is perfect for those who want to combine elegance with a touch of modern edge.
4. Emerald Snake Nails
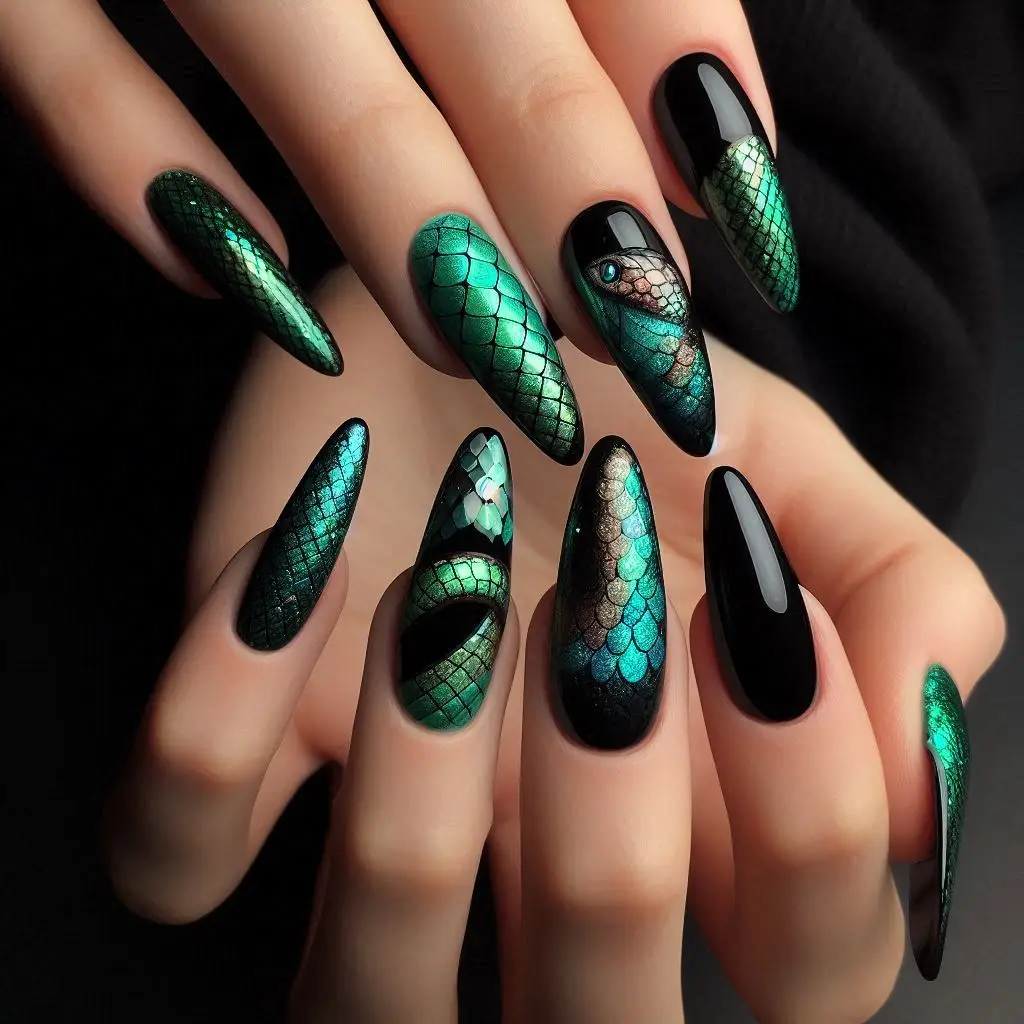
Emerald Snake Nails blend rich emerald green with a regal touch of gold, featuring a coiled snake design for a bold and luxurious style. This manicure combines vibrant color with intricate detailing, making it perfect for making a strong statement. Here’s how to achieve this stunning look:
Materials Needed:
- Emerald Green Nail Polish: For the base color.
- Gold Nail Polish or Gold Foil: For the snake design.
- Base Coat: To protect your natural nails.
- Top Coat: To seal the design and add shine.
- Nail Art Brushes: For detailed snake design work.
- Dotting Tools or Fine Detail Brushes: For precision in drawing the snake.
- Cuticle Oil: To keep your cuticles healthy.
Steps to Achieve the Look:
- Prepare Your Nails:
- Clean and shape your nails into your desired shape, such as square, oval, or almond.
- Apply a base coat to protect your natural nails and let it dry completely.
- Apply the Base Color:
- Emerald Green Base: Paint all your nails with the emerald green polish. Apply one or two coats for full coverage and a rich, vibrant finish. Allow the polish to dry completely.
- Create the Gold Snake Design:
- Gold Snake: Use a fine nail art brush or dotting tool to paint a coiled gold snake on one or two accent nails per hand. The snake can be wrapped around the nail or positioned in a diagonal or vertical pattern.
- Design: Draw the snake with smooth, flowing lines. You can add small details like scales or a slight shimmer to the gold for a more realistic effect.
- Gold Foil Option: Alternatively, you can use gold foil for a textured effect. Apply a layer of clear or tacky base coat where you want the gold snake to be, then gently press the gold foil onto the wet base. Seal with a top coat.
- Gold Snake: Use a fine nail art brush or dotting tool to paint a coiled gold snake on one or two accent nails per hand. The snake can be wrapped around the nail or positioned in a diagonal or vertical pattern.
- Add Final Touches:
- Top Coat: Apply a top coat over the entire design to seal in the gold snake and add a glossy finish. This will help to protect your manicure and keep it looking fresh.
- Drying: Allow your nails to dry completely before touching anything to avoid smudging or denting the design.
- Final Touches:
- Cuticle Care: Apply cuticle oil around your nails to keep your cuticles healthy and moisturized. This will enhance the overall look of your manicure and keep your nails looking neat.
Tips:
- Precision: For a clean and regal look, use a fine brush to carefully draw the gold snake design. Take your time to ensure the lines are smooth and detailed.
- Color Contrast: The rich emerald green provides a striking backdrop for the gold snake, making it stand out. Ensure the gold is vibrant and well-defined against the dark green base.
- Design Placement: Consider placing the snake design on accent nails for a balanced look, while keeping the rest of the nails in solid emerald green.
Emerald Snake Nails create a dramatic and luxurious manicure with their combination of deep emerald green and metallic gold. The coiled snake design adds an element of opulence and boldness, making this look perfect for special occasions or when you want to make a standout statement.
5. Matte Black with Red Snake Nails
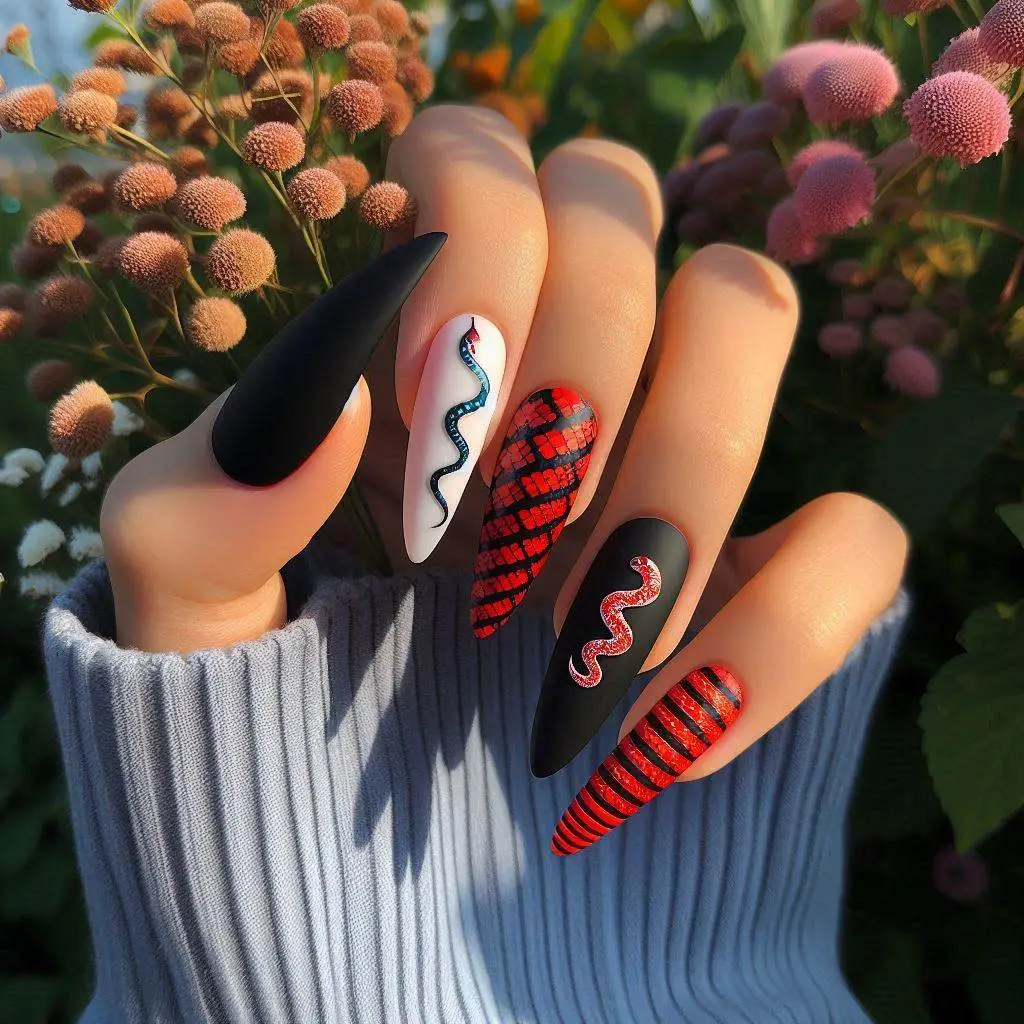
Matte Black with Red Snake Nails create a bold and dramatic look by combining a sleek matte black base with a striking red snake design. This manicure is perfect for those who want to make a powerful statement with a touch of edgy sophistication. Here’s how to achieve this eye-catching design:
Materials Needed:
- Matte Black Nail Polish: For the base color.
- Red Nail Polish: For the snake design.
- Base Coat: To protect your natural nails.
- Top Coat: To seal the design and add shine.
- Nail Art Brushes: For detailed snake design work.
- Dotting Tools or Fine Detail Brushes: For precision in drawing the snake.
- Matte Top Coat: To finish the design with a matte finish.
- Cuticle Oil: To keep your cuticles healthy.
Steps to Achieve the Look:
- Prepare Your Nails:
- Clean and shape your nails into your desired shape, such as square, oval, or almond.
- Apply a base coat to protect your natural nails and let it dry completely.
- Apply the Base Color:
- Matte Black Base: Paint all your nails with the matte black polish. Apply one or two coats for full coverage and a smooth matte finish. Allow the polish to dry completely.
- Create the Red Snake Design:
- Red Snake: Use a fine nail art brush or dotting tool to paint a red snake design on one or two accent nails per hand.
- Design: Draw the snake in a slithering or coiled pattern across the nail. The red snake will stand out dramatically against the matte black background.
- Details: Add details like scales or a forked tongue for a more intricate design if desired.
- Red Snake: Use a fine nail art brush or dotting tool to paint a red snake design on one or two accent nails per hand.
- Add Final Touches:
- Top Coat: Apply a clear top coat over the entire design to seal in the red snake and add a bit of shine. Let it dry completely before proceeding to the next step.
- Matte Finish: To achieve the final matte look, apply a matte top coat over the entire nail. This will give the nails a uniform matte finish while preserving the detailed design.
- Drying: Allow your nails to dry completely before touching anything to avoid smudging or denting the design.
- Final Touches:
- Cuticle Care: Apply cuticle oil around your nails to keep your cuticles healthy and moisturized. This will enhance the overall look of your manicure and keep your nails looking neat.
Tips:
- Precision: Use a fine brush and take your time to draw the red snake with clean, smooth lines. Ensure the design is detailed and stands out against the matte black.
- Color Contrast: The bold red snake provides a striking contrast to the matte black base, creating a dramatic and eye-catching effect.
- Design Placement: Consider placing the snake design on accent nails or in a position that enhances the overall look of the manicure.
Matte Black with Red Snake Nails offer a dramatic and edgy look with their combination of dark matte black and vibrant red. The red snake design adds a bold and artistic touch, making this manicure perfect for those who want to showcase their unique style with confidence.
6. Ombre Snake Nails
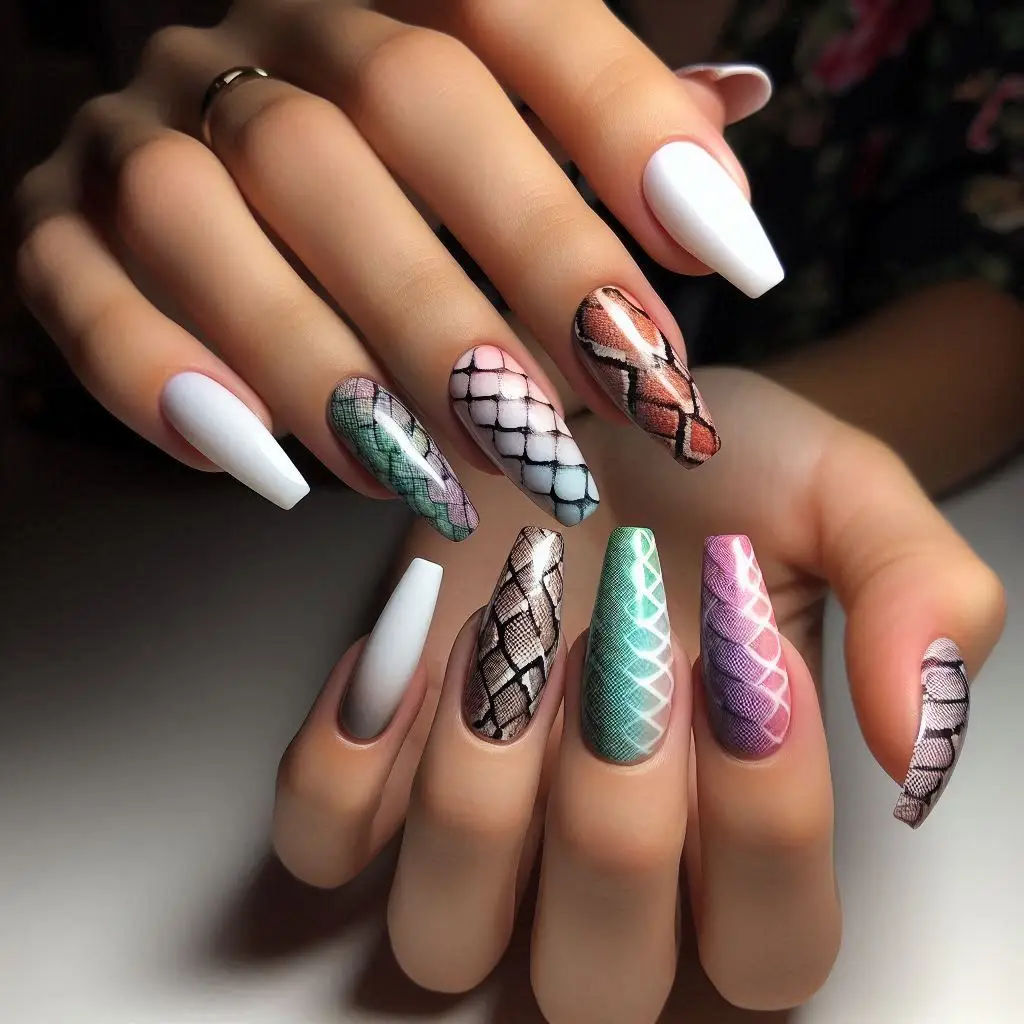
Ombre Snake Nails create a stunning and unique manicure by blending a gradient ombre effect with a detailed snake design winding through the colors. This look combines the smooth, flowing transition of an ombre with the intricate artistry of a snake, resulting in a seamless and eye-catching style. Here’s how to achieve this sophisticated and dramatic design:
Materials Needed:
- Base Nail Polish: Choose three complementary colors for the ombre effect.
- Snake Design Nail Polish: For the snake details.
- Base Coat: To protect your natural nails.
- Top Coat: To seal the design and add shine.
- Makeup Sponges: For creating the ombre effect.
- Nail Art Brushes: For painting the snake design.
- Cuticle Oil: To keep your cuticles healthy.
Steps to Achieve the Look:
- Prepare Your Nails:
- Clean and shape your nails into your desired shape, such as square, oval, or almond.
- Apply a base coat to protect your natural nails and let it dry completely.
- Create the Ombre Effect:
- Base Colors: Choose three colors that transition smoothly into each other. For example, you might use light pink, coral, and deep red for a warm gradient, or blue, teal, and navy for a cool gradient.
- Apply the Ombre:
- Step 1: Apply the lightest color at the base of the nail (near the cuticle).
- Step 2: Apply the medium color in the middle of the nail.
- Step 3: Apply the darkest color at the tip of the nail.
- Blending: Use a makeup sponge to gently blend the colors together while they are still wet. Dab the sponge lightly across the color transitions to create a smooth gradient. Repeat the dabbing process if necessary to blend the colors seamlessly.
- Add the Snake Design:
- Snake Design: Once the ombre gradient is completely dry, use a fine nail art brush to paint the snake winding through the gradient. Choose a contrasting color, such as black or gold, for the snake to make it stand out against the ombre background.
- Design: Draw the snake winding from one part of the nail to another, ensuring it flows naturally with the gradient. You can add details like scales or a forked tongue for added intricacy.
- Snake Design: Once the ombre gradient is completely dry, use a fine nail art brush to paint the snake winding through the gradient. Choose a contrasting color, such as black or gold, for the snake to make it stand out against the ombre background.
- Add Final Touches:
- Top Coat: Apply a clear top coat over the entire design to seal in the snake details and add a glossy finish. This will help to protect your manicure and enhance the gradient and snake design.
- Drying: Allow your nails to dry completely before touching anything to avoid smudging or denting the design.
- Final Touches:
- Cuticle Care: Apply cuticle oil around your nails to keep your cuticles healthy and moisturized. This will enhance the overall look of your manicure and keep your nails looking neat.
Tips:
- Blending: Achieving a smooth ombre effect requires patience and a light touch. Make sure to blend the colors thoroughly for a seamless gradient.
- Precision: For a clean and detailed snake design, use a fine brush and take your time to ensure the snake winds through the gradient without interrupting the smooth transition.
- Color Choices: Choose ombre colors that complement each other and enhance the visibility of the snake design.
Ombre Snake Nails combine the smooth, flowing beauty of an ombre gradient with the intricate and bold detail of a snake design. This manicure is perfect for those who want to showcase a sophisticated and unique style with a touch of artistry.
7. Glitter Snake Wrap Nails
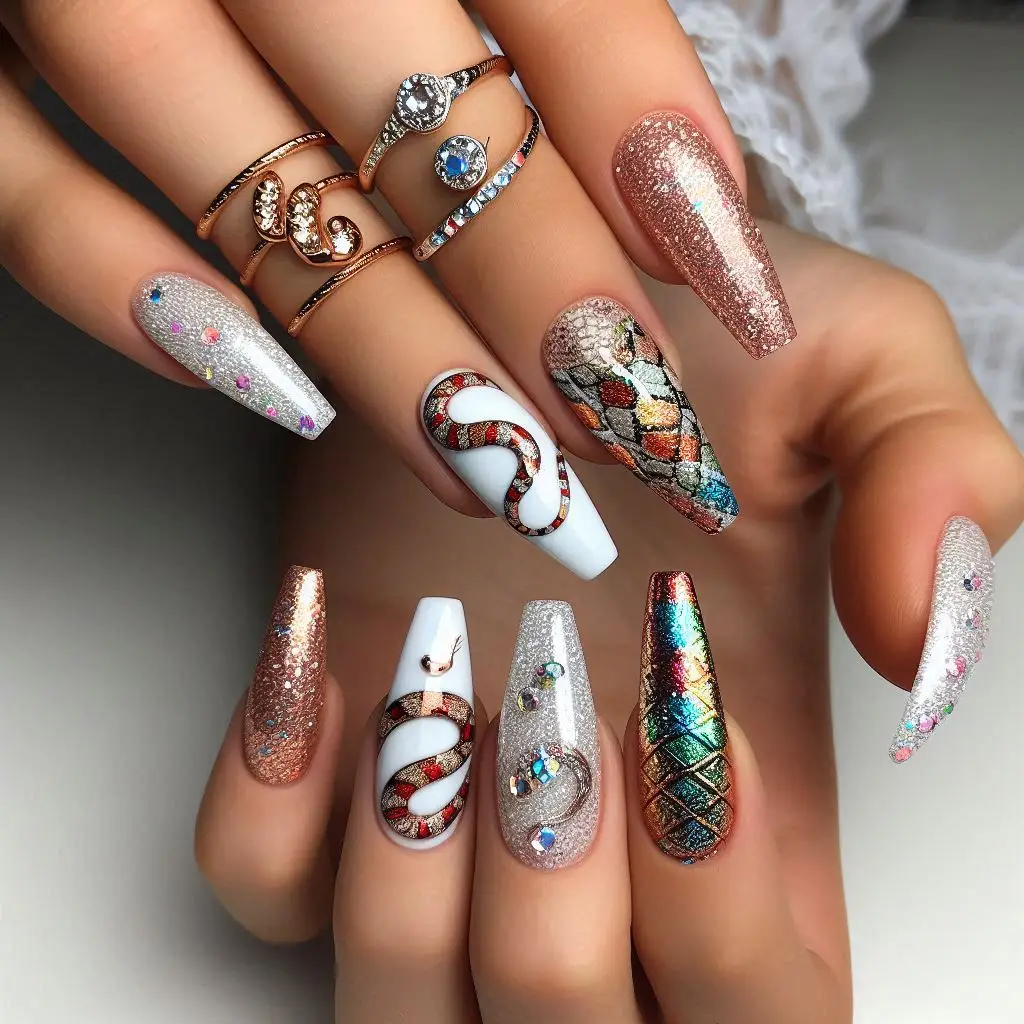
Glitter Snake Wrap Nails offer a glamorous and striking manicure by combining sparkling glitter with intricate silver snake designs coiling around each nail. This look merges the sparkle of glitter with the elegance of silver accents, creating a sophisticated and eye-catching style. Here’s how to achieve this dazzling design:
Materials Needed:
- Glitter Nail Polish: Choose a glitter polish in a shade that complements the silver snake design.
- Silver Nail Polish or Silver Foil: For the snake design.
- Base Coat: To protect your natural nails.
- Top Coat: To seal the design and add shine.
- Nail Art Brushes: For creating the snake design.
- Dotting Tools or Fine Detail Brushes: For precision work on the snakes.
- Cuticle Oil: To keep your cuticles healthy.
Steps to Achieve the Look:
- Prepare Your Nails:
- Clean and shape your nails into your desired shape, such as square, oval, or almond.
- Apply a base coat to protect your natural nails and let it dry completely.
- Apply the Glitter Base:
- Glitter Polish: Apply a coat or two of glitter nail polish on all your nails. Choose a glitter shade that adds sparkle without overpowering the silver snake design. Allow the glitter polish to dry completely.
- Create the Silver Snake Design:
- Silver Snakes: Use a fine nail art brush or dotting tool to paint intricate silver snake designs wrapping around each nail.
- Design: Draw the snake coiling from one side of the nail to another, creating a seamless wrap. The silver snakes should be detailed, with smooth lines and possibly some small scale patterns for added depth.
- Silver Foil Option: Alternatively, you can use silver foil to create the snake design. Apply a layer of clear or tacky base coat where you want the snake, then gently press the foil onto the wet base. Seal with a top coat.
- Silver Snakes: Use a fine nail art brush or dotting tool to paint intricate silver snake designs wrapping around each nail.
- Add Final Touches:
- Top Coat: Apply a clear top coat over the entire design to seal in the silver snakes and add a glossy finish. This will protect your manicure and enhance the glitter and snake details.
- Drying: Allow your nails to dry completely before touching anything to avoid smudging or denting the design.
- Final Touches:
- Cuticle Care: Apply cuticle oil around your nails to keep your cuticles healthy and moisturized. This will enhance the overall look of your manicure and keep your nails looking neat.
Tips:
- Precision: For a clean and detailed silver snake design, use a fine brush and take your time to ensure the snakes wrap smoothly around each nail.
- Color Harmony: Choose a glitter polish that complements the silver design without overwhelming it. Light or neutral glitter shades work well to highlight the silver snakes.
- Application: Ensure that the glitter polish is applied evenly and that the silver snakes are detailed and clear for a polished look.
Glitter Snake Wrap Nails offer a glamorous and sophisticated manicure with their combination of sparkly glitter and intricate silver snake designs. This look is perfect for making a bold statement and adding a touch of luxury to your style.
8. Snake Skin Texture Nails
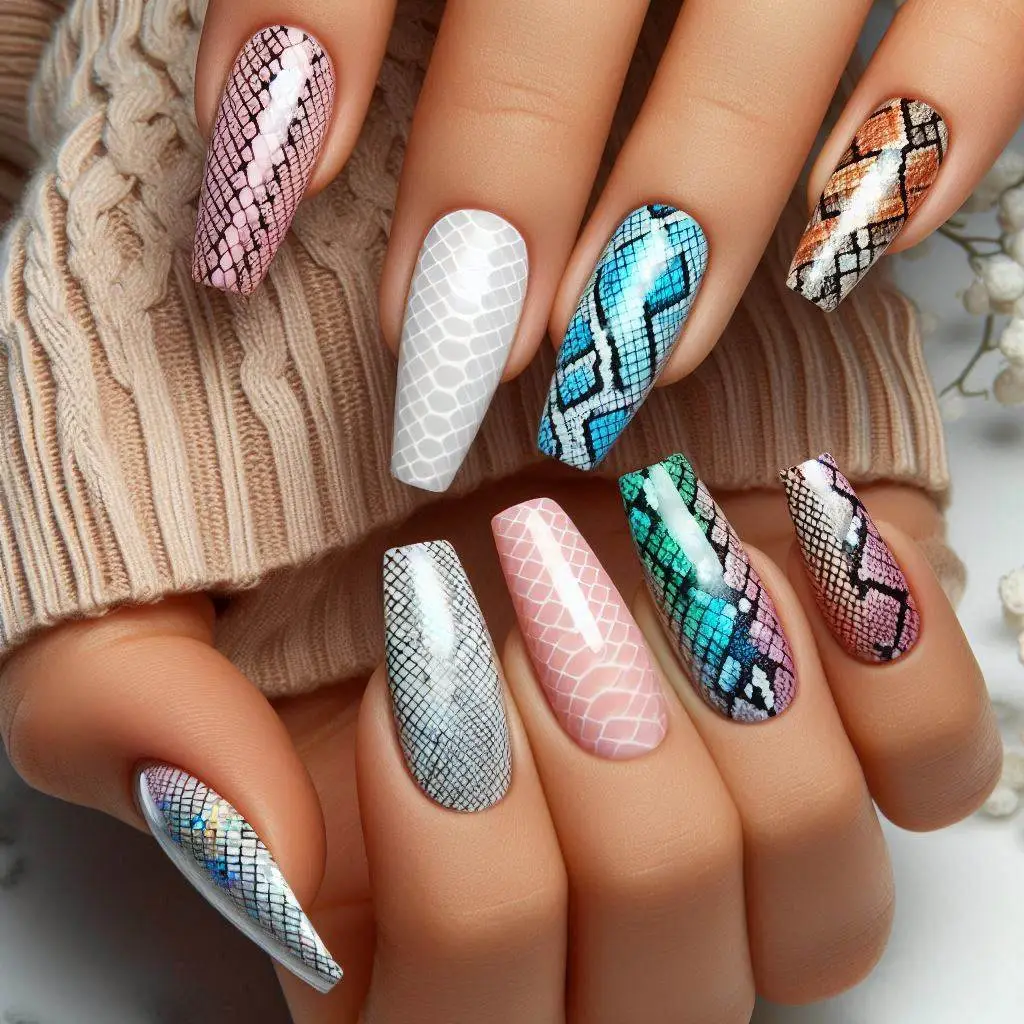
Snake Skin Texture Nails feature 3D textured patterns that mimic the appearance of real snake skin, creating a sophisticated and tactile design. By using subtle, neutral tones, this manicure exudes elegance while adding a unique, tactile dimension to your nails. Here’s how to achieve this sophisticated design:
Materials Needed:
- Base Color Polish: Choose a neutral or subtle tone such as beige, taupe, or soft gray.
- Textured Nail Polish: A polish or top coat designed to create a 3D texture.
- Snake Skin Nail Art Stencil or Tools: For creating the snake skin pattern.
- Top Coat: To seal the design and add shine.
- Base Coat: To protect your natural nails.
- Cuticle Oil: To keep your cuticles healthy.
Steps to Achieve the Look:
- Prepare Your Nails:
- Clean and shape your nails into your desired shape, such as square, oval, or almond.
- Apply a base coat to protect your natural nails and let it dry completely.
- Apply the Base Color:
- Neutral Base: Apply one or two coats of the neutral base color polish on all your nails. Allow it to dry completely. This will serve as the background for the snake skin texture.
- Create the Snake Skin Texture:
- Texture Application:
- 3D Texture Polish: Apply a textured nail polish or top coat specifically designed to create a 3D effect. Follow the product instructions for best results.
- Textured Tools: If using a stencil or texture tool, apply it while the base color is still slightly tacky. Gently press or stamp the stencil onto the nail to create the snake skin pattern. If you prefer a more hands-on approach, use a fine brush or sponge to create the texture manually.
- Pattern: Ensure the texture mimics the scales and patterns of snake skin, creating a realistic effect. You can opt for a subtle texture that adds depth without overwhelming the base color.
- Texture Application:
- Add Final Touches:
- Top Coat: Apply a clear top coat over the entire design to seal in the texture and add a glossy finish if desired. Be cautious not to disturb the texture while applying the top coat. For a matte finish, skip the top coat or use a matte top coat.
- Drying: Allow your nails to dry completely before touching anything to avoid smudging or damaging the textured pattern.
- Final Touches:
- Cuticle Care: Apply cuticle oil around your nails to keep your cuticles healthy and moisturized. This will enhance the overall look of your manicure and keep your nails looking neat.
Tips:
- Texture: Ensure the 3D texture is applied evenly to create a consistent snake skin pattern across all nails.
- Color Harmony: Choose a base color that complements the textured finish and enhances the overall sophisticated look.
- Application Tools: Use high-quality tools or stencils for precise and detailed snake skin patterns.
Snake Skin Texture Nails provide a sophisticated and tactile manicure with their 3D texture and neutral tones. This design combines elegance with a touch of luxury, making it a perfect choice for a polished and unique look.
9. Snake Charmer Nails
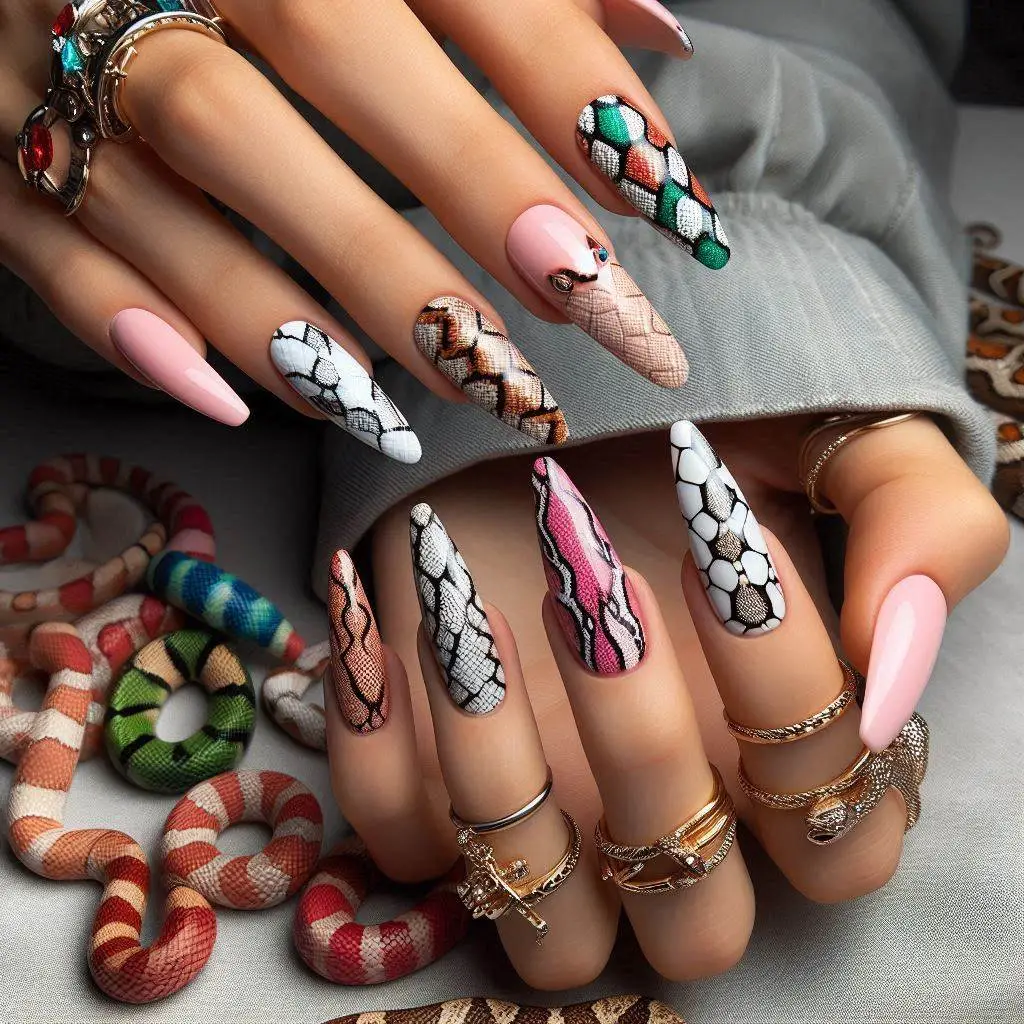
Snake Charmer Nails bring a playful and vibrant twist to nail art with bright, multicolored snake designs on a clear or nude base. This design combines vivid colors with a minimalist base to create a fun and eye-catching look. Here’s how to achieve this lively and charming manicure:
Materials Needed:
- Clear or Nude Base Polish: To provide a neutral background for the snake designs.
- Bright, Multicolored Nail Polishes: Choose a variety of bright colors for the snake designs, such as neon pink, electric blue, vibrant green, and bold orange.
- Nail Art Brushes: For painting the detailed snake designs.
- Top Coat: To seal the design and add shine.
- Base Coat: To protect your natural nails.
- Cuticle Oil: To keep your cuticles healthy.
Steps to Achieve the Look:
- Prepare Your Nails:
- Clean and shape your nails into your desired shape, such as square, oval, or almond.
- Apply a base coat to protect your natural nails and let it dry completely.
- Apply the Base Color:
- Clear or Nude Base: Apply one or two coats of clear or nude polish on all your nails. Allow it to dry completely. This will serve as a subtle backdrop that highlights the colorful snake designs.
- Create the Multicolored Snake Designs:
- Snake Design:
- Color Choice: Use bright, multicolored polishes to paint the snake designs. You can opt for different colors for each snake or use a mix of colors for a single snake.
- Design: Use a fine nail art brush to create the snake designs on each nail. You can design the snakes in a coiled or winding pattern, with vibrant colors creating a playful effect. Consider adding details like scales or patterns to enhance the design.
- Placement: Position the snakes randomly or create a pattern, depending on your preference. You can place a single snake on accent nails or cover multiple nails with various snake designs.
- Snake Design:
- Add Final Touches:
- Top Coat: Apply a clear top coat over the entire design to seal in the multicolored snakes and add a glossy finish. This will help protect your manicure and enhance the vibrancy of the colors.
- Drying: Allow your nails to dry completely before touching anything to avoid smudging or denting the design.
- Final Touches:
- Cuticle Care: Apply cuticle oil around your nails to keep your cuticles healthy and moisturized. This will enhance the overall look of your manicure and keep your nails looking neat.
Tips:
- Color Contrast: Choose vibrant and contrasting colors to make the snake designs stand out against the clear or nude base.
- Design Consistency: Ensure that the snake designs are consistent and clear. Use fine brushes for detailed work and avoid overlapping colors too much.
- Creative Freedom: Feel free to experiment with different snake patterns and color combinations to achieve a unique and playful look.
Snake Charmer Nails combine the fun of bright, multicolored snake designs with the simplicity of a clear or nude base. This manicure is perfect for those who want to add a vibrant and playful touch to their nail art.
10. Snake Eye Accent Nail
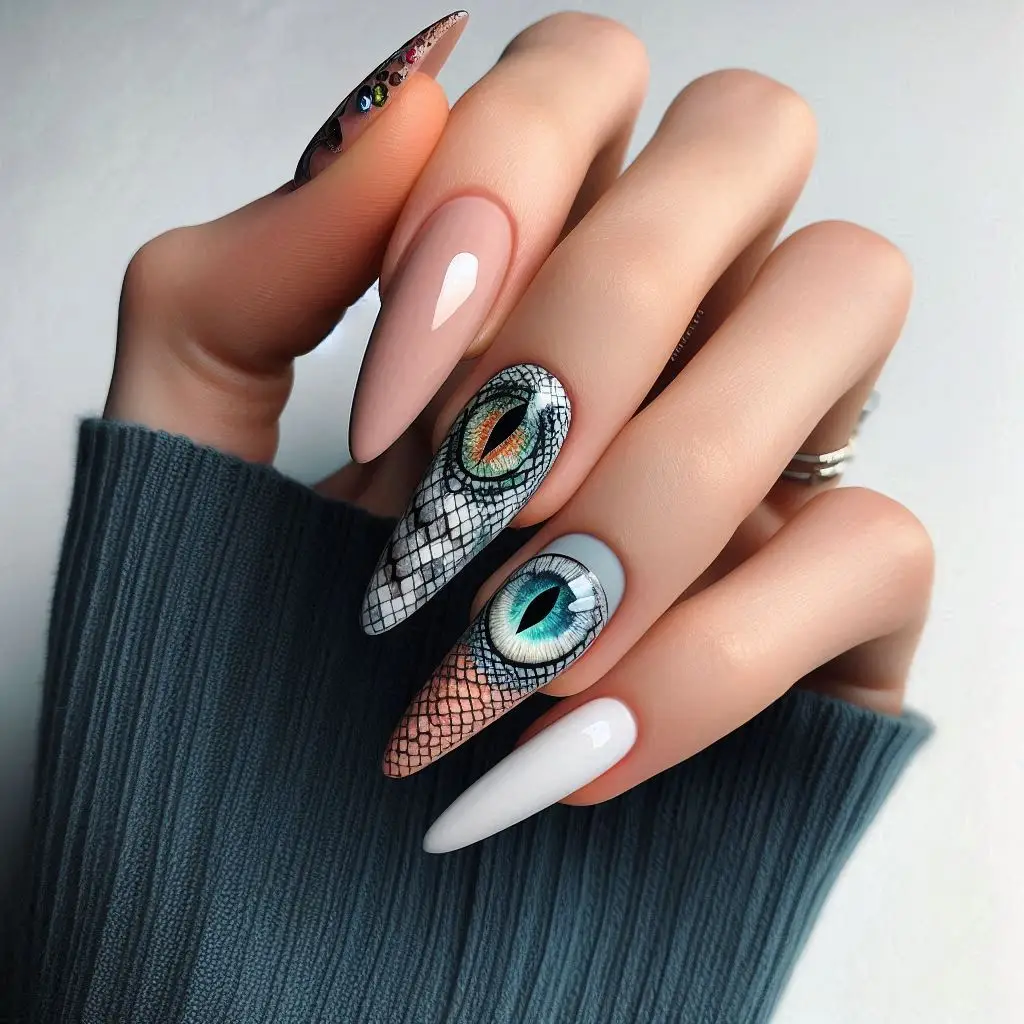
Snake Eye Accent Nail creates a bold and striking statement by featuring a detailed snake eye design on a single nail. This design adds a touch of edginess and intrigue to your manicure while keeping the overall look sophisticated. Here’s how to achieve this dramatic and unique nail art:
Materials Needed:
- Base Color Polish: Choose a neutral or subtle base color that complements the snake eye design.
- Detail Nail Polishes: Black, white, and any other colors needed for the snake eye.
- Top Coat: To seal the design and add shine.
- Base Coat: To protect your natural nails.
- Fine Nail Art Brushes: For painting the intricate details of the snake eye.
- Dotting Tools: For creating precise dots and details.
- Cuticle Oil: To keep your cuticles healthy.
Steps to Achieve the Look:
- Prepare Your Nails:
- Clean and shape your nails into your desired shape, such as square, oval, or almond.
- Apply a base coat to protect your natural nails and let it dry completely.
- Apply the Base Color:
- Neutral Base: Apply one or two coats of a neutral base color on all your nails, including the accent nail. Allow it to dry completely. This will provide a clean backdrop for the snake eye design.
- Create the Snake Eye Design:
- Design:
- Outline: Use a fine nail art brush to outline the snake eye on the chosen accent nail. You can place the eye in the center or off to the side for a more artistic effect.
- Details: Fill in the eye with black polish to create the outline of the snake’s eye. Use white polish to add the sclera (the white part of the eye) and create highlights for a more realistic effect.
- Pupil: Add a small, colored dot (such as green or gold) in the center of the eye to represent the snake’s pupil. Use a dotting tool for precision.
- Shading: Add shading and details around the eye to enhance the depth and texture. Use a fine brush to add subtle lines and gradients.
- Design:
- Add Final Touches:
- Top Coat: Apply a clear top coat over the entire design to seal in the snake eye and add a glossy finish. This will protect your manicure and enhance the details of the design.
- Drying: Allow your nails to dry completely before touching anything to avoid smudging or denting the design.
- Final Touches:
- Cuticle Care: Apply cuticle oil around your nails to keep your cuticles healthy and moisturized. This will enhance the overall look of your manicure and keep your nails looking neat.
Tips:
- Precision: Use fine brushes and dotting tools for detailed work to ensure the snake eye design is sharp and clear.
- Color Contrast: Choose colors that contrast well with the base color to make the snake eye stand out.
- Practice: If you’re new to detailed nail art, consider practicing the snake eye design on a nail wheel or paper before applying it to your accent nail.
Snake Eye Accent Nail adds a bold and edgy touch to your manicure with its intricate and striking design. This accent nail is perfect for making a statement while keeping the rest of your manicure elegant and understated.
11. Metallic Silver Snake Nails
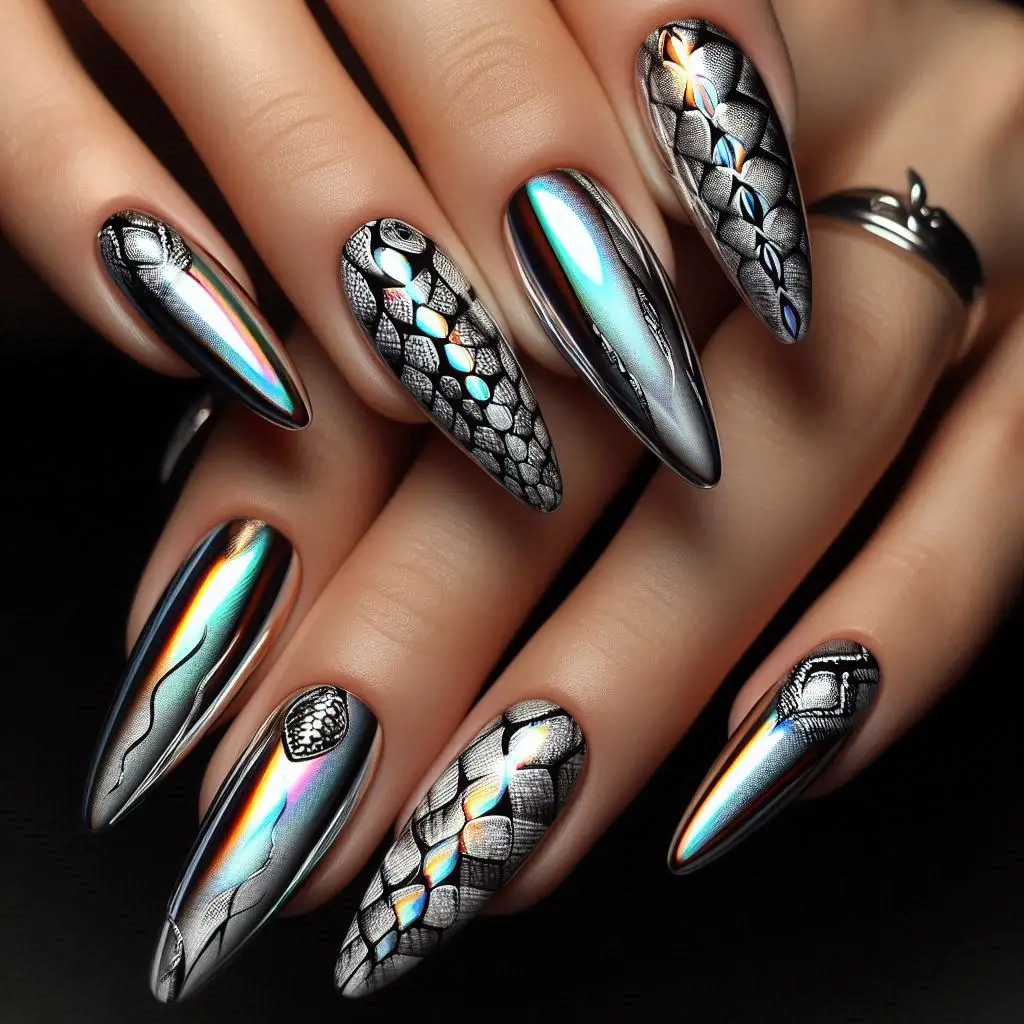
Metallic Silver Snake Nails feature chrome silver nails adorned with sleek black snake designs, creating a futuristic and striking look. This combination of high-shine metallic and detailed black accents offers a sophisticated and edgy style. Here’s how to achieve this chic and contemporary manicure:
Materials Needed:
- Chrome Silver Nail Polish: For the base color.
- Black Nail Polish: For the snake designs.
- Top Coat: To seal the design and add shine.
- Base Coat: To protect your natural nails.
- Fine Nail Art Brushes: For painting the detailed snake designs.
- Dotting Tools: For precision work.
- Cuticle Oil: To keep your cuticles healthy.
Steps to Achieve the Look:
- Prepare Your Nails:
- Clean and shape your nails into your desired shape, such as square, oval, or almond.
- Apply a base coat to protect your natural nails and let it dry completely.
- Apply the Chrome Silver Base:
- Chrome Silver Polish: Apply one or two coats of chrome silver nail polish on all your nails. Chrome polish has a high-shine finish, so make sure to apply it evenly. Allow it to dry completely to achieve a smooth, reflective surface.
- Create the Black Snake Designs:
- Design:
- Outline: Use a fine nail art brush to outline the black snake designs on your chrome silver nails. You can choose to create a single snake design on accent nails or incorporate snakes on multiple nails.
- Details: Fill in the outlines with black polish, ensuring clean and precise lines. You can add details like scales or patterns to enhance the snake design.
- Patterns: Create various patterns, such as coiled snakes or winding designs, to add interest and texture to the chrome base.
- Design:
- Add Final Touches:
- Top Coat: Apply a clear top coat over the entire design to seal in the black snake designs and add a glossy finish. This will protect your manicure and enhance the metallic shine of the chrome polish. For a matte finish, use a matte top coat instead.
- Drying: Allow your nails to dry completely before touching anything to avoid smudging or denting the design.
- Final Touches:
- Cuticle Care: Apply cuticle oil around your nails to keep your cuticles healthy and moisturized. This will enhance the overall look of your manicure and keep your nails looking neat.
Tips:
- Precision: Use fine brushes for detailed snake designs to ensure they are sharp and clear against the chrome silver base.
- Color Contrast: The black snake designs should contrast well with the chrome silver to stand out effectively.
- Application: Apply the chrome polish carefully to avoid streaks and ensure a smooth, reflective finish.
Metallic Silver Snake Nails combine the futuristic appeal of chrome silver with the edgy elegance of black snake designs, making for a sleek and modern manicure. This look is perfect for those who want to make a bold fashion statement with a touch of sophistication.
12. Snake and Floral Nails
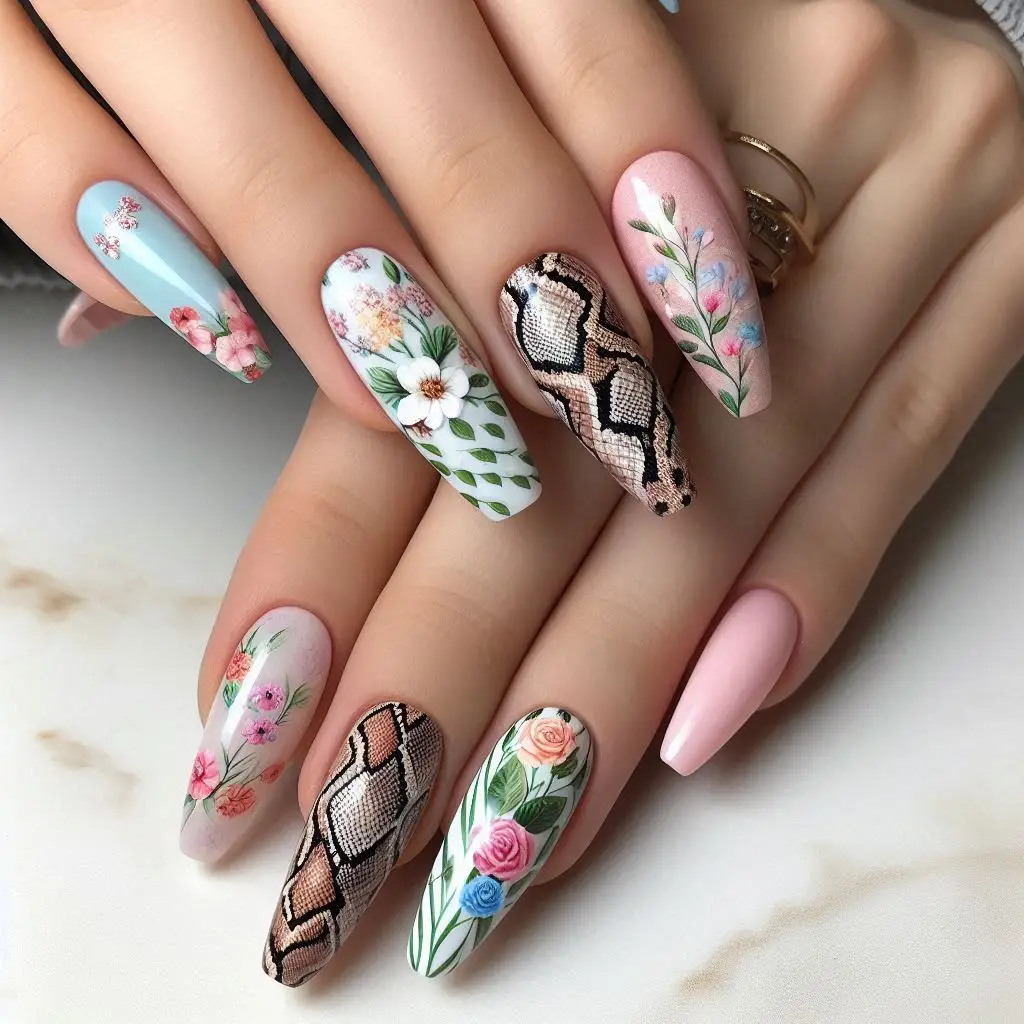
Snake and Floral Nails combine delicate snake and floral patterns on pastel nails, creating a soft, feminine touch with a hint of intrigue. This design blends the elegance of floral elements with the edginess of snake motifs on a gentle pastel background. Here’s how to achieve this harmonious and stylish manicure:
Materials Needed:
- Pastel Nail Polishes: Choose soft pastel colors like blush pink, lavender, mint green, or baby blue for the base.
- Black and/or Colored Nail Polishes: For the snake and floral designs.
- Top Coat: To seal the design and add shine.
- Base Coat: To protect your natural nails.
- Fine Nail Art Brushes: For painting the intricate designs.
- Dotting Tools: For detailed work.
- Cuticle Oil: To keep your cuticles healthy.
Steps to Achieve the Look:
- Prepare Your Nails:
- Clean and shape your nails into your desired shape, such as square, oval, or almond.
- Apply a base coat to protect your natural nails and let it dry completely.
- Apply the Pastel Base:
- Pastel Base Colors: Apply one or two coats of your chosen pastel colors on all your nails. Allow the base color to dry completely. This soft backdrop will highlight the snake and floral designs.
- Create the Floral Patterns:
- Design:
- Flowers: Use fine brushes or dotting tools to paint delicate floral patterns on your nails. You can create small, dainty flowers or more elaborate floral designs depending on your preference. Choose colors that complement the pastel base, such as soft pinks, whites, or light blues.
- Placement: Position the floral designs on each nail or create accent flowers on a few nails for a balanced look.
- Design:
- Add the Snake Designs:
- Design:
- Snakes: Use a fine brush to outline and fill in the snake designs on your nails. You can opt for black snakes or use colors that contrast with the pastel base. Add details like scales or patterns to make the snakes stand out.
- Placement: Integrate the snake designs with the floral patterns, either intertwining the snakes with the flowers or placing them on separate nails for a harmonious mix.
- Design:
- Add Final Touches:
- Top Coat: Apply a clear top coat over the entire design to seal in the floral and snake patterns and add a glossy finish. This will help protect your manicure and enhance the overall look.
- Drying: Allow your nails to dry completely before touching anything to avoid smudging or denting the design.
- Final Touches:
- Cuticle Care: Apply cuticle oil around your nails to keep your cuticles healthy and moisturized. This will enhance the overall look of your manicure and keep your nails looking neat.
Tips:
- Color Harmony: Choose pastel base colors that complement both the floral and snake designs to create a cohesive and elegant look.
- Design Balance: Balance the placement of floral and snake patterns to ensure neither element overwhelms the other.
- Precision: Use fine brushes and dotting tools for detailed work to ensure the patterns are clear and well-defined.
Snake and Floral Nails blend the softness of pastel colors with the boldness of snake and floral patterns, resulting in a manicure that is both delicate and intriguing. This design is perfect for those who want to incorporate a touch of edge into a feminine and stylish look.
13. Black and White Snake Nails
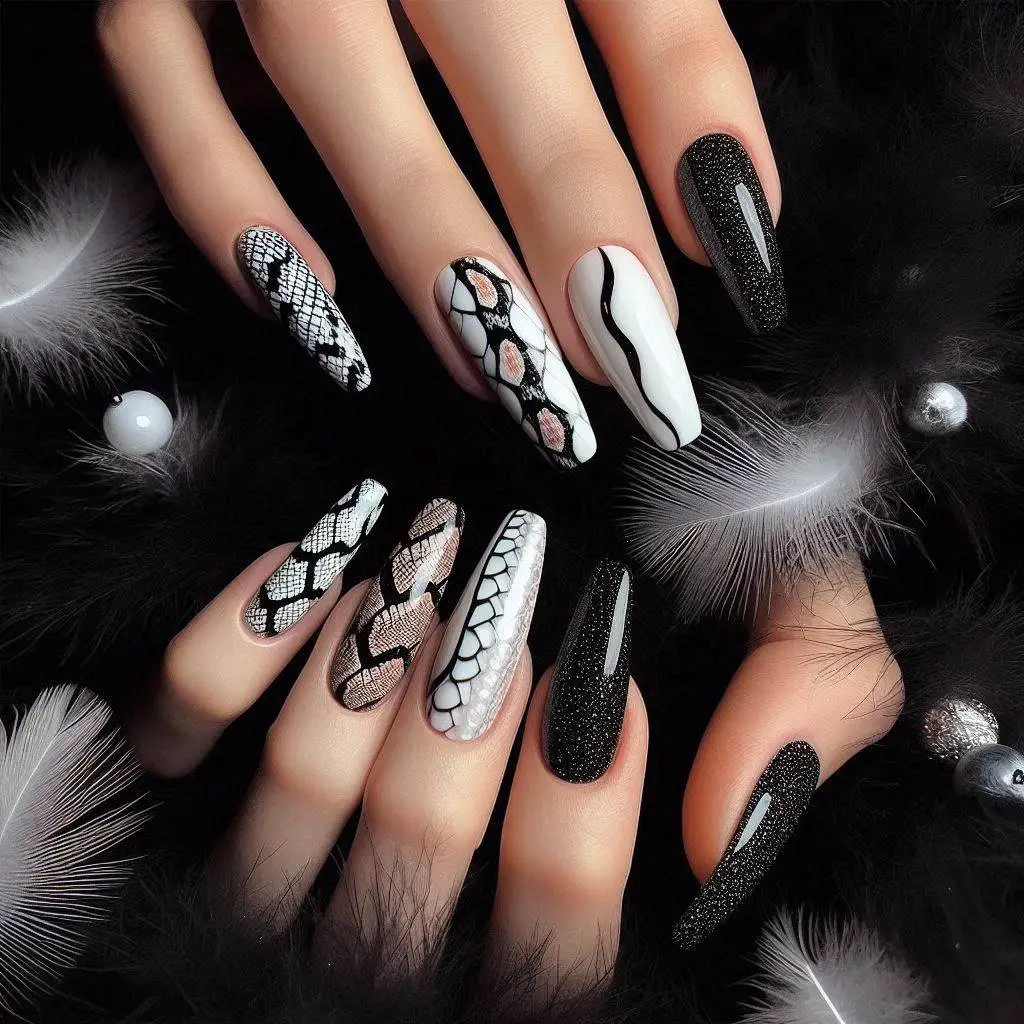
Black and White Snake Nails feature classic black and white snake designs against a stark contrasting background, offering a timeless and sophisticated look. This monochromatic style combines the elegance of black and white with edgy snake motifs for a chic, standout manicure. Here’s how to create this striking design:
Materials Needed:
- White Nail Polish: For the base color.
- Black Nail Polish: For the snake designs.
- Top Coat: To seal the design and add shine.
- Base Coat: To protect your natural nails.
- Fine Nail Art Brushes: For painting the intricate snake designs.
- Dotting Tools: For precise detailing.
- Cuticle Oil: To keep your cuticles healthy.
Steps to Achieve the Look:
- Prepare Your Nails:
- Clean and shape your nails into your desired shape, such as square, oval, or almond.
- Apply a base coat to protect your natural nails and let it dry completely.
- Apply the White Base:
- White Base Color: Apply one or two coats of white nail polish on all your nails. Allow it to dry completely. The white base will provide a crisp, clean backdrop for the black snake designs.
- Create the Black Snake Designs:
- Design:
- Snakes: Use a fine nail art brush to outline and fill in the black snake designs on your nails. You can create coiled snakes, winding patterns, or even small snake details depending on your preference.
- Details: Add intricate details like scales or patterns to enhance the snake designs and make them stand out against the white background.
- Design:
- Add Final Touches:
- Top Coat: Apply a clear top coat over the entire design to seal in the black snake designs and add a glossy finish. This will protect your manicure and enhance the contrast between the black and white.
- Drying: Allow your nails to dry completely before touching anything to avoid smudging or denting the design.
- Final Touches:
- Cuticle Care: Apply cuticle oil around your nails to keep your cuticles healthy and moisturized. This will enhance the overall look of your manicure and keep your nails looking neat.
Tips:
- Precision: Use fine brushes for detailed snake designs to ensure they are sharp and well-defined against the white base.
- Design Balance: Consider the placement and size of the snake designs to ensure they are evenly distributed across your nails for a balanced look.
- Contrast: The stark contrast between black and white enhances the visibility of the snake designs and adds to the overall impact of the manicure.
Black and White Snake Nails offer a sophisticated and classic look with their high contrast and timeless design. The black and white color scheme makes the snake motifs stand out, creating a striking and elegant manicure that is both edgy and refined.
14. Snake Coil Nails
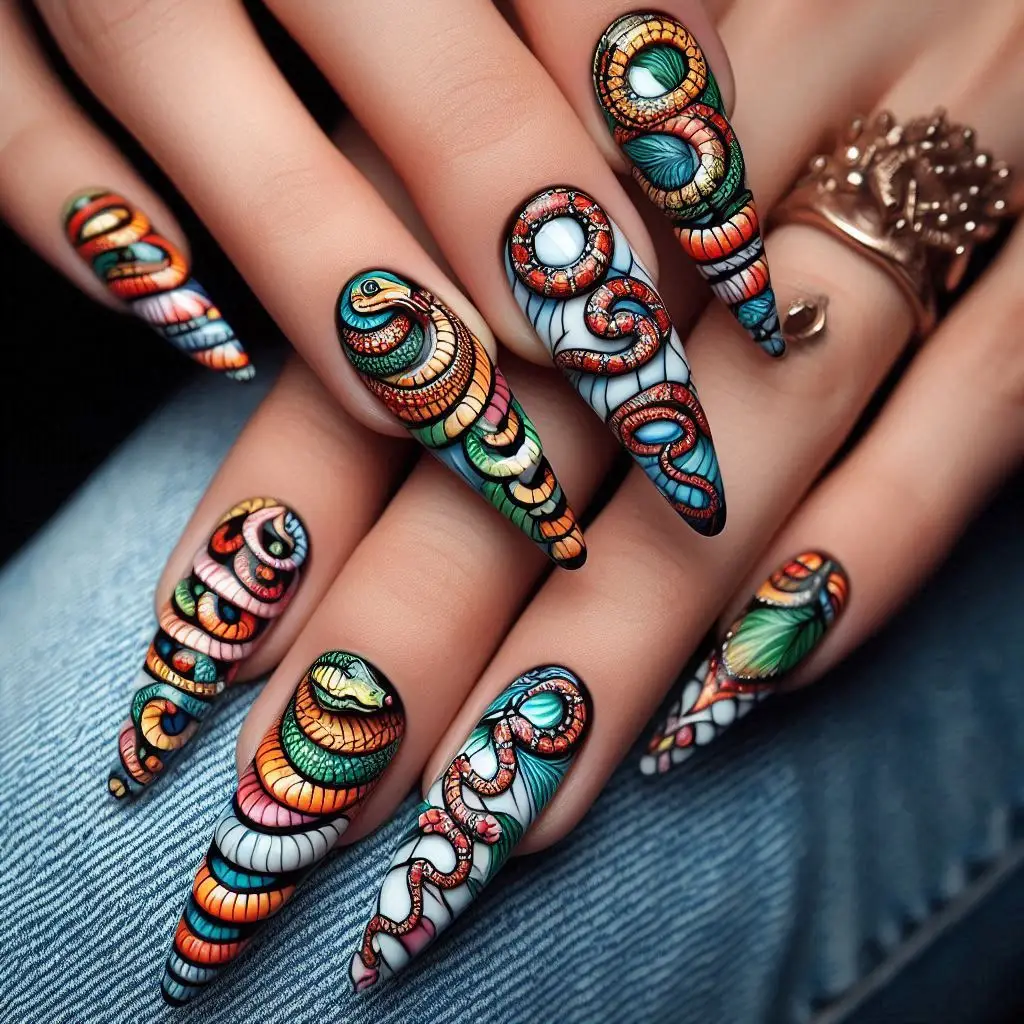
Snake Coil Nails feature spiraled snake designs wrapping around each nail, creating a dynamic and swirling effect. This design combines intricate snake patterns with a sense of movement, making for a bold and eye-catching manicure. Here’s how to achieve this stylish and captivating look:
Materials Needed:
- Base Color Polish: Choose a neutral or contrasting color that complements the snake coil design, such as white, black, or a pastel shade.
- Snake Color Polish: Black or a metallic color for the snake coils.
- Top Coat: To seal the design and add shine.
- Base Coat: To protect your natural nails.
- Fine Nail Art Brushes: For painting the detailed snake coils.
- Dotting Tools: For precision work and additional detailing.
- Cuticle Oil: To keep your cuticles healthy.
Steps to Achieve the Look:
- Prepare Your Nails:
- Clean and shape your nails into your desired shape, such as square, oval, or almond.
- Apply a base coat to protect your natural nails and let it dry completely.
- Apply the Base Color:
- Base Color Polish: Apply one or two coats of your chosen base color on all your nails. Allow it to dry completely. The base color will provide a backdrop for the snake coil designs.
- Create the Snake Coil Designs:
- Design:
- Coils: Use a fine nail art brush to paint spiraled snake designs wrapping around each nail. Start from the base of the nail and create a coiling effect that wraps around towards the tip. You can create full coils or partial spirals depending on your preference.
- Details: Add intricate details like scales, patterns, or shading within the coils to enhance the design and add depth. Use a fine brush or dotting tool for precise detailing.
- Color Contrast: Ensure that the snake coils stand out against the base color. Black is a classic choice, but metallics can add a touch of glam.
- Design:
- Add Final Touches:
- Top Coat: Apply a clear top coat over the entire design to seal in the snake coils and add a glossy finish. This will protect your manicure and enhance the overall look.
- Drying: Allow your nails to dry completely before touching anything to avoid smudging or denting the design.
- Final Touches:
- Cuticle Care: Apply cuticle oil around your nails to keep your cuticles healthy and moisturized. This will enhance the overall look of your manicure and keep your nails looking neat.
Tips:
- Precision: Use fine brushes for detailed work to ensure the snake coils are smooth and well-defined.
- Design Flow: Ensure the coils wrap around the nail in a flowing, dynamic pattern for the best visual effect.
- Contrast: Choose a base color that provides good contrast with the snake coil design to make the coils stand out.
Snake Coil Nails create a visually striking and dynamic look with their swirling snake designs. This manicure adds movement and interest to your nails, making it a bold choice for those who want a unique and edgy style.
15. Snake and Gemstone Nails
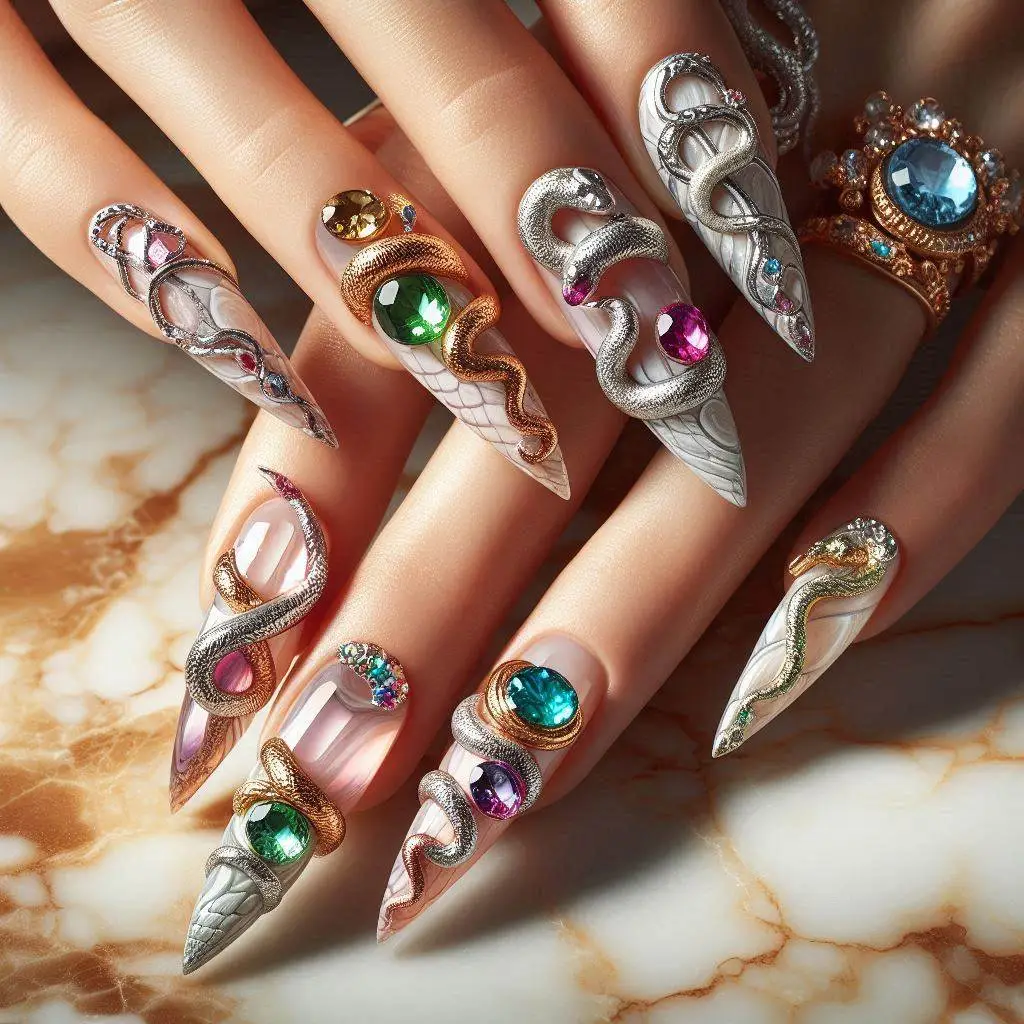
Snake and Gemstone Nails combine intricate snake motifs with tiny gemstones for a glamorous and sparkling effect. This design merges edgy snake patterns with the luxury of gemstones, creating a sophisticated and eye-catching manicure. Here’s how to achieve this dazzling look:
Materials Needed:
- Base Color Polish: Choose a neutral or contrasting color that complements the snake and gemstone designs, such as black, white, or a pastel shade.
- Snake Color Polish: Black or metallic colors for the snake motifs.
- Tiny Gemstones: Choose small gemstones or rhinestones for embellishment.
- Top Coat: To seal the design and add shine.
- Base Coat: To protect your natural nails.
- Fine Nail Art Brushes: For painting the snake motifs.
- Dotting Tools or Tweezers: For placing the gemstones.
- Nail Glue or Clear Top Coat: To adhere the gemstones.
- Cuticle Oil: To keep your cuticles healthy.
Steps to Achieve the Look:
- Prepare Your Nails:
- Clean and shape your nails into your desired shape, such as square, oval, or almond.
- Apply a base coat to protect your natural nails and let it dry completely.
- Apply the Base Color:
- Base Color Polish: Apply one or two coats of your chosen base color on all your nails. Allow it to dry completely. The base color will provide a backdrop for the snake and gemstone designs.
- Create the Snake Motifs:
- Design:
- Snakes: Use a fine nail art brush to paint the snake motifs on your nails. You can create coiled snakes, winding patterns, or any other snake design that you prefer. Use contrasting colors like black on a lighter base or metallics for added elegance.
- Details: Add details like scales or intricate patterns within the snakes to enhance the design.
- Design:
- Add Gemstones:
- Placement:
- Gems: Using dotting tools or tweezers, carefully place tiny gemstones onto the snake designs. You can place them along the snake’s body, on the coils, or as accent pieces around the snakes.
- Adhesion: Use nail glue or a clear top coat to adhere the gemstones to your nails. Apply a small amount of glue or top coat where you want to place each gemstone, then gently press the gemstone into place.
- Design: Consider adding gemstones to specific parts of the snake design to highlight certain areas or create a balanced, symmetrical look.
- Placement:
- Add Final Touches:
- Top Coat: Apply a clear top coat over the entire design to seal in the snake motifs and gemstones, adding a glossy finish. This will help protect the gemstones and the overall design.
- Drying: Allow your nails to dry completely before touching anything to avoid smudging or displacing the gemstones.
- Final Touches:
- Cuticle Care: Apply cuticle oil around your nails to keep your cuticles healthy and moisturized. This will enhance the overall look of your manicure and keep your nails looking neat.
Tips:
- Precision: Use fine brushes for detailed work and tweezers for precise placement of the gemstones.
- Gemstone Size: Choose tiny gemstones that won’t overpower the snake motifs but add a subtle touch of glamour.
- Adhesion: Ensure the gemstones are securely attached by pressing them gently into the glue or top coat.
Snake and Gemstone Nails blend edgy snake designs with sparkling gemstones for a chic and sophisticated manicure. This combination adds both drama and elegance, making your nails a statement piece of glamour and style.
16. Serpent French Manicure Nails
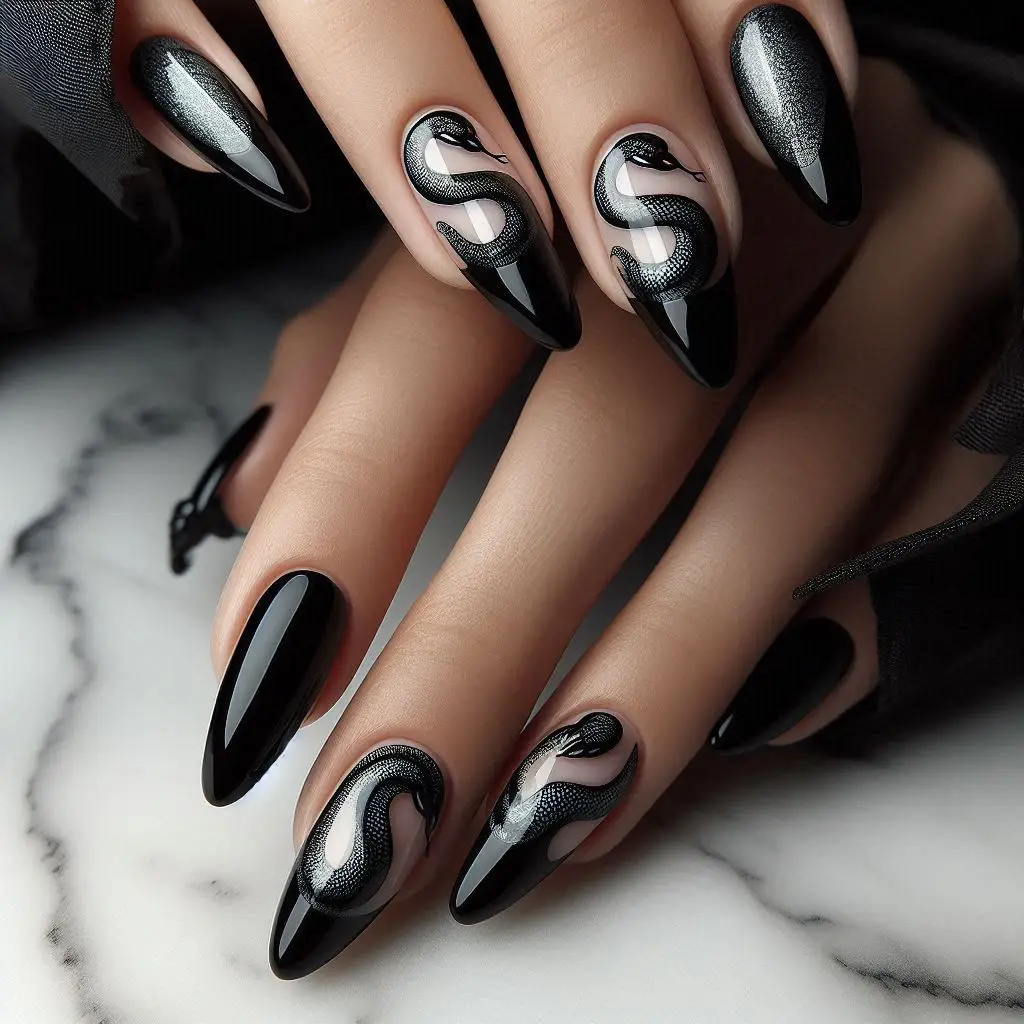
Serpent French Manicure Nails blend the classic elegance of a French manicure with the edgy allure of a snake coiling around the tips. This unique twist adds a modern and dynamic touch to the traditional French look. Here’s how to achieve this stylish and captivating design:
Materials Needed:
- Base Color Polish: Choose a neutral nude or soft pink for the base of the French manicure.
- Tip Color Polish: White or a contrasting color for the French tips.
- Snake Color Polish: Black or metallic colors for the snake motifs.
- Top Coat: To seal the design and add shine.
- Base Coat: To protect your natural nails.
- Fine Nail Art Brushes: For painting the snake motifs.
- Dotting Tools or Nail Art Tools: For precise detailing.
- Cuticle Oil: To keep your cuticles healthy.
Steps to Achieve the Look:
- Prepare Your Nails:
- Clean and shape your nails into your desired shape, such as square or almond.
- Apply a base coat to protect your natural nails and let it dry completely.
- Apply the Base Color:
- Base Color Polish: Apply one or two coats of a nude or soft pink polish on all your nails. This will be the base color of your French manicure. Allow it to dry completely.
- Create the French Tips:
- French Tips: Using a white polish or a contrasting color, carefully paint the tips of your nails. You can use tape or a French tip guide to achieve a clean, straight line. Allow the tips to dry completely.
- Add the Snake Motifs:
- Design:
- Snakes: Use a fine nail art brush to paint a coiling snake design around the tips of your nails. Start at the base of the tip and create a coiling effect that wraps around the edge of the nail. You can create partial coils or full wraps depending on your preference.
- Details: Add intricate details to the snake design, such as scales or patterns, to enhance the overall look. Use a fine brush or dotting tool for precise work.
- Color Choice: Black snakes will provide a striking contrast against the white tips, while metallic colors can add a touch of glamour.
- Design:
- Add Final Touches:
- Top Coat: Apply a clear top coat over the entire design to seal in the snake motifs and French tips, adding a glossy finish. This will protect your manicure and ensure longevity.
- Drying: Allow your nails to dry completely before touching anything to avoid smudging or denting the design.
- Final Touches:
- Cuticle Care: Apply cuticle oil around your nails to keep your cuticles healthy and moisturized. This will enhance the overall look of your manicure and keep your nails looking neat.
Tips:
- Precision: Use fine brushes for detailed snake designs to ensure they are smooth and well-defined.
- Contrast: The black or metallic snake motifs will stand out beautifully against the classic white French tips.
- Design Balance: Ensure the snake coils are evenly distributed around the tips for a balanced and stylish look.
Serpent French Manicure Nails add a unique and edgy twist to the traditional French manicure by incorporating coiling snake motifs around the tips. This design blends classic elegance with modern flair, making your nails a standout feature of your look.
17. Red and Gold Snake Nails

Red and Gold Snake Nails feature a striking combination of fiery red polish and intricate gold snake designs. This bold and eye-catching look blends vibrant color with luxurious metallic accents, making it a standout choice for those who want their nails to make a statement. Here’s how to achieve this dramatic and glamorous manicure:
Materials Needed:
- Base Color Polish: Fiery red for the main nail color.
- Snake Color Polish: Metallic gold for the snake designs.
- Top Coat: To seal the design and add shine.
- Base Coat: To protect your natural nails.
- Fine Nail Art Brushes: For painting the snake designs.
- Dotting Tools or Nail Art Tools: For precise detailing.
- Cuticle Oil: To keep your cuticles healthy.
Steps to Achieve the Look:
- Prepare Your Nails:
- Clean and shape your nails into your desired shape, such as square, oval, or almond.
- Apply a base coat to protect your natural nails and let it dry completely.
- Apply the Base Color:
- Base Color Polish: Apply one or two coats of fiery red polish on all your nails. This vibrant color will be the backdrop for your snake designs. Allow it to dry completely.
- Create the Snake Designs:
- Design:
- Snakes: Use a fine nail art brush to paint intricate gold snake designs on your red nails. You can create coiling snakes, winding patterns, or any snake design that complements the red base.
- Details: Add details like scales or patterns within the gold snakes to enhance the design and add depth. Use a fine brush or dotting tool for precision.
- Design Placement: Consider placing the snake designs strategically across your nails, such as wrapping around the edges or curling along the sides for a dynamic look.
- Design:
- Add Final Touches:
- Top Coat: Apply a clear top coat over the entire design to seal in the gold snake motifs and add a glossy finish. This will protect your manicure and enhance the overall look.
- Drying: Allow your nails to dry completely before touching anything to avoid smudging or denting the design.
- Final Touches:
- Cuticle Care: Apply cuticle oil around your nails to keep your cuticles healthy and moisturized. This will enhance the overall look of your manicure and keep your nails looking neat.
Tips:
- Precision: Use fine brushes for detailed gold snake designs to ensure they are smooth and well-defined against the red base.
- Contrast: The vibrant red polish will make the gold snake designs stand out beautifully, creating a dramatic and luxurious look.
- Design Balance: Ensure the snake designs are well-balanced and evenly distributed for a cohesive and striking manicure.
Red and Gold Snake Nails combine bold red polish with intricate gold snake designs to create a dramatic and eye-catching look. This manicure blends vibrant color with luxurious metallic accents, making it perfect for those who want their nails to be a focal point of their style.
18. Snake Skin Ombre Nails
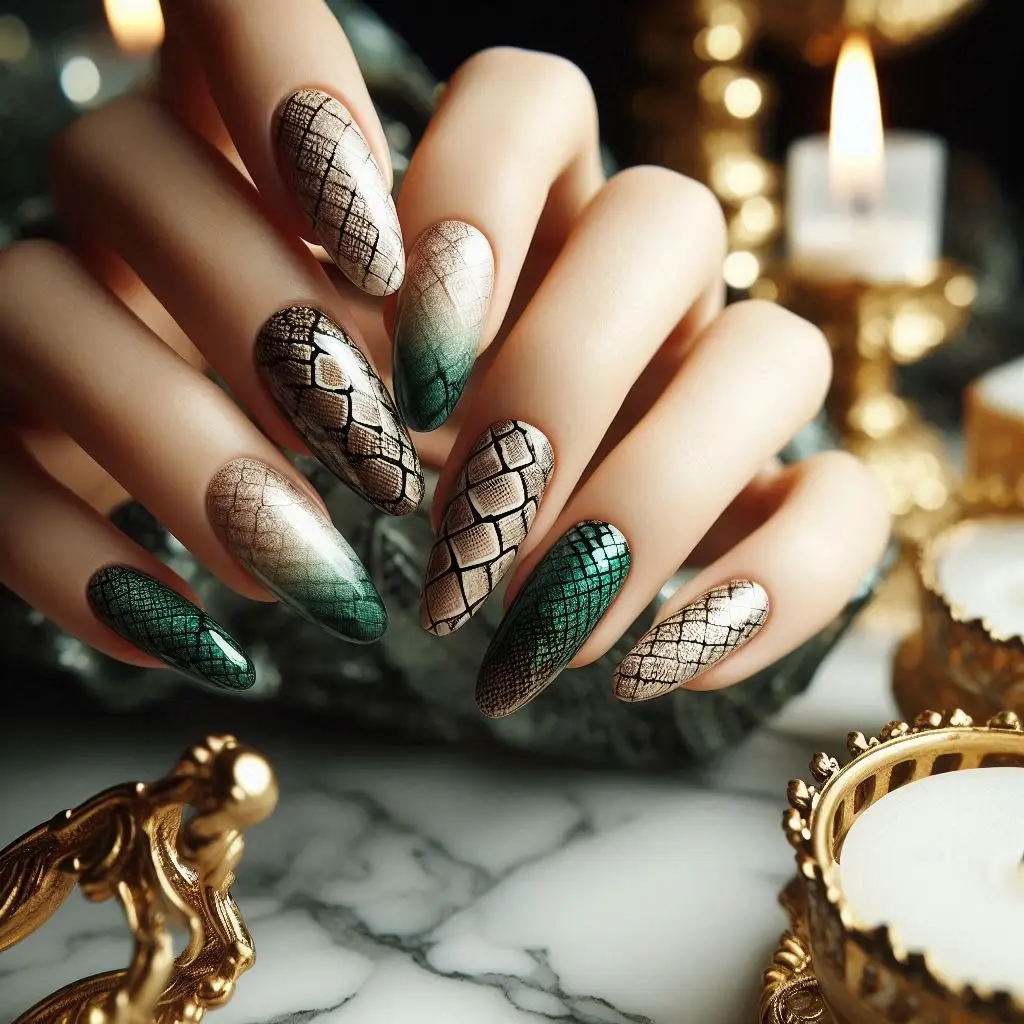
Snake Skin Ombre Nails feature a sophisticated blend of a snake skin pattern transitioning from dark to light, creating a seamless and elegant gradient. This design combines the edgy texture of snake skin with the smooth transition of an ombre effect, resulting in a chic and modern manicure. Here’s how to achieve this stylish look:
Materials Needed:
- Base Color Polish: Choose a dark color for the starting point of the ombre gradient.
- Gradient Color Polish: Select a lighter color that blends with the base color.
- Snake Skin Pattern Polish: Use a contrasting color for the snake skin pattern.
- Top Coat: To seal the design and add shine.
- Base Coat: To protect your natural nails.
- Makeup Sponges: For blending the ombre effect.
- Fine Nail Art Brushes: For painting the snake skin pattern.
- Dotting Tools or Nail Art Tools: For precise detailing.
- Cuticle Oil: To keep your cuticles healthy.
Steps to Achieve the Look:
- Prepare Your Nails:
- Clean and shape your nails into your desired shape, such as square, oval, or almond.
- Apply a base coat to protect your natural nails and let it dry completely.
- Create the Ombre Gradient:
- Base Color: Apply one or two coats of the dark base color on all your nails. This will be the starting point of your ombre gradient. Allow it to dry completely.
- Gradient Effect:
- Blend: Apply a small amount of the lighter gradient color on a makeup sponge. Gently dab the sponge onto the nail, starting from the tip and blending towards the base to create a smooth transition from dark to light. Repeat if necessary for a more intense gradient.
- Blend Smoothly: Ensure the gradient blends seamlessly from the dark base color to the lighter shade.
- Add the Snake Skin Pattern:
- Design:
- Snake Skin Pattern: Use a fine nail art brush to paint the snake skin pattern over the ombre gradient. You can create subtle, scaled patterns or more pronounced snake skin designs depending on your preference.
- Details: Add details to the snake skin pattern, such as intricate scales or texture, to enhance the overall look.
- Contrast: Choose a contrasting color for the snake skin pattern to make it stand out against the gradient background.
- Design:
- Add Final Touches:
- Top Coat: Apply a clear top coat over the entire design to seal in the snake skin pattern and gradient effect. This will add shine and protect your manicure.
- Drying: Allow your nails to dry completely before touching anything to avoid smudging or denting the design.
- Final Touches:
- Cuticle Care: Apply cuticle oil around your nails to keep your cuticles healthy and moisturized. This will enhance the overall look of your manicure and keep your nails looking neat.
Tips:
- Smooth Gradient: For a smooth ombre gradient, ensure you blend the colors thoroughly and use a fresh part of the sponge for each nail.
- Snake Skin Precision: Use a fine brush for the snake skin pattern to ensure clean and defined details.
- Color Contrast: Choose a contrasting color for the snake skin pattern to make it stand out against the gradient background.
Snake Skin Ombre Nails combine the edgy texture of a snake skin pattern with a sophisticated gradient effect, creating an elegant and modern manicure. This design blends dark and light shades seamlessly with intricate snake skin details, resulting in a chic and eye-catching look.
19. Snake in the Grass Nails
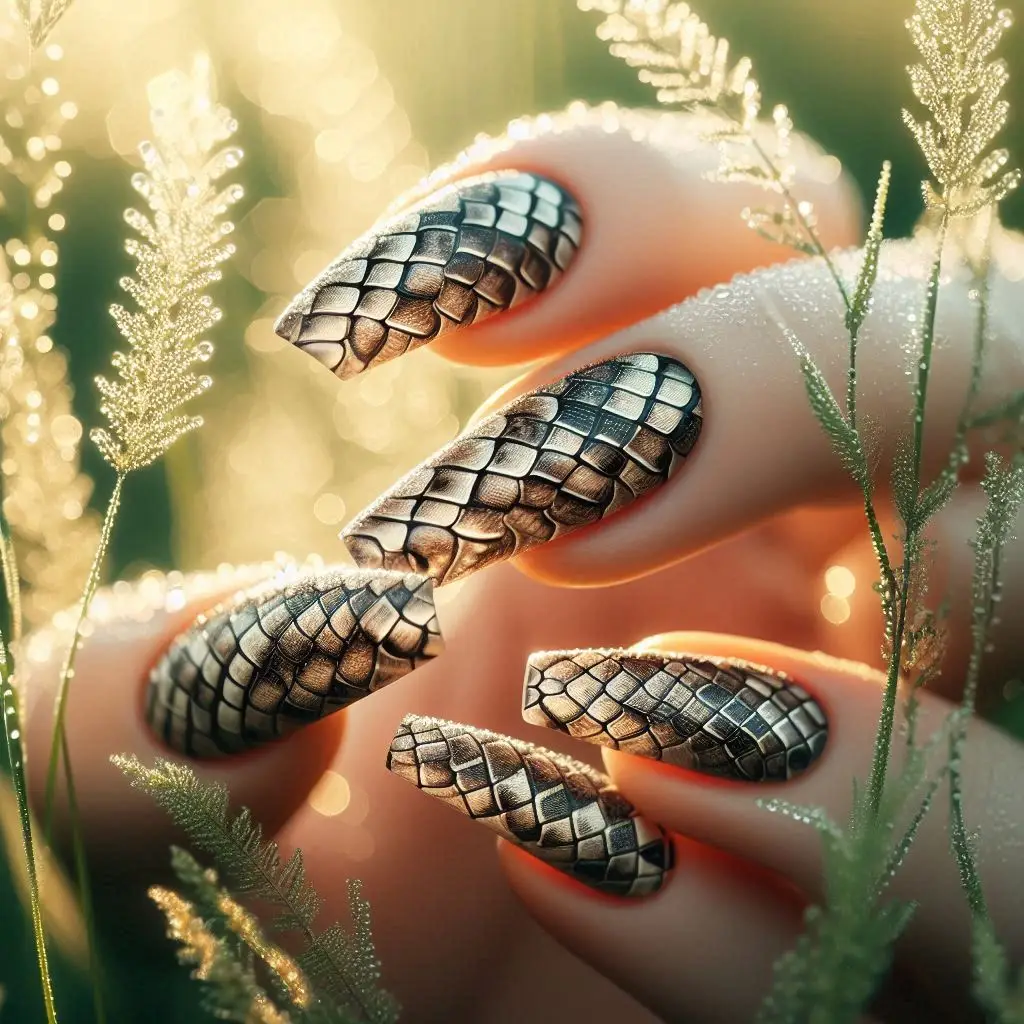
Snake in the Grass Nails feature a natural and earthy design with green nails and subtle snake patterns peeking through blades of grass. This manicure blends a fresh, vibrant green base with delicate snake designs to create a unique and nature-inspired look. Here’s how to achieve this stylish and earthy design:
Materials Needed:
- Base Color Polish: A vibrant green for the main nail color.
- Grass Color Polish: Different shades of green for the grass details.
- Snake Color Polish: A contrasting color like black or metallic for the snake designs.
- Top Coat: To seal the design and add shine.
- Base Coat: To protect your natural nails.
- Fine Nail Art Brushes: For painting the snake and grass designs.
- Dotting Tools or Nail Art Tools: For precise detailing.
- Cuticle Oil: To keep your cuticles healthy.
Steps to Achieve the Look:
- Prepare Your Nails:
- Clean and shape your nails into your desired shape, such as square, oval, or almond.
- Apply a base coat to protect your natural nails and let it dry completely.
- Apply the Base Color:
- Base Color Polish: Apply one or two coats of vibrant green polish on all your nails. This will be the backdrop for your snake and grass designs. Allow it to dry completely.
- Create the Grass Design:
- Grass Details:
- Base Grass: Use a lighter or darker shade of green polish to paint blades of grass across your nails. You can create vertical or diagonal lines to mimic the look of grass.
- Layering: Add different shades of green to create depth and variation, making the grass look more natural.
- Grass Texture: Use a fine nail art brush or dotting tool to add subtle details and texture to the grass for a realistic effect.
- Grass Details:
- Add the Snake Designs:
- Design:
- Snakes: Use a fine nail art brush to paint subtle snake designs peeking through the grass. You can create small snake motifs that appear to be hiding or partially visible among the blades of grass.
- Details: Add details like scales or patterns to the snakes for added depth and realism.
- Placement: Strategically place the snakes so that they blend naturally with the grass, giving the impression that they are camouflaged.
- Design:
- Add Final Touches:
- Top Coat: Apply a clear top coat over the entire design to seal in the grass and snake motifs and add a glossy finish. This will protect your manicure and enhance the overall look.
- Drying: Allow your nails to dry completely before touching anything to avoid smudging or denting the design.
- Final Touches:
- Cuticle Care: Apply cuticle oil around your nails to keep your cuticles healthy and moisturized. This will enhance the overall look of your manicure and keep your nails looking neat.
Tips:
- Natural Look: Use varying shades of green to create a more natural and layered grass effect.
- Subtle Snakes: Ensure the snake designs are subtle and blend seamlessly with the grass to achieve a camouflaged effect.
- Detailing: Pay attention to the details of both the grass and snake designs to make the manicure look realistic and cohesive.
Snake in the Grass Nails combines a vibrant green base with intricate grass and subtle snake designs for a natural and earthy look. This manicure creates a fresh, nature-inspired appearance with a unique and artistic twist.
20. Snake and Moon Phase Nails
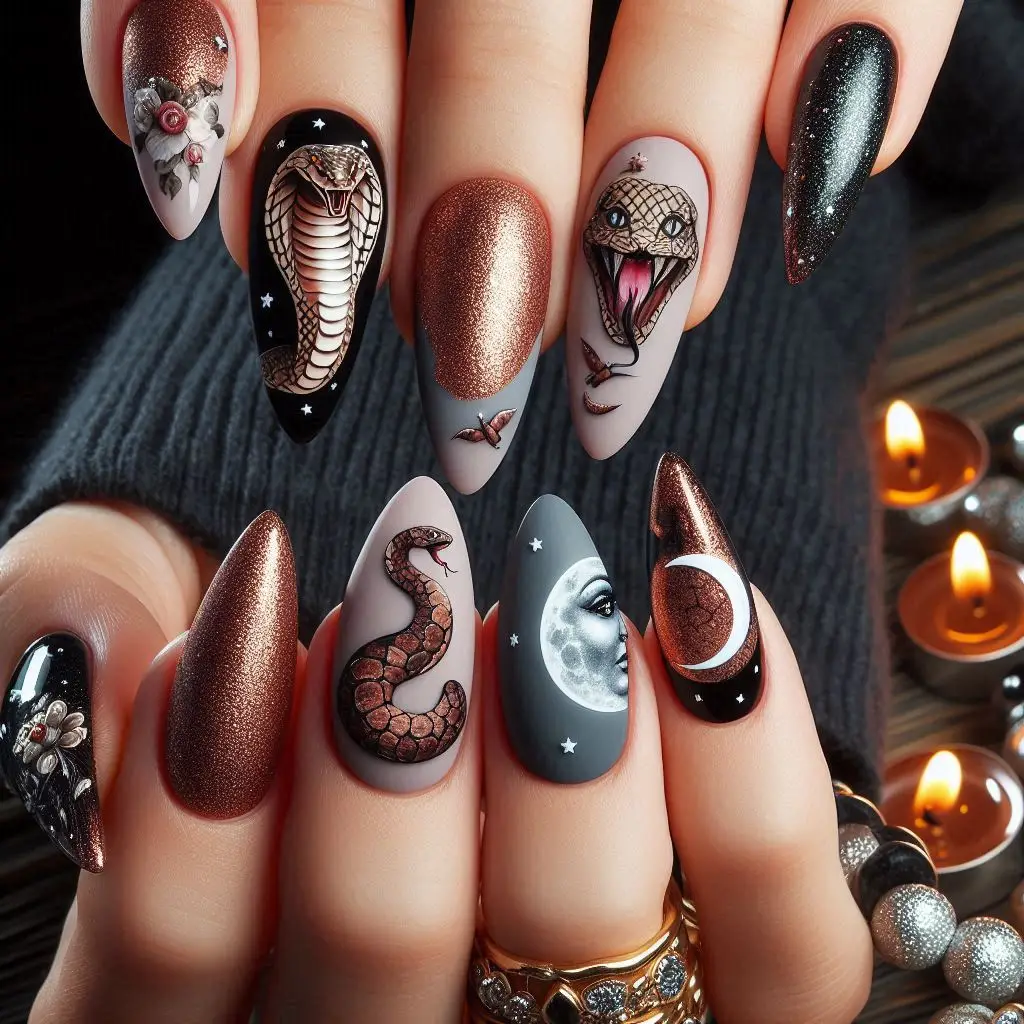
Snake and Moon Phase Nails blend mystical snake designs with celestial moon phases to create a magical and ethereal manicure. This combination brings together the enigmatic allure of snakes with the serene beauty of the moon, resulting in a unique and enchanting look. Here’s how to achieve this celestial-inspired nail design:
Materials Needed:
- Base Color Polish: Choose a dark, cosmic color like midnight blue, deep purple, or black.
- Moon Phase Polish: White or metallic silver for the moon phases.
- Snake Color Polish: Black or metallic for the snake designs.
- Top Coat: To seal the design and add shine.
- Base Coat: To protect your natural nails.
- Fine Nail Art Brushes: For painting the moon phases and snake designs.
- Dotting Tools or Nail Art Tools: For precise detailing.
- Cuticle Oil: To keep your cuticles healthy.
Steps to Achieve the Look:
- Prepare Your Nails:
- Clean and shape your nails into your desired shape, such as square, oval, or almond.
- Apply a base coat to protect your natural nails and let it dry completely.
- Apply the Base Color:
- Base Color Polish: Apply one or two coats of a dark, cosmic color (midnight blue, deep purple, or black) to all your nails. This will serve as the backdrop for your moon phase and snake designs. Allow it to dry completely.
- Create the Moon Phases:
- Moon Phases:
- Design: Use a fine nail art brush or a dotting tool to paint the different moon phases (new moon, crescent, half moon, full moon) on your nails. You can place these phases evenly across each nail or focus on a few nails for a balanced look.
- Details: Use white or metallic silver polish for the moon phases to ensure they stand out against the dark base color. Add subtle shading or craters for a more detailed appearance.
- Moon Phases:
- Add the Snake Designs:
- Design:
- Snakes: Use a fine nail art brush to paint intricate snake designs intertwined with or wrapping around the moon phases. You can create detailed snakes with scales or opt for simpler, more stylized designs depending on your preference.
- Placement: Position the snakes so that they complement the moon phases, creating a harmonious and mystical effect.
- Details: Add details to the snakes, such as eyes or patterns, to enhance the overall design.
- Design:
- Add Final Touches:
- Top Coat: Apply a clear top coat over the entire design to seal in the moon phases and snake motifs and add a glossy finish. This will protect your manicure and enhance the overall look.
- Drying: Allow your nails to dry completely before touching anything to avoid smudging or denting the design.
- Final Touches:
- Cuticle Care: Apply cuticle oil around your nails to keep your cuticles healthy and moisturized. This will enhance the overall look of your manicure and keep your nails looking neat.
Tips:
- Cosmic Base: Choose a dark base color that evokes a celestial feel, enhancing the mystical theme of the design.
- Moon Phase Placement: Position the moon phases in a way that they are easily visible and complement the snake designs.
- Detailing: Pay attention to the details of both the moon phases and snake designs to ensure they are well-defined and visually striking.
Snake and Moon Phase Nails combine the enigmatic allure of snakes with the serene beauty of moon phases for a mystical and celestial manicure. This design blends dark, cosmic hues with intricate details, resulting in a magical and enchanting nail look.
21. Pearl Snake Nails
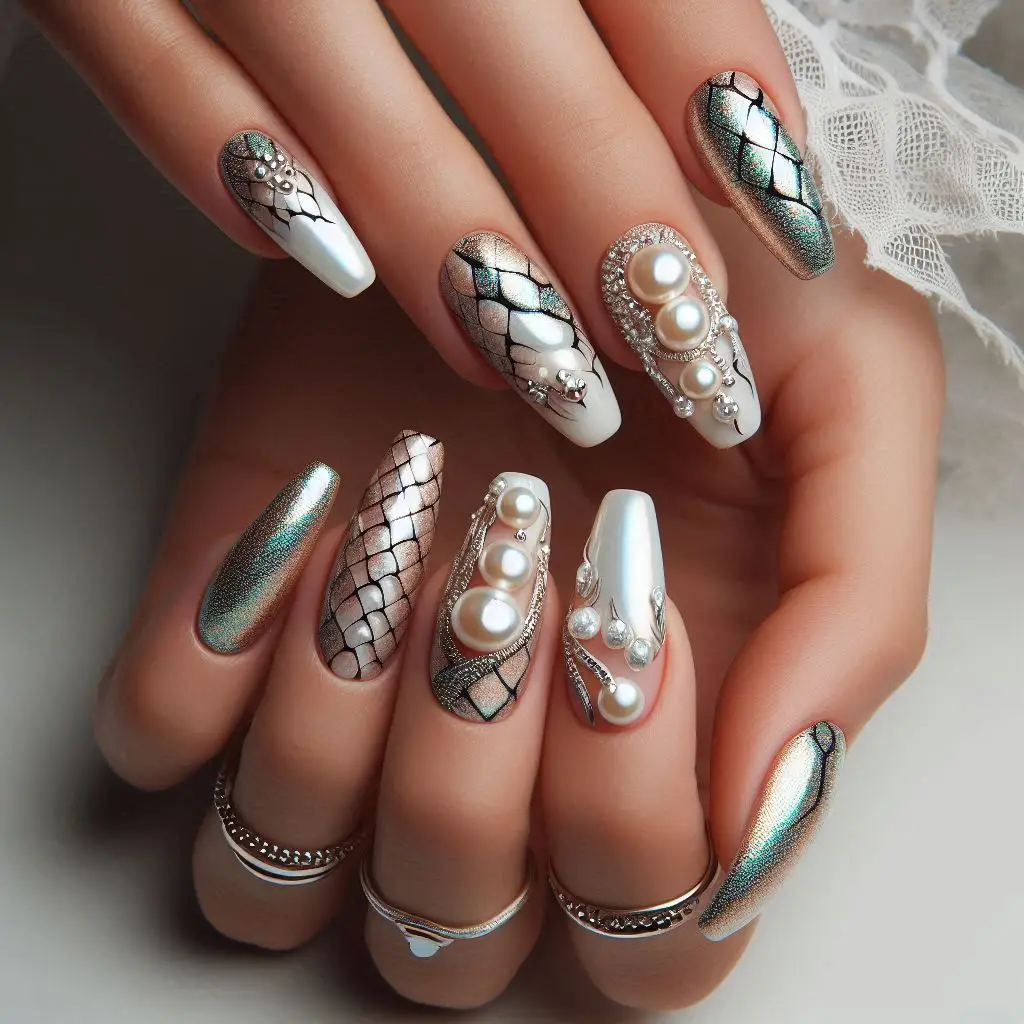
Pearl Snake Nails offer a sophisticated and classy take on snake-inspired nail art by incorporating elegant pearl accents into the design. The combination of a glossy nude base and pearl embellishments forms a subtle yet luxurious look, perfect for special occasions or when you want to add a touch of refinement to your nails. Here’s how to achieve this refined and chic nail design:
Materials Needed:
- Base Color Polish: A glossy nude or pale pink.
- Pearl Accents: Small pearl beads or pearl-like nail embellishments.
- Nail Glue or Gel: For securing the pearl accents.
- Top Coat: To seal the design and add extra shine.
- Base Coat: To protect your natural nails.
- Fine Nail Art Brushes: For precise placement of the pearls.
- Dotting Tools or Tweezers: To help with the application of pearl accents.
- Cuticle Oil: To keep your cuticles healthy and moisturized.
Steps to Achieve the Look:
- Prepare Your Nails:
- Clean and shape your nails into your desired shape, such as oval or almond, which complements the elegant nature of this design.
- Apply a base coat to protect your natural nails and allow it to dry completely.
- Apply the Base Color:
- Base Color Polish: Apply one or two coats of a glossy nude or pale pink polish. This will create a soft and elegant background for your pearl snake design. Let it dry thoroughly between coats.
- Create the Pearl Snake Design:
- Plan the Design:
- Snake Shape: Decide on the snake’s shape, such as a winding or coiled snake, and where you’d like it to appear on your nails. Typically, placing the snake diagonally across the nail creates a more dynamic and visually appealing look.
- Apply the Pearls:
- Placement: Use a dotting tool or tweezers to carefully place each pearl in the shape of a snake. Start by applying a small amount of nail glue or gel to the nail where you want the pearls to be placed.
- Positioning: Begin with the head of the snake, positioning one larger pearl as the snake’s head, and then continue placing smaller pearls along the nail to form the snake’s body.
- Details: You can add tiny metallic or rhinestone accents for the eyes or to enhance the overall design, adding depth and dimension.
- Plan the Design:
- Secure the Design:
- Top Coat: Once the pearls are securely in place, apply a generous layer of clear top coat over the entire nail. This will not only seal the design but also ensure the pearls stay attached and the nails have a high-gloss finish.
- Drying: Allow the nails to dry completely before touching anything to avoid smudging or displacing the pearls.
- Final Touches:
- Cuticle Care: Apply cuticle oil around your nails to keep your cuticles healthy and enhance the overall look of your manicure.
Tips:
- Pearl Size: Choose pearl sizes that are proportional to your nail size. Smaller pearls create a more delicate and intricate design, while larger pearls make a bold statement.
- Symmetry: Ensure the pearls are evenly spaced and follow a smooth, flowing line to create a realistic snake shape.
- Minimalist Approach: If you prefer a subtler look, consider placing the pearl snake design on just one or two accent nails, leaving the other nails with a simple glossy nude finish.
Pearl Snake Nails bring together the timeless elegance of pearls with the bold and fashionable snake motif, resulting in a nail design that is both refined and eye-catching. Whether for a special occasion or simply to elevate your everyday look, this manicure exudes sophistication and style.
22. Dark Snake Glam Nails
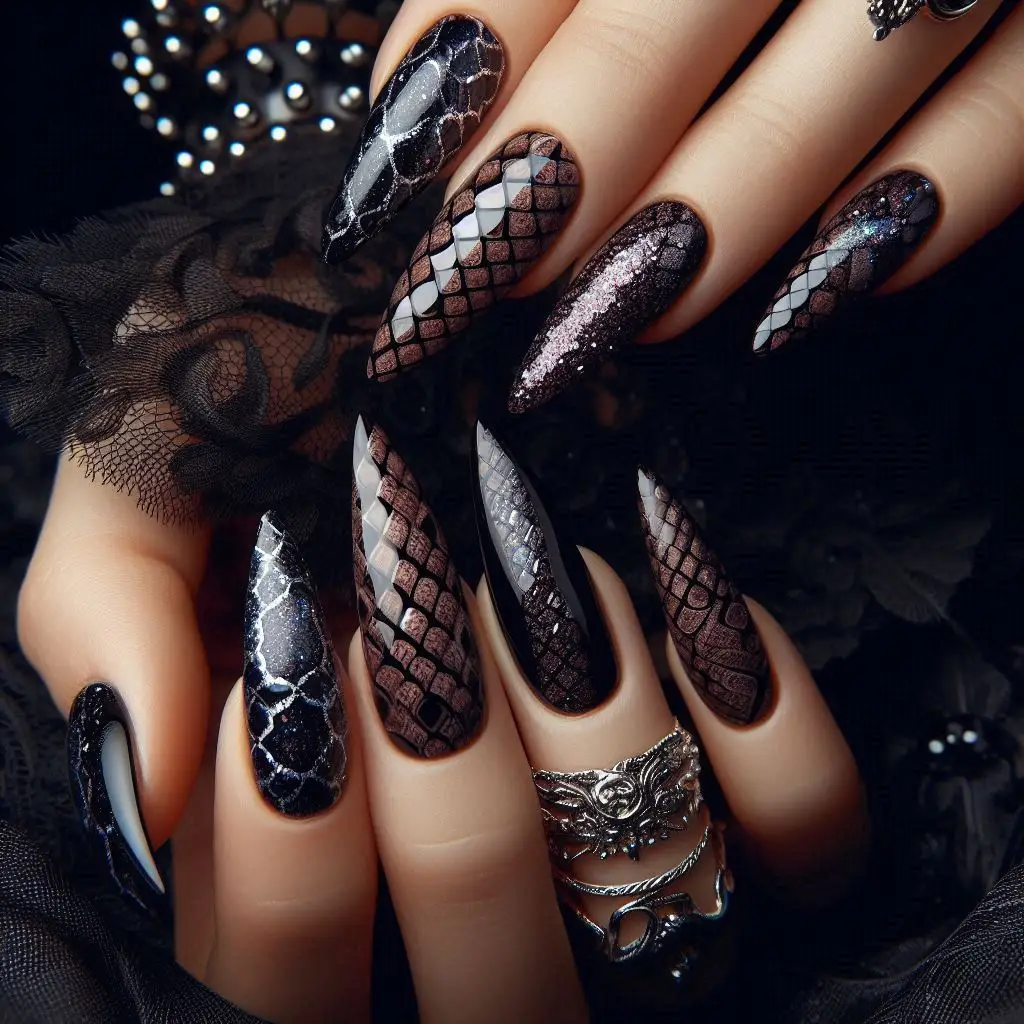
Dark Snake Glam Nails combine the allure of deep, rich colors like purple or burgundy with the mysterious elegance of black snake silhouettes. This nail design is perfect for those who love a dark, glamorous, and slightly edgy style. Here’s how to create this striking look:
Materials Needed:
- Base Color Polish: Deep purple or burgundy.
- Black Nail Polish: For creating the snake silhouettes.
- Nail Art Brushes: Fine brushes for detailed work.
- Top Coat: To seal the design and add shine.
- Base Coat: To protect your natural nails.
- Matte Top Coat (Optional): For a sophisticated matte finish.
- Dotting Tools or Detailing Pens: For precise snake designs.
- Cuticle Oil: To keep your cuticles hydrated and healthy.
Steps to Achieve the Look:
- Prepare Your Nails:
- Clean, shape, and buff your nails as desired.
- Apply a base coat to protect your natural nails and ensure smooth application of the polish.
- Apply the Base Color:
- Base Color Polish: Paint your nails with a deep purple or burgundy polish. Apply two coats to ensure a rich, even color, and let each coat dry thoroughly.
- Create the Snake Silhouettes:
- Design Planning: Decide where you’d like the snake silhouettes to appear on your nails. You can create one larger snake on an accent nail or smaller, winding snakes on each nail for a more intricate look.
- Applying the Black Polish:
- Fine Brush or Detailing Pen: Use a fine nail art brush or detailing pen dipped in black polish to draw the snake’s body. Start by drawing the snake’s head, then create a winding, flowing line to form the body.
- Details: Add small details like the snake’s forked tongue or eyes using a dotting tool or detailing pen for precision.
- Optional: Matte Finish:
- If you prefer a matte look, apply a matte top coat over the base color before drawing the snake silhouettes. This will make the black snake design stand out more against the muted base.
- Seal the Design:
- Apply a glossy top coat over the entire nail to seal in the design, ensuring that your dark snake glam nails stay intact and glossy.
- Alternatively, if you’ve opted for a matte look, use a matte top coat for the final sealing layer.
- Final Touches:
- Cuticle Care: Apply cuticle oil around your nails to keep your cuticles nourished and enhance the overall appearance of your manicure.
Tips:
- Snake Placement: Experiment with different placements for the snake silhouettes, such as wrapping around the nail or positioned diagonally across the nail bed.
- Gradient Effect: For added depth, consider creating a gradient background by blending the deep purple or burgundy with a slightly lighter shade before applying the snake silhouettes.
- Accents: Add tiny rhinestones or metallic accents to the snake design for an extra touch of glam.
Dark Snake Glam Nails offer a sophisticated, edgy twist on traditional nail art. The combination of deep, luxurious colors with sleek black snake designs creates a dramatic, glamorous manicure that’s perfect for evening events or when you want to make a bold fashion statement.
23. Snake Charmer Design Nails
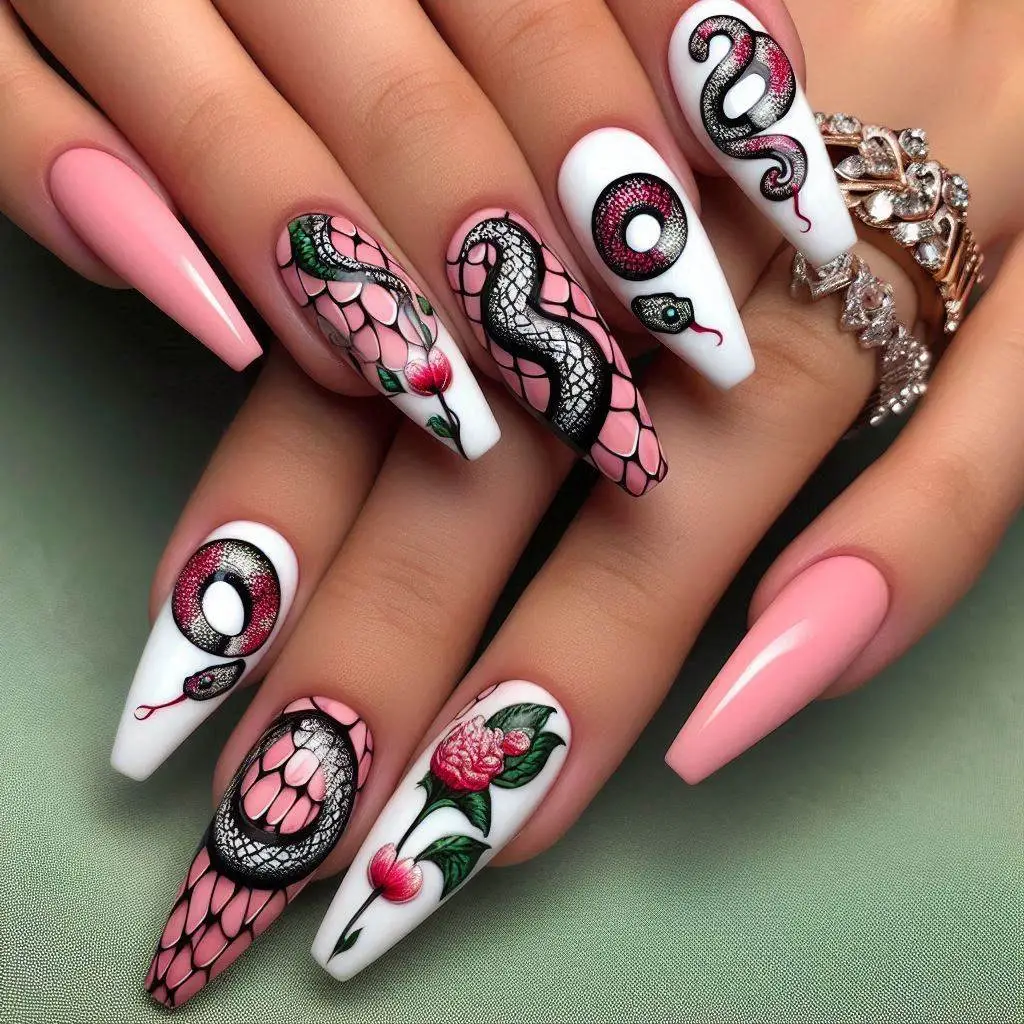
Snake Charmer Design Nails feature enchanting snake designs that wrap around your nails, creating a mystical and magical vibe. This design is perfect for those who love to blend elegance with a touch of the mystical. Here’s how to create this mesmerizing look:
Materials Needed:
- Base Color Polish: Choose a color that complements the mystical theme, such as deep green, dark purple, or midnight blue.
- Metallic or Glitter Polish: For adding accents and making the design pop.
- Black or Dark Polish: For the snake outlines and details.
- Nail Art Brushes: Fine brushes for intricate designs.
- Top Coat: To seal the design and add shine.
- Base Coat: To protect your natural nails.
- Dotting Tools or Detailing Pens: For precise snake designs.
- Optional Accessories: Tiny rhinestones or moon and star decals to enhance the magical theme.
Steps to Achieve the Look:
- Prepare Your Nails:
- Clean, shape, and buff your nails as desired.
- Apply a base coat to protect your natural nails and ensure smooth application of the polish.
- Apply the Base Color:
- Base Color Polish: Paint your nails with a mystical-themed color like deep green, dark purple, or midnight blue. Apply two coats for an even, opaque finish, and allow each coat to dry thoroughly.
- Create the Snake Designs:
- Planning the Design: Visualize where you want the snake to wrap around your nails. You can have the snake start from the base of the nail and coil around or have it slither across the nail in a more intricate pattern.
- Drawing the Snake:
- Fine Brush or Detailing Pen: Use a fine nail art brush or detailing pen dipped in black or dark polish to draw the snake’s body. Begin with the snake’s head and work your way around the nail, creating a winding or coiled pattern.
- Details: Add details such as scales, eyes, or a forked tongue to make the snake design more realistic. You can use metallic or glitter polish to highlight certain parts of the snake, like its eyes or scales.
- Optional Mystical Accents:
- Enhance the Theme: Add tiny rhinestones, moon, or star decals around the snake design to heighten the mystical vibe. You can also use a metallic or glitter polish to add shimmer to the background or accentuate the snake’s features.
- Seal the Design:
- Apply a top coat over the entire nail to protect the design and add a glossy finish. This will ensure your Snake Charmer Design Nails last longer and maintain their vibrant look.
- Final Touches:
- Cuticle Care: Apply cuticle oil around your nails to keep your cuticles nourished, enhancing the overall appearance of your manicure.
Tips:
- Snake Placement: Experiment with different placements and angles for the snake. You can have the snake wrap around the nail in a spiral or extend from one side to the other.
- Gradient Background: Consider creating a gradient background using mystical colors like deep purple fading into midnight blue to add depth and dimension to the design.
- Additional Elements: Incorporate other mystical elements like tiny crescent moons, stars, or mystical symbols alongside the snake design for a more elaborate look.
Snake Charmer Design Nails are a captivating choice for those who love to infuse a bit of magic into their nail art. The combination of enchanting snake designs with a mystical theme creates a stunning, otherworldly manicure that’s perfect for special occasions or whenever you want to make a magical statemen
24. Snakes on Matte Grey Nails
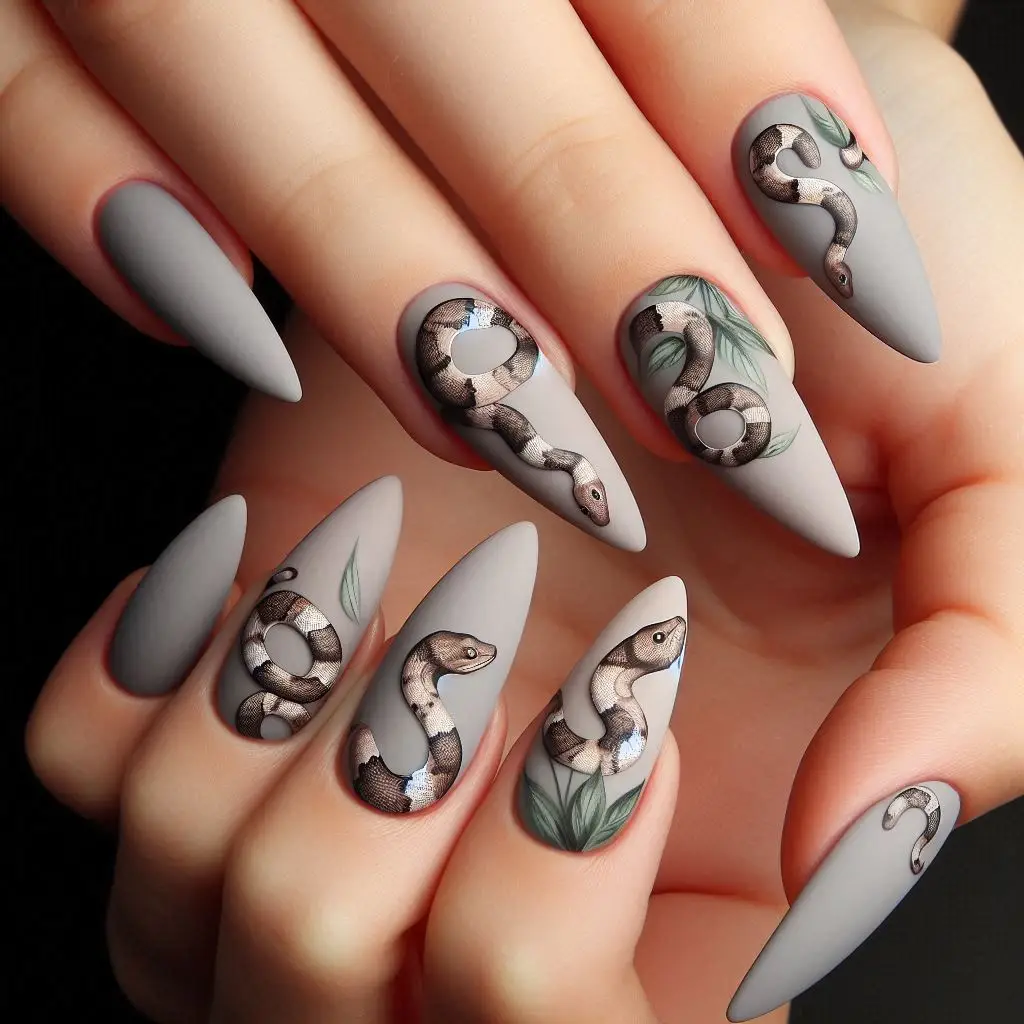
Snakes on Matte Grey Nails offer a sleek and modern take on nail art with a minimalist twist. This design combines the cool, understated elegance of matte grey nails with the clean, contrasting look of white snake designs. Here’s how to create this chic and stylish look:
Materials Needed:
- Matte Grey Nail Polish: A muted grey shade with a matte finish.
- White Nail Polish: For the snake designs.
- Matte Top Coat: To ensure the matte finish stays intact.
- Nail Art Brushes or Detailing Pen: Fine tools for precise snake designs.
- Base Coat: To protect your natural nails.
Steps to Achieve the Look:
- Prepare Your Nails:
- Clean, shape, and buff your nails to your desired shape.
- Apply a base coat to protect your natural nails and provide a smooth surface for the polish.
- Apply the Matte Grey Polish:
- Base Color: Apply two coats of matte grey nail polish to each nail, allowing each coat to dry completely before applying the next. The matte finish gives a sophisticated and modern backdrop for the snake designs.
- Create the Snake Designs:
- Design Placement: Decide where you want the snake designs on your nails. You can opt for a single snake wrapping around each nail or different parts of the snake slithering across multiple nails.
- Drawing the Snake:
- Fine Brush or Detailing Pen: Use a fine nail art brush or a detailing pen dipped in white nail polish to draw the snake. Start with the head and work your way down the body, creating smooth, curving lines that mimic the snake’s natural movement.
- Minimalist Detailing: Keep the design simple and clean. You can add subtle details like a forked tongue or simple scales, but the focus should remain on the sleek, minimalist contrast between the white snake and the matte grey background.
- Seal the Design:
- Matte Top Coat: Apply a matte top coat over the entire nail to protect the design and maintain the matte finish. This step is crucial to ensure the white snake design stays sharp and the overall look remains chic and modern.
- Final Touches:
- Clean Edges: Use a small brush dipped in nail polish remover to clean up any excess polish around the edges of your nails for a neat finish.
- Cuticle Care: Apply cuticle oil to keep your cuticles nourished and to complete the polished look.
Tips:
- Variation in Snake Designs: You can vary the snake designs on each nail, perhaps making some snakes longer or more detailed, while others remain simple and sleek.
- Accents: For a slightly more intricate look, you could add tiny silver or black dots along the snake’s body to create the appearance of scales without overwhelming the minimalist design.
- Matte Consistency: Ensure your top coat is matte to keep the overall look consistent. A glossy top coat might detract from the modern, minimalist aesthetic.
Snakes on Matte Grey Nails are perfect for those who appreciate understated elegance with a hint of edgy style. The contrast between the matte grey base and the crisp white snake designs creates a balanced and eye-catching manicure that’s both modern and minimalist. This design is versatile enough for both everyday wear and special occasions where you want your nails to make a subtle yet striking statement.
25. Red Snake on Black Base Nails
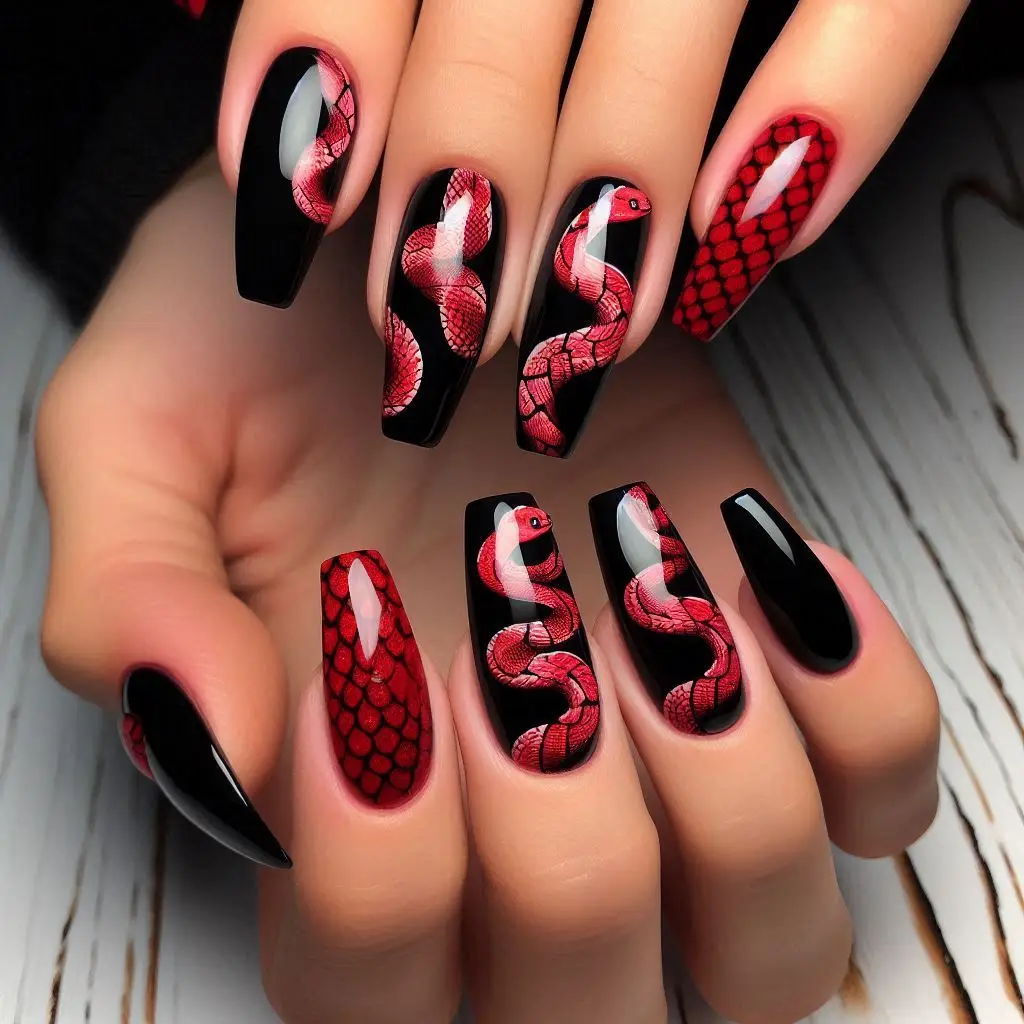
Red Snake on Black Base Nails combine bold, daring colors with a striking design for a truly eye-catching manicure. The deep, matte black base serves as the perfect canvas for the vivid red snake designs, creating a high-contrast, dramatic look that’s sure to stand out. Here’s how to achieve this fierce and stylish nail art:
Materials Needed:
- Matte Black Nail Polish: A deep, jet-black shade with a matte finish.
- Red Nail Polish: A bright, vivid red for the snake designs.
- Matte Top Coat: To maintain the matte effect.
- Nail Art Brushes or Detailing Pen: Fine tools for precise snake detailing.
- Base Coat: To protect your natural nails and enhance polish adhesion.
Steps to Achieve the Look:
- Prepare Your Nails:
- Nail Prep: Clean, shape, and buff your nails to your preferred shape.
- Base Coat: Apply a base coat to protect your nails and create a smooth surface for the polish.
- Apply the Matte Black Base:
- Color Application: Apply two even coats of matte black nail polish to each nail, allowing each coat to dry thoroughly. The matte black provides a dark and smooth background that will make the red snakes pop.
- Create the Red Snake Designs:
- Design Placement: Plan where you want the red snakes to appear on your nails. You can have one snake slithering across each nail, or you can create a continuous snake design that spans across multiple nails.
- Drawing the Snake:
- Use a Fine Brush or Detailing Pen: Dip your fine nail art brush or detailing pen into the red nail polish. Begin by outlining the snake’s head and body, curving it to create a natural, slithering effect.
- Detailing: You can add extra details like eyes, a forked tongue, or simple scale markings to enhance the design. Keep the lines smooth and the curves elegant to contrast effectively with the matte black background.
- Seal the Design:
- Matte Top Coat: After the snake designs are completely dry, apply a matte top coat to lock in the design and maintain the matte finish. This will keep the overall look cohesive and prevent the red polish from chipping.
- Final Touches:
- Clean Up: Use a small brush dipped in nail polish remover to clean up any stray polish around the edges of your nails.
- Cuticle Care: Apply a bit of cuticle oil to keep your nails and cuticles looking healthy and hydrated.
Tips:
- Enhancing the Snake Design: To make the snakes appear more lifelike, you can add subtle shading using a darker or lighter red polish. This gives the snakes depth and dimension against the matte black background.
- Variations: Consider varying the size and thickness of the snakes on each nail to create visual interest. For a more uniform look, you can keep the design consistent across all nails.
- Accents: If you want to add an extra layer of detail, you can incorporate tiny red or black rhinestones at the snake’s eyes or along the body for a touch of sparkle without overpowering the design.
Red Snake on Black Base Nails are perfect for those who want a manicure that’s both bold and elegant. The stark contrast between the vivid red snakes and the matte black base creates a dramatic and sophisticated look that’s sure to turn heads. This nail design is ideal for making a statement, whether for a night out, a special event, or just because you want to express your daring sense of style.
26. Snake and Starry Night Nails
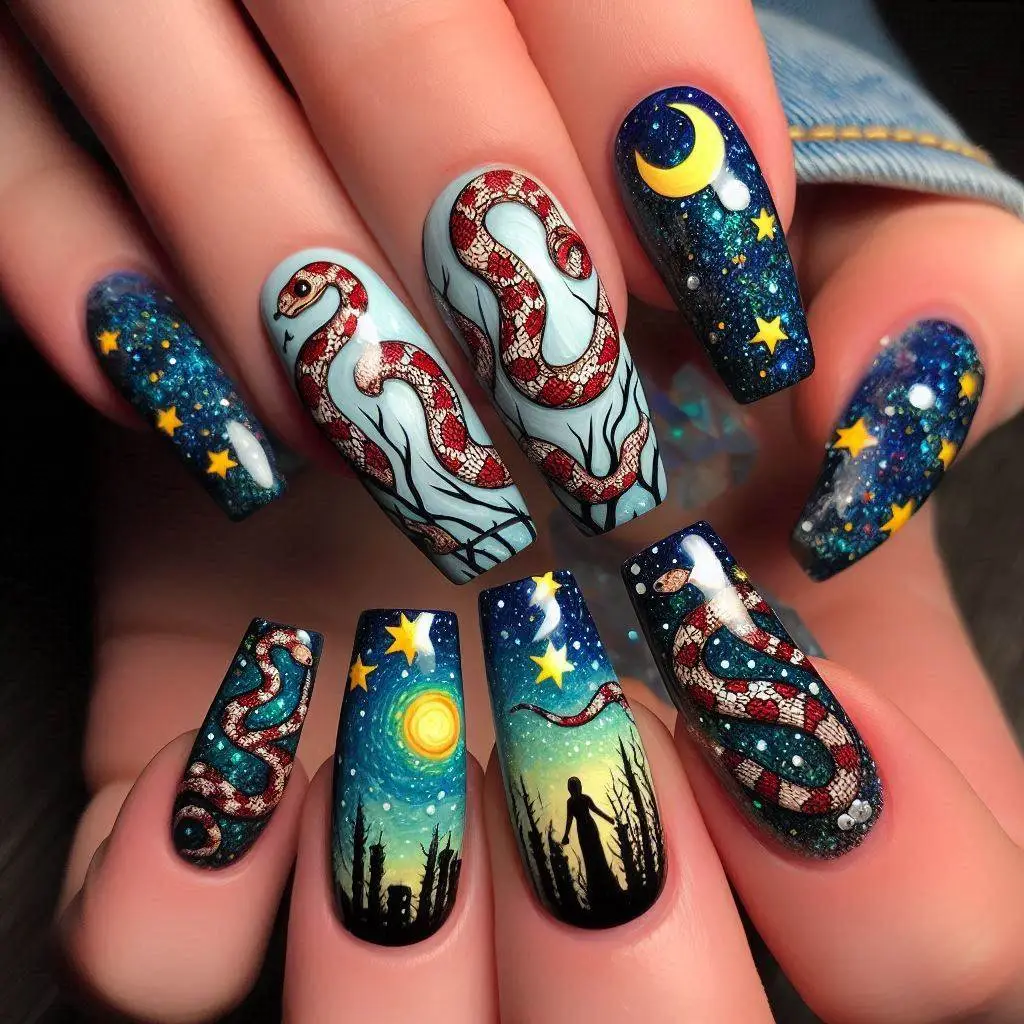
Snake and Starry Night Nails offer a magical and enchanting look, combining the mystery of the night sky with the allure of a slithering snake. The contrast between the deep, dark backdrop and the shimmering stars creates a dreamy atmosphere, while the snake adds an edgy, captivating element. Here’s how to create this beautiful design:
Materials Needed:
- Deep Blue or Black Nail Polish: For the night sky background.
- White or Silver Nail Polish: For the stars.
- Metallic or Glitter Nail Polish: For added sparkle to the stars.
- Green or Gold Nail Polish: For the snake design, or any color that complements your theme.
- Top Coat: To seal the design.
- Nail Art Brushes or Detailing Pen: For creating the snake and stars.
- Base Coat: To protect your natural nails.
Steps to Achieve the Look:
- Prepare Your Nails:
- Nail Prep: Clean, shape, and buff your nails to your desired shape.
- Base Coat: Apply a base coat to protect your nails and ensure smooth application of the polish.
- Apply the Night Sky Backdrop:
- Base Color: Apply two coats of deep blue or black nail polish to create the night sky background. Allow each coat to dry thoroughly before moving on.
- Starry Details:
- Dotting the Stars: Use a fine brush or a dotting tool to add small dots of white or silver polish across your nails, mimicking stars in the sky. You can create clusters of stars or spread them evenly across the nails.
- Glitter Accents: Add a touch of glitter polish over some of the stars to make them sparkle like real stars.
- Create the Snake Design:
- Plan the Snake Placement: Decide where you want the snake to appear on your nails. You can have it slithering across one or more nails or create a continuous design that spans across several nails.
- Drawing the Snake:
- Outline the Snake: Using a fine nail art brush or detailing pen, draw the outline of the snake using your chosen color (green, gold, or any other shade that stands out against the night sky). Start with the head and then extend the body in a smooth, curved line.
- Add Details: Enhance the snake by adding small details like scales, eyes, and a forked tongue. You can also add a metallic sheen or glitter to the snake to make it more eye-catching.
- Seal the Design:
- Top Coat: Once your design is complete and dry, apply a top coat to protect the art and give it a glossy finish. This will also help the design last longer.
- Final Touches:
- Clean Up: Use a small brush dipped in nail polish remover to clean up any excess polish around the edges of your nails.
- Cuticle Care: Finish with a drop of cuticle oil to keep your nails and cuticles looking their best.
Tips:
- Vary the Star Sizes: Mix larger and smaller stars to create a more realistic night sky effect.
- Accent Nails: Consider making one or two nails the focal point with the snake design, while the other nails feature only the starry night background.
- Moon Accent: Add a crescent moon to the design for an extra celestial touch.
Snake and Starry Night Nails combine the elegance of a starlit sky with the boldness of a snake, creating a manicure that is both enchanting and edgy. Perfect for those who love to incorporate mystical and nature-inspired elements into their nail art, this design is sure to captivate and inspire. Whether you’re going for a subtle, starry vibe or a more detailed and intricate snake design, this look is versatile and can be customized to fit your personal style.
27. 3D Snake Coil Nails
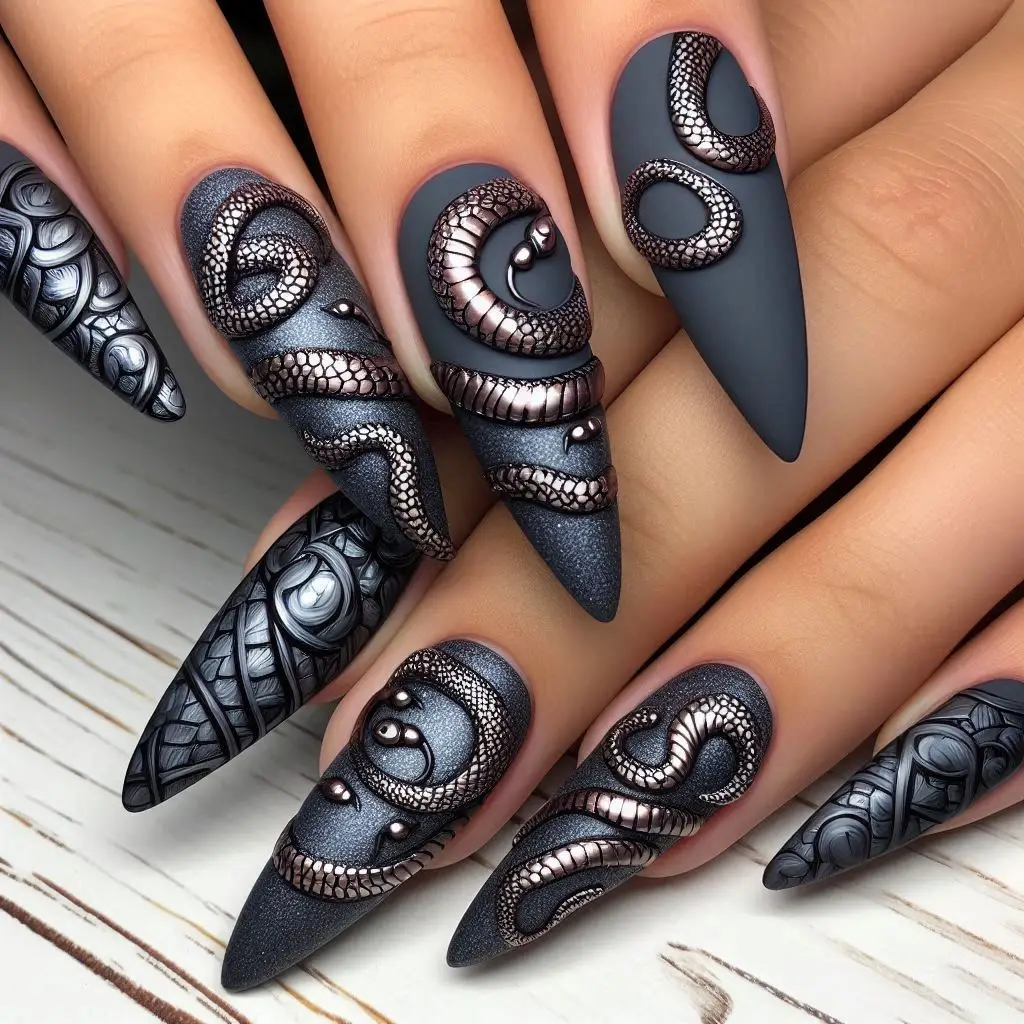
3D Snake Coil Nails offer a bold and tactile nail art experience, with raised, textured snake designs that wrap around matte nails. This striking effect adds dimension and drama, perfect for those who want their manicure to stand out. Here’s how to create this unique look:
Materials Needed:
- Matte Nail Polish: Any base color of your choice, ideally in dark or neutral tones.
- 3D Nail Art Gel or Acrylic Powder: For creating the raised snake designs.
- Nail Art Brushes: Fine and detailing brushes for shaping the snake.
- UV/LED Lamp: If using gel products.
- Top Coat: A matte top coat to maintain the matte finish, or a glossy one for a contrast.
- Base Coat: To protect your natural nails.
Steps to Achieve the Look:
- Prepare Your Nails:
- Nail Prep: Clean, shape, and buff your nails.
- Base Coat: Apply a base coat to protect your nails and provide a smooth surface for your design.
- Apply the Matte Base Color:
- Matte Polish: Apply two coats of your chosen matte nail polish color. Allow each coat to dry thoroughly. This will serve as the background for your 3D snake design.
- Create the 3D Snake Coil:
- 3D Gel or Acrylic Application:
- Mix the Gel/Acrylic: Prepare your 3D nail art gel or acrylic powder according to the instructions. Choose a color that contrasts nicely with your base, like black on a matte nude or green on a matte black.
- Shape the Snake: Using a fine brush, start shaping the snake directly onto the nail. Begin with the head, then create a coiled body that wraps around the nail. Focus on making the coils raised and textured for a true 3D effect.
- Detailing: Once the main shape is created, add details like scales, eyes, and a forked tongue. You can also use a contrasting color or glitter to highlight certain parts of the snake.
- Cure if Using Gel: Place your nails under a UV/LED lamp to cure the gel if you’re using gel products. For acrylic, allow it to air dry as needed.
- 3D Gel or Acrylic Application:
- Finish with a Top Coat:
- Matte or Glossy Finish: Depending on your desired look, apply a matte top coat to keep the overall matte effect or a glossy top coat to make the snake stand out even more. This will protect your design and ensure it lasts longer.
- Final Touches:
- Clean Edges: Use a small brush dipped in nail polish remover to clean up any excess around your nails.
- Moisturize: Apply cuticle oil to keep your nails healthy and hydrated.
Tips:
- Contrast is Key: Choose a snake color that contrasts with your matte base for maximum impact.
- Experiment with Placement: The snake can wrap around one nail or span multiple nails for a continuous design.
- Optional Gems: Add small gems or metallic accents to the snake’s body for an extra touch of luxury.
3D Snake Coil Nails are all about making a statement with texture and design. The raised, coiled snake not only looks visually striking but also adds a tactile element to your manicure. This design is perfect for those who enjoy bold, artistic nail art that stands out and makes a lasting impression. Whether you’re attending a special event or simply want to elevate your everyday look, these 3D nails are sure to turn heads.
28. Snake Skin French Tip Nails
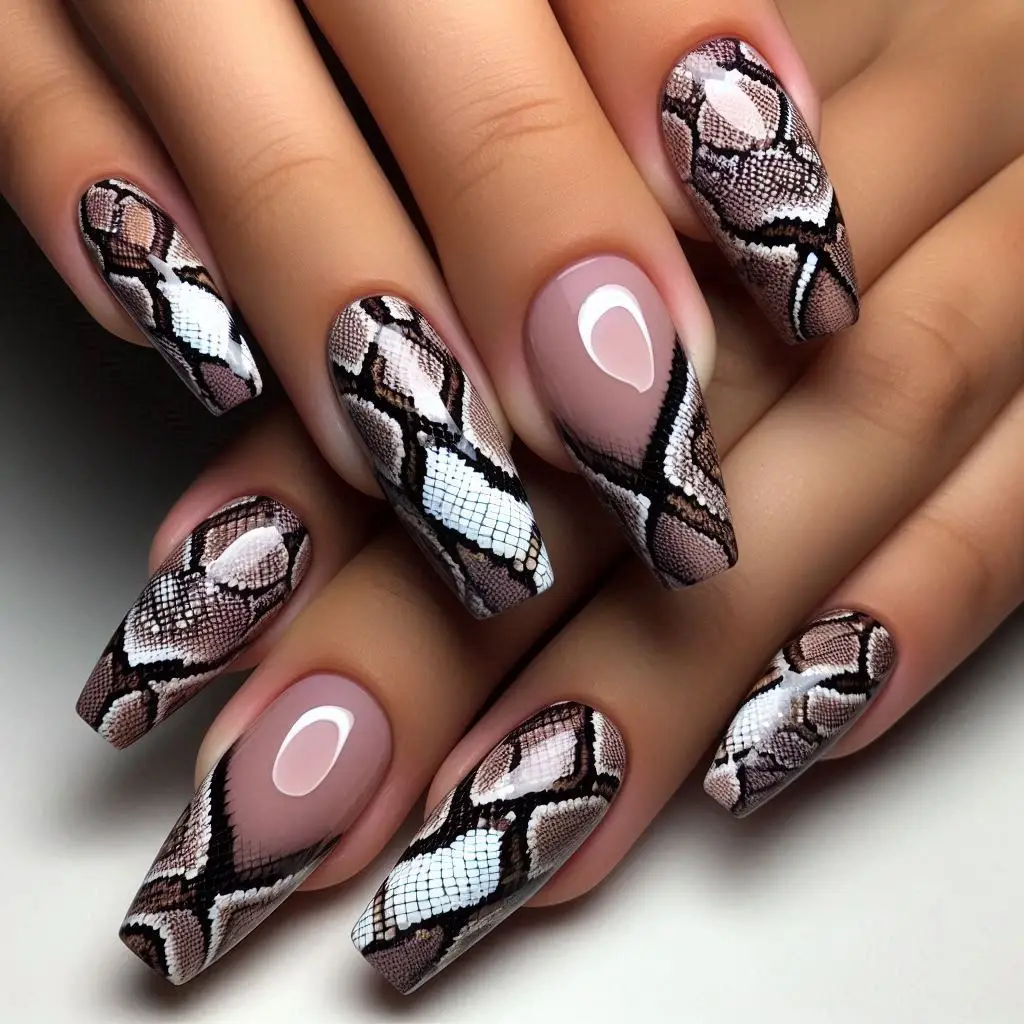
Snake Skin French Tip Nails combine the classic elegance of French tips with a subtle, wild twist using a snake skin pattern. This design adds a touch of sophistication while embracing an edgy, modern vibe. Here’s how to achieve this elegant yet wild look:
Materials Needed:
- Base Color Polish: A nude or soft pink shade for the base.
- Snake Skin Pattern Stencil or Nail Stickers: To create the snake skin effect.
- French Tip Guides or Nail Tape: To perfect the French tip shape.
- Glossy Top Coat: To add shine and seal the design.
- Fine Detailing Brush: For precise application.
- Base Coat: To protect your natural nails.
Steps to Achieve the Look:
- Prepare Your Nails:
- Nail Prep: Start by cleaning, shaping, and buffing your nails to ensure a smooth surface.
- Base Coat: Apply a base coat to protect your natural nails and create a smooth base for the polish.
- Apply the Base Color:
- Base Polish: Apply two coats of your chosen nude or soft pink polish. This will serve as the backdrop for your French tips and snake skin pattern. Let each coat dry completely.
- Create the French Tips with Snake Skin Pattern:
- Tip Guides or Tape: Once your base color is dry, use French tip guides or nail tape to outline the tips of your nails.
- Snake Skin Application:
- Stencils/Stick-on Patterns: Place the snake skin stencil or sticker on the tip area of your nails.
- Polish Over Stencil: Apply a contrasting color, like black or dark grey, over the stencil to create the snake skin effect. Use a fine detailing brush for precision if needed.
- Remove Stencil/Sticker: Carefully remove the stencil or sticker to reveal the snake skin pattern.
- Refine the Tips: If necessary, clean up the edges with a small brush dipped in nail polish remover.
- Apply a Glossy Top Coat:
- Seal and Shine: Finish with a glossy top coat to seal in the design and give your nails a shiny, polished look. This step is crucial to achieve that elegant finish while also protecting your snake skin pattern.
- Final Touches:
- Clean Up: Use a small brush to clean up any excess polish around your nails.
- Moisturize: Apply cuticle oil to keep your nails and surrounding skin healthy.
Tips:
- Subtle Colors: Opt for subtle, neutral colors for the snake skin pattern to keep the look elegant and not too overpowering.
- Experiment with Patterns: Try different snake skin patterns or textures for a personalized look.
- Accent Nails: You can choose to do the snake skin French tips on all nails or just as an accent on a few for a more understated look.
Snake Skin French Tip Nails bring a unique twist to the classic French manicure by incorporating a snake skin pattern. The glossy finish elevates the design, making it both sophisticated and edgy. This look is perfect for someone who appreciates elegance with a touch of wildness, whether for a special occasion or an everyday style upgrade.
29. Snake in the Sand Nails
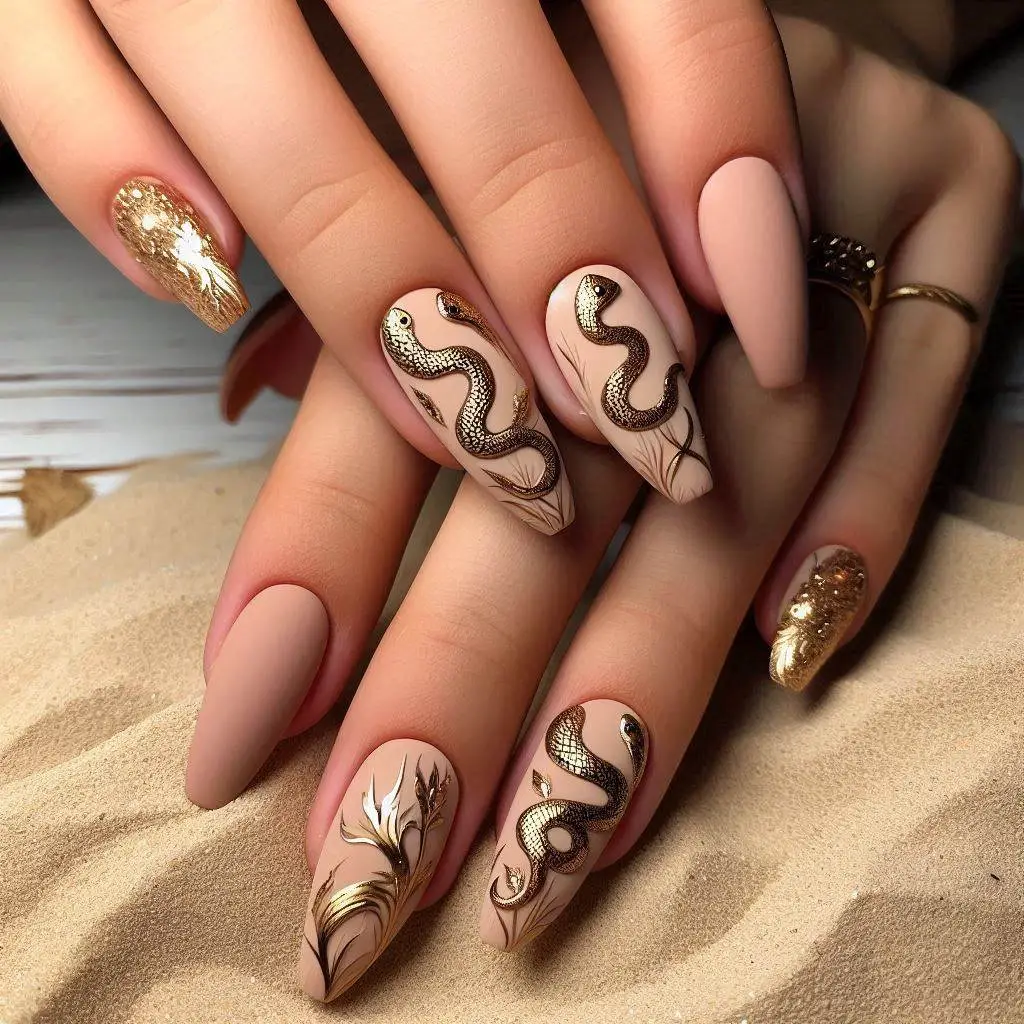
Snake in the Sand Nails is a beach-inspired design that combines the subtlety of nude tones with the luxurious touch of gold, creating the illusion of a snake slithering through the sand. This look is both elegant and striking, perfect for those who want to bring a bit of the beach vibe to their manicure. Here’s how to achieve this unique and stylish design:
Materials Needed:
- Nude Base Polish: A soft, sandy nude shade to mimic the look of sand.
- Gold Nail Art Polish or Gold Foil: For the snake design.
- Fine Detailing Brush: For precise application of the snake design.
- Top Coat: To add a glossy finish and protect the design.
- Base Coat: To prep your nails and ensure the polish adheres well.
Steps to Achieve the Look:
- Prepare Your Nails:
- Nail Prep: Start by cleaning, shaping, and buffing your nails. This ensures a smooth surface for your nail art.
- Base Coat: Apply a base coat to protect your natural nails and provide a smooth foundation for the polish.
- Apply the Nude Base:
- Nude Polish: Apply two coats of your chosen nude polish. This will serve as the sandy backdrop for the gold snake design. Allow each coat to dry completely.
- Create the Gold Snake Design:
- Plan the Design: Before applying the gold, decide where you want the snake to slither across your nails. It can be on just one nail for a subtle accent or across multiple nails for a more dramatic effect.
- Apply the Gold Snake:
- Freehand Method: Using a fine detailing brush and gold nail art polish, carefully draw the snake design onto your nails. Start with the snake’s head and tail, then connect them with a smooth, winding line.
- Gold Foil Method: If you prefer using gold foil, apply a layer of adhesive to the area where the snake will be, then carefully place the foil on top. Use a fine brush to shape the foil into a snake design.
- Detailing: Add any extra details, such as eyes or texture to the snake, using a very fine brush or dotting tool.
- Apply a Glossy Top Coat:
- Seal the Design: Once the gold snake design is dry, apply a top coat to seal it in and give your nails a glossy finish. This will also protect the gold from chipping.
- Final Touches:
- Clean Up: Use a small brush dipped in nail polish remover to clean up any excess polish around your nails.
- Moisturize: Finish with cuticle oil to keep your nails and cuticles hydrated.
Tips:
- Snake Placement: For a more cohesive look, consider having the snake design start on one nail and continue onto the next.
- Gold Variations: Experiment with different shades of gold, such as rose gold or a more yellow-toned gold, to suit your personal style.
- Accent Nails: If you prefer a more subtle look, create the snake design on just one or two accent nails and keep the rest in a simple nude polish.
Snake in the Sand Nails combines the beauty of nature with a touch of luxury, making it an ideal choice for anyone looking to create a sophisticated and unique nail design. The gold against the nude base evokes the image of a snake gliding through sandy dunes, bringing a bit of beach-inspired elegance to your manicure.
30. Snake and Rose Nails
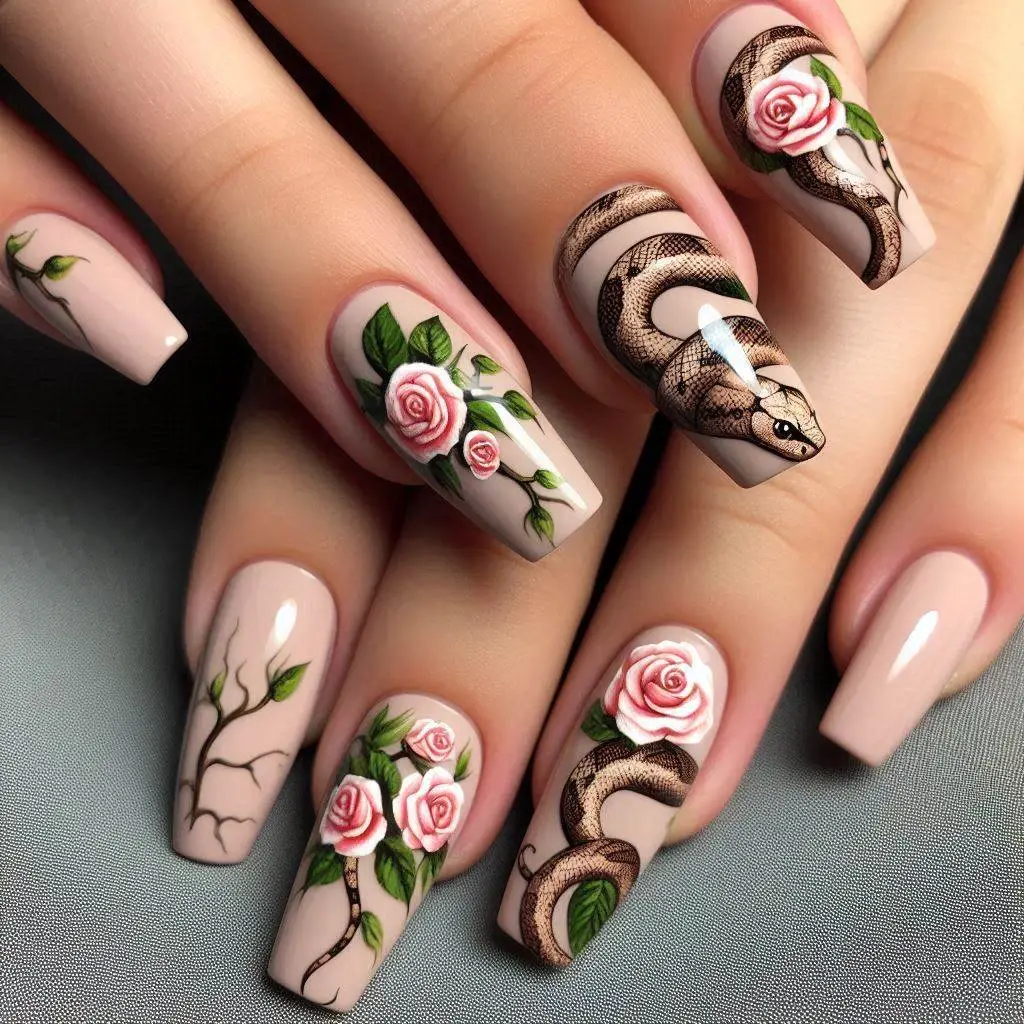
Snake and Rose Nails blend the fierce allure of snakes with the delicate beauty of roses, creating a manicure that’s both romantic and edgy. This design is perfect for those who want to express their bold style with a touch of elegance. Here’s how to achieve this unique look:
Materials Needed:
- Neutral Base Polish: A soft beige or light nude shade to create a subtle background.
- Black Nail Art Polish: For the snake design.
- Red or Pink Nail Art Polish: For the rose motifs.
- Fine Detailing Brush: To create the intricate designs.
- Top Coat: To seal and protect the design.
- Base Coat: To prep and protect your nails.
Steps to Achieve the Look:
- Prepare Your Nails:
- Nail Prep: Clean, shape, and buff your nails for a smooth surface.
- Base Coat: Apply a base coat to protect your nails and ensure the polish adheres well.
- Apply the Neutral Base:
- Neutral Polish: Apply two coats of your chosen neutral base polish. This will serve as a subtle backdrop, allowing the snake and rose designs to stand out. Let each coat dry completely.
- Create the Snake Design:
- Plan the Design: Decide on the placement of the snake on your nails. The snake can slither across one nail or extend across multiple nails for a more dramatic effect.
- Apply the Snake:
- Using the fine detailing brush and black nail art polish, carefully draw the snake’s body in a winding, flowing pattern. Start with the head, then create the curves of the body, and finish with the tail.
- Add details like scales or eyes to give the snake more character.
- Add the Rose Motifs:
- Plan the Roses: Choose where to place the rose motifs. You can have the roses intertwining with the snake or placed separately on another nail.
- Create the Roses:
- Using red or pink nail art polish, draw small rose shapes by creating spiral-like patterns. Start with a small dot, then gradually spiral outwards to form the petals.
- Add green leaves using a small brush if desired, to enhance the floral design.
- Seal with a Top Coat:
- Top Coat: Once your design is dry, apply a glossy or matte top coat to seal the artwork and add durability to your manicure.
- Final Touches:
- Clean Up: Use a small brush dipped in nail polish remover to tidy up any polish that may have strayed onto your skin.
- Moisturize: Finish with cuticle oil to keep your nails and cuticles looking healthy and hydrated.
Tips:
- Contrast: For a more striking effect, consider using a darker neutral base, like a soft grey or taupe, which will make the snake and roses pop even more.
- Accent Nails: If you prefer a more understated look, consider placing the snake on one accent nail and the roses on another, leaving the rest of the nails in a simple neutral tone.
- Embellishments: Add tiny rhinestones or gold accents to the center of the roses or along the snake’s body for a touch of sparkle.
Snake and Rose Nails offer a captivating mix of romance and edge, making them an ideal choice for those looking to express a bold yet feminine style. The neutral base allows the intricate details of the snake and roses to shine, creating a manicure that’s both sophisticated and unique.
31. Snake Wrapped in Chain Nails
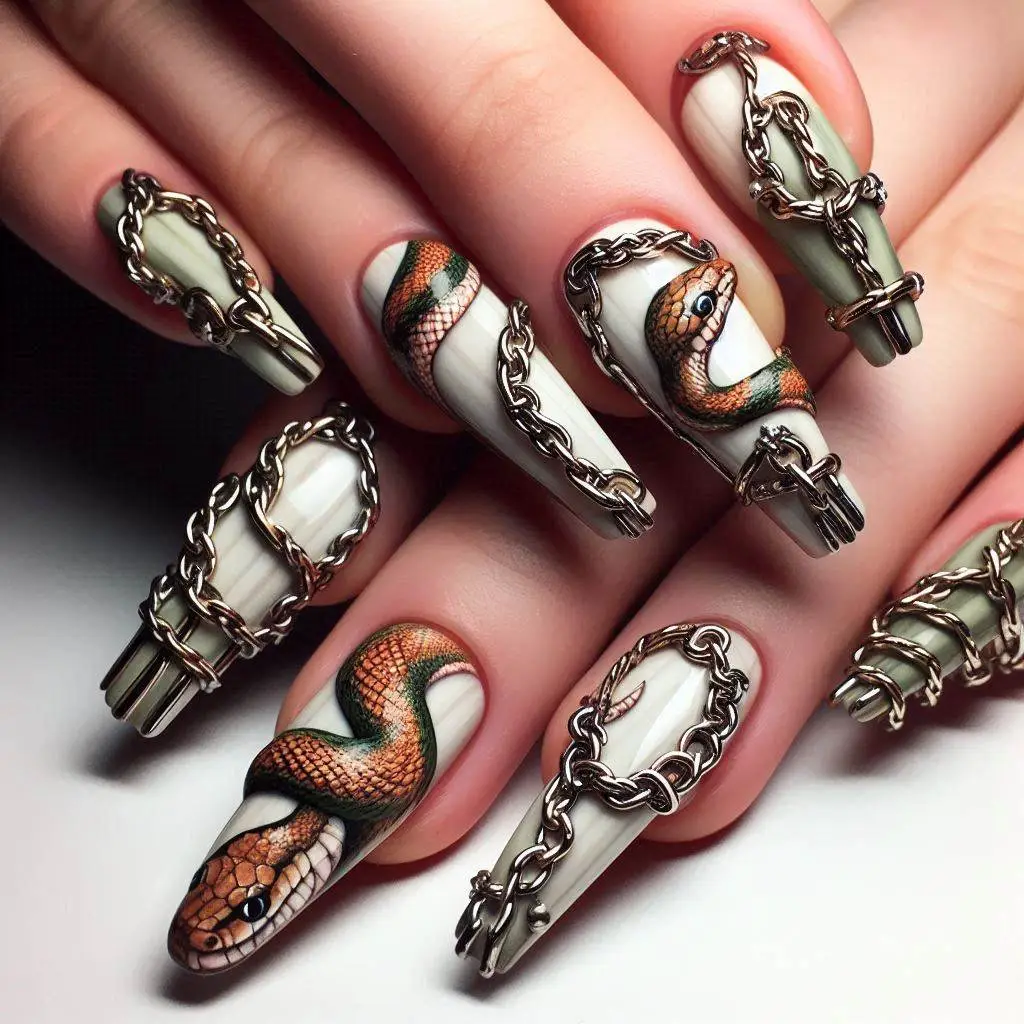
Snake Wrapped in Chain Nails create a striking, industrial aesthetic by combining the fierce allure of snakes with the boldness of metallic chains. This design offers a unique, edgy look that’s perfect for those who want to make a statement. Here’s how to achieve this dynamic style:
Materials Needed:
- Metallic Base Polish: A silver or chrome polish to mimic the look of chains.
- Black Nail Art Polish: For the snake design.
- Metallic Chain Stickers or Nail Foil: To create the chain effect.
- Fine Detailing Brush: For precise application of the snake.
- Top Coat: To seal and protect the design.
- Base Coat: To prep your nails and ensure longevity.
Steps to Achieve the Look:
- Prepare Your Nails:
- Nail Prep: Clean, shape, and buff your nails for a smooth surface.
- Base Coat: Apply a base coat to protect your nails and ensure the polish adheres well.
- Apply the Metallic Base:
- Metallic Polish: Apply two coats of your chosen metallic polish (silver or chrome) to create a base that resembles metal chains. Allow each coat to dry completely.
- Create the Chain Design:
- Chain Stickers or Foil: Use metallic chain stickers or nail foil to create the chain effect on your nails.
- Stickers: Apply the chain stickers in your desired pattern on the metallic base. Press them down firmly to ensure they adhere well.
- Nail Foil: Apply a layer of adhesive to the area where you want the chain design, then gently press the foil onto the adhesive and smooth it out. Use a top coat to seal the foil in place.
- Chain Stickers or Foil: Use metallic chain stickers or nail foil to create the chain effect on your nails.
- Add the Snake Design:
- Plan the Design: Decide where the snake will be wrapped around the chains. You can create a more dramatic effect by having the snake wrap around the entire nail or just a section of it.
- Apply the Snake:
- Using a fine detailing brush and black nail art polish, carefully draw the snake design. Start by sketching the snake’s head, then add the body and tail, ensuring it wraps around the chain design.
- Add details such as scales or fangs to enhance the snake’s appearance.
- Seal with a Top Coat:
- Top Coat: Apply a glossy or matte top coat over the entire nail to seal in the design and add durability. This will also give your nails a polished finish.
- Final Touches:
- Clean Up: Use a small brush dipped in nail polish remover to clean up any excess polish around your nails.
- Moisturize: Apply cuticle oil to keep your nails and cuticles healthy and hydrated.
Tips:
- Metallic Variations: Experiment with different metallic colors, such as gold or bronze, for a different twist on the chain effect.
- Design Placement: For a more cohesive look, consider having the chain and snake designs flow together across multiple nails.
- Embellishments: Add small rhinestones or metallic studs to the chain design for extra flair and a touch of glamour.
Snake Wrapped in Chain Nails offer a bold and industrial aesthetic that combines the raw power of snakes with the sleekness of metallic chains. This striking design is perfect for those who want their nails to reflect a fierce and edgy style.
32. Glitter Snake Accent Nails
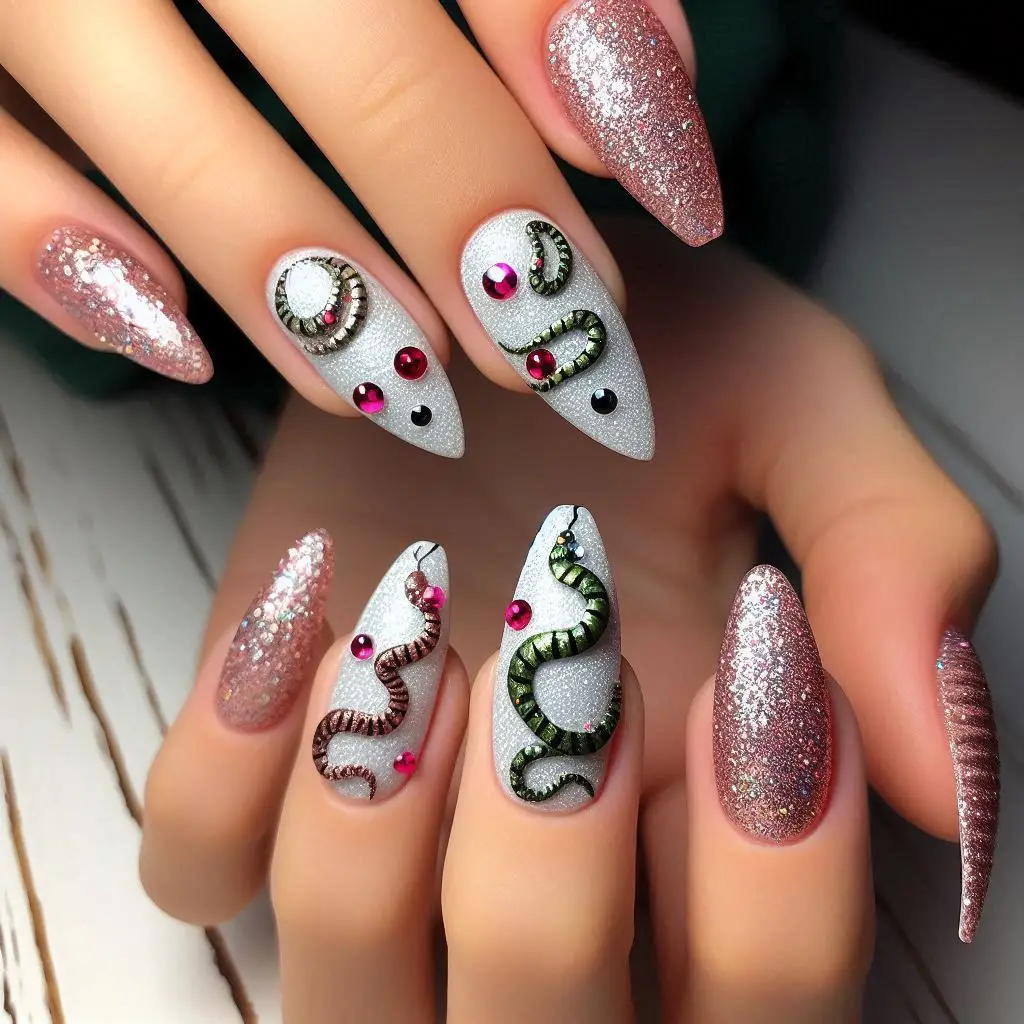
Glitter Snake Accent Nails combine the allure of snakes with the sparkle of glitter, creating a striking and eye-catching manicure. This design adds a touch of glamour while showcasing a bold, serpentine theme. Here’s a step-by-step guide to achieve this sparkling look:
Materials Needed:
- Solid Base Polish: Choose a color that contrasts well with glitter, such as black, deep blue, or nude.
- Glitter Nail Polish: Select a glitter polish in silver, gold, or any color that complements your base.
- Fine Detailing Brush: For creating the snake shapes with glitter.
- Top Coat: To seal and protect the design.
- Base Coat: To prep and protect your nails.
Steps to Achieve the Look:
- Prepare Your Nails:
- Nail Prep: Clean, shape, and buff your nails for a smooth surface.
- Base Coat: Apply a base coat to protect your nails and ensure that the polish adheres well.
- Apply the Solid Base Color:
- Base Polish: Apply two coats of your chosen solid base polish. Allow each coat to dry completely.
- Create the Snake Accent Design:
- Plan the Design: Decide where you want the glitter snakes to be on your nails. You can have a full nail accent or just a part of it.
- Apply the Glitter:
- Using the fine detailing brush, dip it into the glitter nail polish and carefully outline or fill in the shape of a snake on your chosen accent nails. You can create a winding snake pattern or even have a snake wrapping around the nail.
- For a more intricate design, you can use different colors of glitter to create highlights and shadows on the snake.
- Seal with a Top Coat:
- Top Coat: Apply a glossy top coat over the entire nail to seal the glitter and give the design a smooth finish. This will also help in protecting the glitter from chipping.
- Final Touches:
- Clean Up: Use a small brush dipped in nail polish remover to tidy up any excess glitter around your nails.
- Moisturize: Apply cuticle oil to keep your nails and cuticles healthy and hydrated.
Tips:
- Color Coordination: Choose a base color that contrasts well with your glitter to make the design pop. For example, use dark colors like black or navy for a striking contrast with bright glitter.
- Design Variations: You can vary the size and style of the glitter snakes, from small, subtle accents to more elaborate designs covering a larger part of the nail.
- Layering: For added texture, apply a layer of clear polish over the glitter snakes and then add another layer of glitter polish. This can give a multi-dimensional effect.
Glitter Snake Accent Nails offer a glamorous twist on traditional nail designs, combining the allure of snakes with the sparkle of glitter. This eye-catching manicure is perfect for adding a touch of sparkle to any occasion.
33. Rainbow Snake Nails
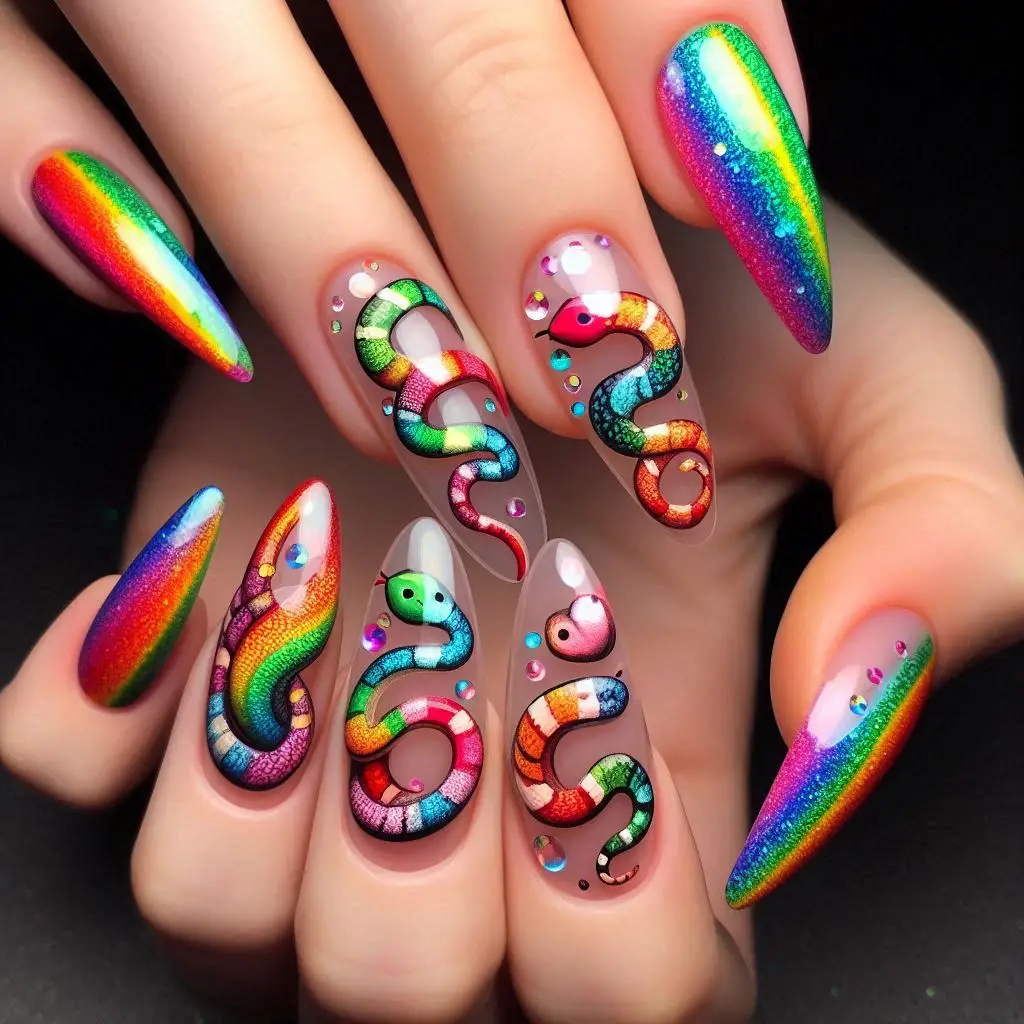
Rainbow Snake Nails feature a playful and vibrant snake design that coils across a clear base, creating a cheerful and eye-catching manicure. This design combines the fun of a rainbow with the elegance of a snake, making it perfect for those who love bold and colorful nail art. Here’s how to create this colorful look:
Materials Needed:
- Clear Base Polish: To create a transparent background for the snake design.
- Rainbow Nail Art Colors: Choose vibrant colors for the snake, such as red, orange, yellow, green, blue, and purple.
- Fine Detailing Brush: For precise application of the snake design.
- Top Coat: To seal and protect the design.
- Base Coat: To prep your nails and ensure the polish adheres well.
Steps to Achieve the Look:
- Prepare Your Nails:
- Nail Prep: Clean, shape, and buff your nails for a smooth surface.
- Base Coat: Apply a base coat to protect your nails and ensure that the polish adheres well.
- Apply the Clear Base:
- Clear Polish: Apply two coats of clear base polish to create a transparent background. Allow each coat to dry completely.
- Create the Rainbow Snake Design:
- Plan the Design: Decide where you want the rainbow snake to slither on your nails. You can choose to have the snake wrapping around the entire nail or just a portion of it.
- Apply the Snake:
- Using the fine detailing brush, create the snake’s body in a rainbow gradient. Start by drawing the head and work your way down, changing colors for each segment of the snake to create a smooth gradient effect.
- For a more intricate design, you can add details such as scales or patterns within each color segment.
- Seal with a Top Coat:
- Top Coat: Apply a glossy top coat over the entire nail to seal the design and add shine. This will also help in protecting the artwork from chipping.
- Final Touches:
- Clean Up: Use a small brush dipped in nail polish remover to tidy up any excess polish around your nails.
- Moisturize: Apply cuticle oil to keep your nails and cuticles healthy and hydrated.
Tips:
- Gradient Effect: To achieve a smooth gradient effect, you can use a sponge to blend the colors together before applying them to your nails.
- Accent Nails: Consider applying the rainbow snake design to one or two accent nails and keeping the other nails in a solid color to let the design stand out.
- Extra Sparkle: Add a layer of iridescent glitter polish over the rainbow snake design for extra sparkle and dimension.
Rainbow Snake Nails offer a vibrant and fun twist on traditional nail designs, combining the playful colors of a rainbow with the elegance of a snake. This design is perfect for adding a splash of color and personality to your manicure.

