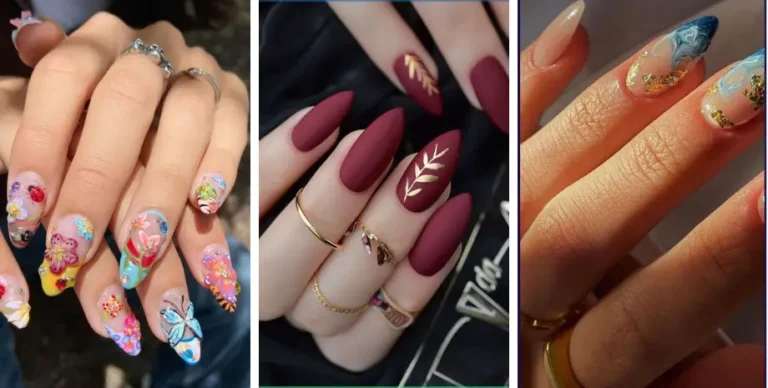
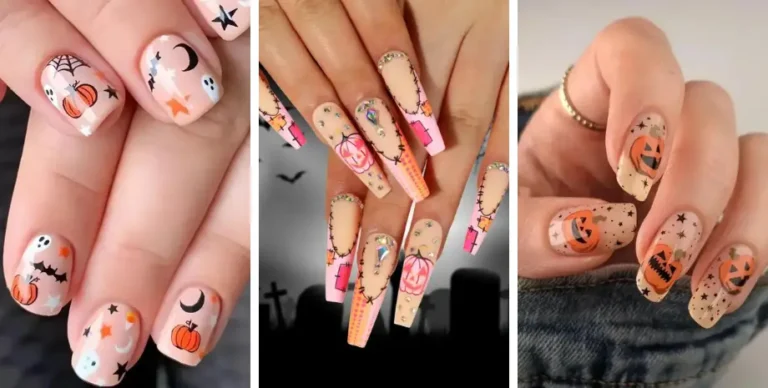
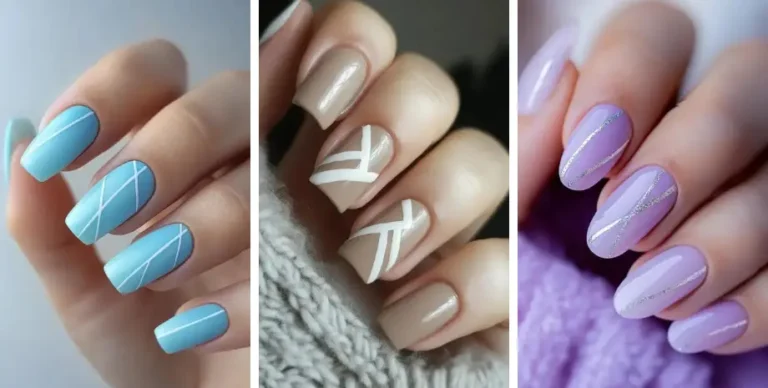
Short nails are often underestimated, but they hold incredible potential for creative expression and stylish flair. In this collection, you’ll discover a variety of designs that transform the modest short nail into a canvas for sophistication, fun, and elegance. From the bold pops of color to the subtle, delicate patterns, short nails can embody any mood or occasion with just the right design.
Embracing short nails doesn’t mean compromising on style or creativity. Whether it’s a chic pink with a touch of glitter or a vibrant carnival-inspired design, each look offers a unique way to showcase your personality. The designs presented here cater to those who prefer a minimalist approach as well as those who love to make a statement with their nail art. The versatility of short nails makes them a perfect choice for anyone looking to express themselves through their fingertips.
As you explore these short nail design ideas, you’ll find that each one tells its own story. The feeling of having well-designed, stylish nails is both empowering and satisfying. Whether you’re gearing up for a special occasion or simply want to brighten your everyday look, these designs offer an array of options to match your personal style and mood.
1. Bubblegum Bliss: Perfectly Pink Short Nail Charm
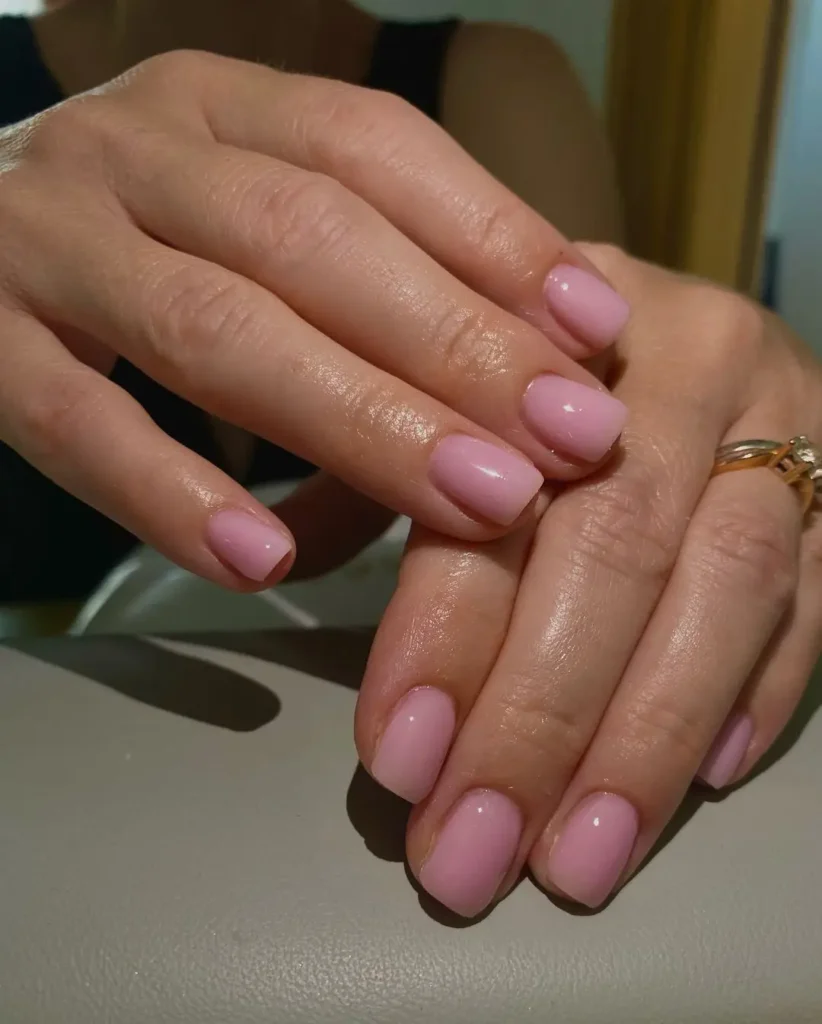
Bubblegum Bliss: Perfectly Pink Short Nail Charm is a playful and delightful nail design that combines the fun, vibrant shade of bubblegum pink with the practicality of short nails. This look is ideal for those who love a pop of color with a touch of charm. Here’s how to achieve it:
Materials Needed:
- Bubblegum Pink Nail Polish: For the base color.
- Base Coat: To protect your natural nails.
- Top Coat: To add shine and durability.
- Nail Art Stickers or Small Charms (Optional): For added embellishment.
Steps to Achieve the Look:
- Prepare Your Nails:
- Clean and trim your nails to a short, even length.
- Shape your nails into your preferred style, whether it’s square, round, or oval.
- Apply a base coat to protect your natural nails and help the polish adhere better. Let it dry completely.
- Apply the Bubblegum Pink Base:
- Apply one or two coats of bubblegum pink polish to all your nails, allowing each coat to dry completely. This will create a bright, fun base that’s full of charm.
- Add Optional Charms or Stickers:
- If you want to add an extra touch of charm, apply small nail art stickers or charms to one or two accent nails. These can be cute shapes like hearts, stars, or bows that complement the pink color.
- Use tweezers for precise placement and press them down gently to ensure they adhere well.
- Seal the Design:
- Apply a top coat over the entire nail to add shine and protect the bubblegum pink polish and any embellishments. This will also help your manicure last longer.
- Finish Up:
- Allow your nails to dry completely before touching anything to avoid smudging or disturbing the design.
Tips:
- Color Variations: If you prefer a more subdued look, consider using a pastel pink instead of bubblegum pink.
- Nail Art Options: For a more personalized design, you can hand-paint small patterns or add a glittery accent nail.
- Clean-Up: Use a small brush dipped in nail polish remover to clean up any excess polish around your cuticles.
Bubblegum Bliss: Perfectly Pink Short Nail Charm is a delightful, fun design that adds a touch of sweetness to your everyday look while keeping it practical and chic. Perfect for anyone who loves a pop of pink!
2. Modern Chic Silver-Lined Nails
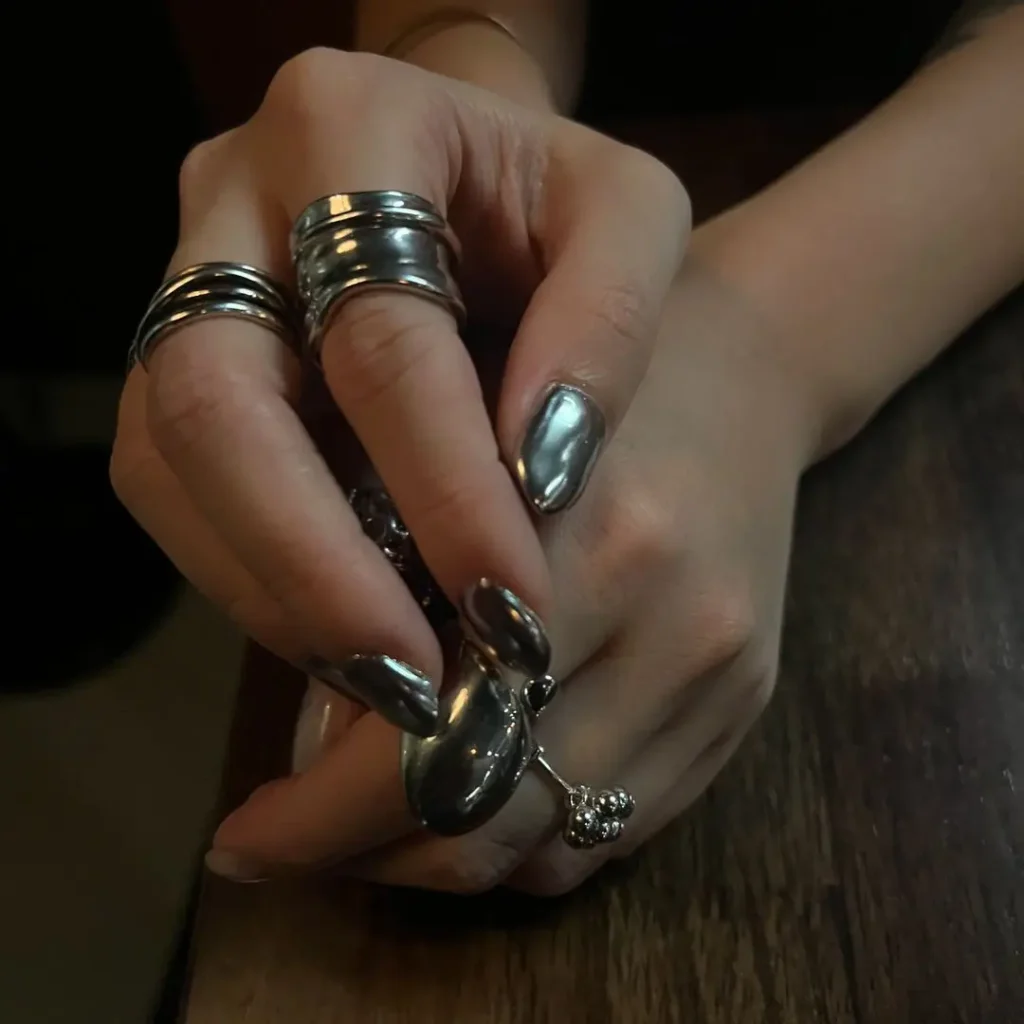
Modern Chic Silver-Lined Nails is a sleek and stylish nail design that features clean, minimalist lines of silver against a neutral or bold base color. This look exudes sophistication and is perfect for anyone wanting a contemporary yet understated style. Here’s how to achieve it:
Materials Needed:
- Base Color Nail Polish: Choose a neutral shade like nude, white, or black, or go bold with a deep color like navy or burgundy.
- Silver Nail Art Striping Tape or Silver Nail Polish: For the silver lines.
- Base Coat: To protect your natural nails.
- Top Coat: To add shine and durability.
Steps to Achieve the Look:
- Prepare Your Nails:
- Clean and shape your nails.
- Apply a base coat to protect your natural nails and let it dry completely.
- Apply the Base Color:
- Apply one or two coats of your chosen base color to all your nails, allowing each coat to dry completely. This will create a smooth canvas for the silver lines.
- Add the Silver Lines:
- Using Silver Striping Tape:
- Cut small pieces of silver striping tape to the desired length. env- Apply the tape to each nail in your preferred pattern (e.g., horizontal, vertical, diagonal lines, or even geometric shapes).
- Press the tape down firmly to ensure it adheres well, and trim any excess with small scissors or nail clippers.
- Using Silver Nail Polish:
- If you prefer to paint the lines, use a fine brush or striping brush to apply silver polish in clean, straight lines. Practice steady, even strokes for a professional finish.
- Design Variations: Consider adding a single silver line to each nail for a minimalist look, or create more complex geometric patterns for a modern twist.
- Using Silver Striping Tape:
- Seal the Design:
- Apply a top coat over the entire nail to protect the silver lines and add a glossy finish. This will also help to keep the striping tape or polish lines in place.
- Finish Up:
- Allow your nails to dry completely before touching anything to avoid smudging or disturbing the design.
Tips:
- Contrast: For a bolder look, choose a dark base color with silver lines. For a softer, more understated look, use a light or nude base color.
- Precision: If using striping tape, make sure to press it down firmly and trim any excess for a clean look. If hand-painting, practice on a piece of paper or test nail to perfect your technique.
- Clean-Up: Use a small brush dipped in nail polish remover to clean up any excess polish around your cuticles.
Modern Chic Silver-Lined Nails offers a versatile and elegant design that’s perfect for both everyday wear and special occasions. The silver lines add a touch of modern sophistication, making this a go-to look for anyone who loves clean, minimalist style.
3. Festive Candy Cane Stripe Delight
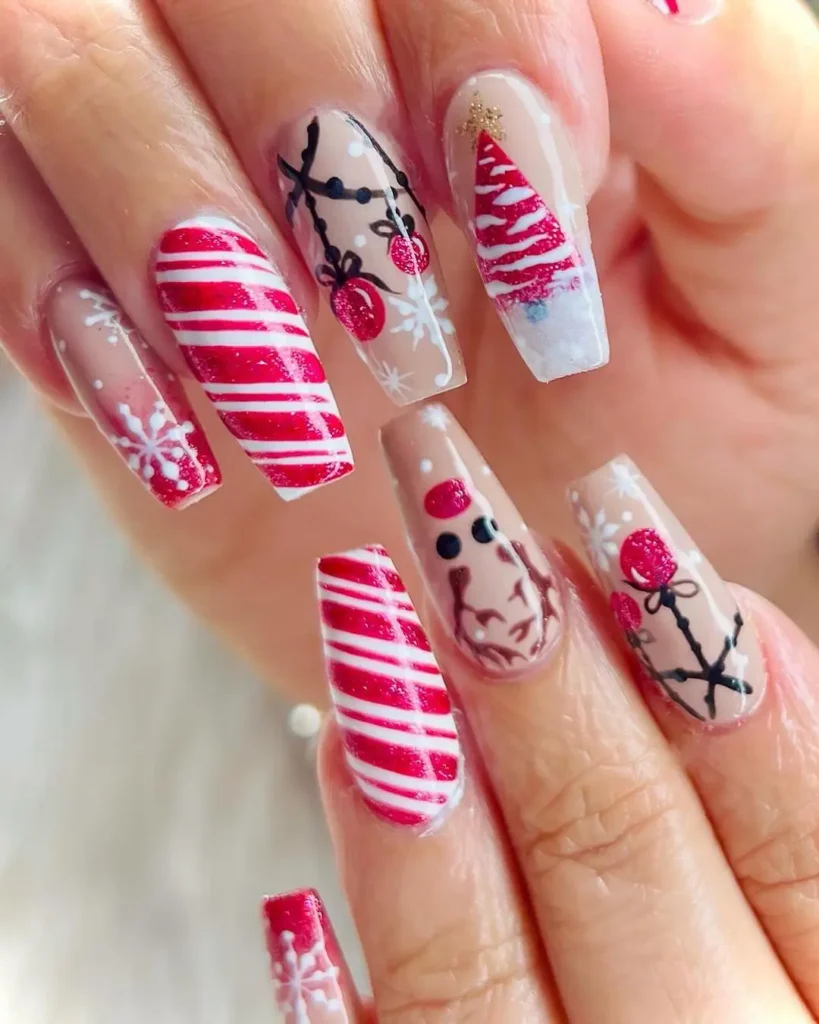
Festive Candy Cane Stripe Delight is a fun and festive nail design that captures the holiday spirit with classic red and white candy cane stripes. This playful look is perfect for celebrating the season and adding a touch of holiday cheer to your nails. Here’s how to achieve it:
Materials Needed:
- Red Nail Polish: For the candy cane stripes.
- White Nail Polish: For the base color.
- Base Coat: To protect your natural nails.
- Top Coat: To add shine and durability.
- Striping Tape or Fine Nail Art Brush: For creating precise stripes.
- Nail Polish Remover and Clean-Up Brush: To fix any mistakes.
Steps to Achieve the Look:
- Prepare Your Nails:
- Clean and shape your nails.
- Apply a base coat to protect your natural nails and let it dry completely.
- Apply the White Base Color:
- Apply one or two coats of white nail polish to all your nails, allowing each coat to dry completely. This will create the perfect background for your candy cane stripes.
- Create the Candy Cane Stripes:
- Using Striping Tape:
- Once the white base is completely dry, apply thin strips of striping tape diagonally across each nail. Ensure the tape is evenly spaced to mimic candy cane stripes.
- Paint over the exposed areas with red nail polish.
- Carefully remove the striping tape before the red polish dries to reveal crisp, clean stripes.
- Using a Fine Nail Art Brush:
- If you’re using a brush, carefully paint diagonal red stripes across each nail, leaving even spaces in between for the white base to show through. Steady, even strokes will help you achieve clean lines.
- Design Variations: You can create different patterns by adjusting the width of the stripes or adding some glitter or metallic stripes for an extra festive touch.
- Using Striping Tape:
- Seal the Design:
- Apply a top coat over the entire nail to protect the design and add a glossy finish. This will also help your candy cane stripes last longer.
- Finish Up:
- Allow your nails to dry completely before touching anything to avoid smudging or disturbing the design.
Tips:
- Patience: Make sure each layer is fully dry before moving on to the next step to avoid smudging or pulling the polish when removing the tape.
- Stripe Consistency: If using a brush, practice your stripes on a piece of paper or a test nail to ensure consistent width and spacing.
- Festive Flair: Consider adding a layer of glitter top coat or a small rhinestone accent to one nail for extra holiday sparkle.
Festive Candy Cane Stripe Delight is a cheerful and eye-catching design that perfectly embodies the holiday spirit. The classic red and white stripes are not only festive but also fun, making this design a favorite for the season!
4. Classic French with a Glitter Twist
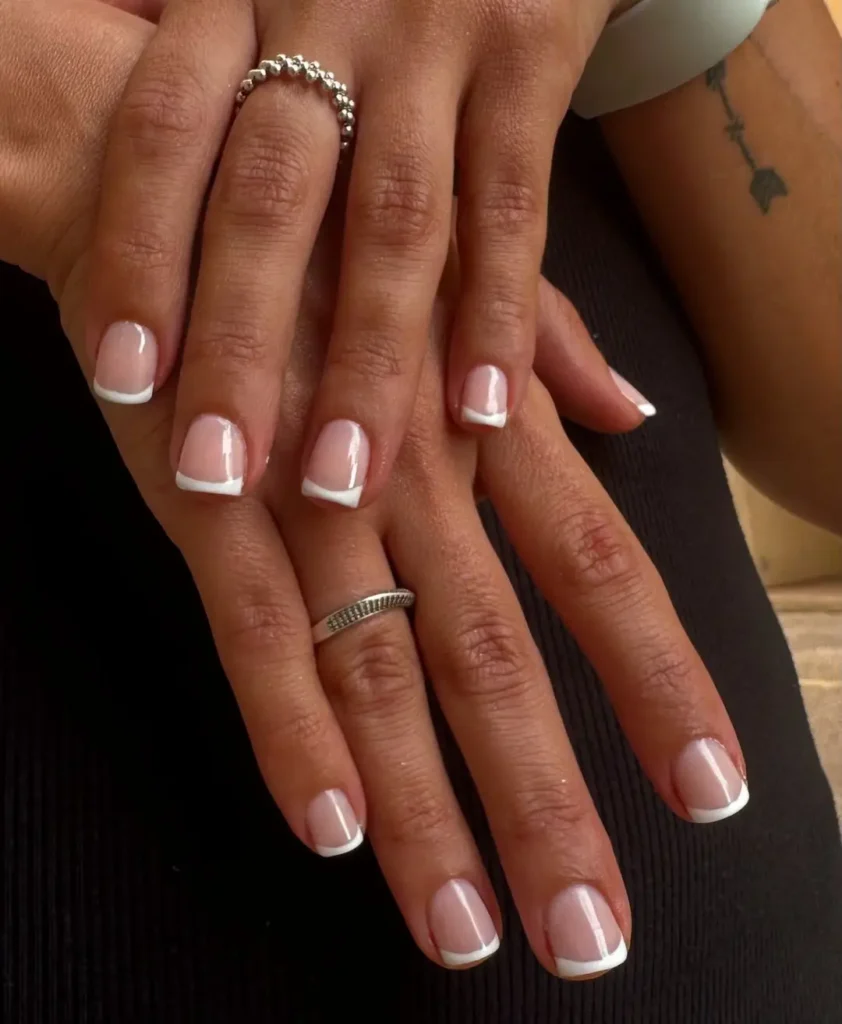
Classic French with a Glitter Twist is a refined yet playful update on the timeless French manicure. This design maintains the elegant simplicity of the classic French look but adds a touch of sparkle with glitter accents. It’s perfect for those who want to keep it chic but with a bit of added glamour. Here’s how to achieve it:
Materials Needed:
- Nude or Pink Base Polish: For the classic French base color.
- White Nail Polish: For the tips.
- Glitter Polish: Choose a color that complements the base and tips (silver, gold, or a matching shade).
- Base Coat: To protect your natural nails.
- Top Coat: To seal the design and add shine.
- Striping Tape or Nail Art Brush: For creating clean tips.
- Nail Polish Remover and Clean-Up Brush: To fix any mistakes.
Steps to Achieve the Look:
- Prepare Your Nails:
- Clean and shape your nails.
- Apply a base coat to protect your natural nails and let it dry completely.
- Apply the Base Color:
- Apply one or two coats of nude or pink polish to your nails. This color should be close to your natural nail color to give a clean, classic look. Allow each coat to dry completely.
- Create the French Tips:
- Using Striping Tape:
- Once the base color is dry, apply striping tape to each nail to mark the tips. Place the tape at the desired length for the white tips.
- Apply white nail polish over the tips of each nail, ensuring a clean and straight edge.
- Carefully remove the striping tape before the white polish dries to reveal crisp, clean lines.
- Using a Nail Art Brush:
- If you prefer to hand-paint the tips, use a fine nail art brush to apply white polish. Follow the natural curve of your nail to create even, straight tips.
- Using Striping Tape:
- Add the Glitter Twist:
- Glitter Tips: Apply a layer of glitter polish over the white tips for a sparkling finish. You can also use a glitter top coat to add subtle shimmer.
- Glitter Accent: For a more understated approach, add glitter to just one or two accent nails or along the edge of the French tips.
- Seal the Design:
- Apply a top coat over the entire nail to protect the design and add a glossy finish. This will also help to keep the glitter in place and prevent it from chipping.
- Finish Up:
- Allow your nails to dry completely before touching anything to avoid smudging or disturbing the design.
Tips:
- Even Tips: Make sure the striping tape or freehand lines are even and consistent for a professional finish.
- Glitter Application: For a more intense glitter look, you can layer multiple coats of glitter polish or use loose glitter for added sparkle.
- Clean-Up: Use a small brush dipped in nail polish remover to clean up any excess polish around your cuticles.
Classic French with a Glitter Twist combines the timeless elegance of a French manicure with a touch of modern sparkle. This design is versatile, making it suitable for everyday wear or special occasions where you want to add a little extra flair to your classic look.
5. Vibrant Carnival Nail Fiesta
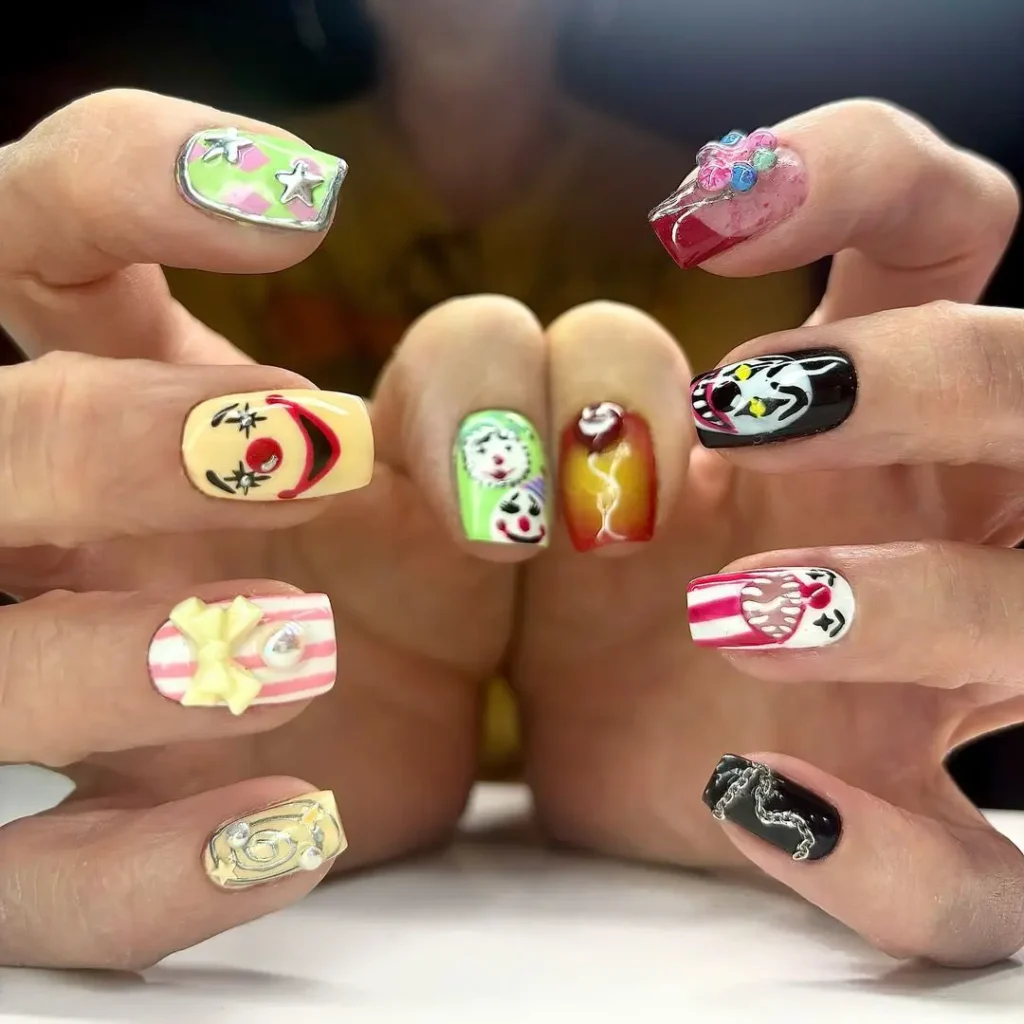
Vibrant Carnival Nail Fiesta is a bold and colorful nail design inspired by the lively and energetic atmosphere of a carnival. This design features a mix of vibrant colors, playful patterns, and dazzling accents that capture the joy and excitement of a festive celebration. Here’s how to create this fun and festive nail look:
Materials Needed:
- Bright Nail Polishes: Choose a variety of vibrant colors like fuchsia, turquoise, neon yellow, electric blue, and orange.
- Glitter Polish: For a sparkling, festive touch.
- Base Coat: To protect your natural nails.
- Top Coat: To seal the design and add shine.
- Nail Art Brushes or Dotting Tools: For creating patterns and designs.
- Nail Art Stickers or Rhinestones (Optional): For added embellishments.
Steps to Achieve the Look:
- Prepare Your Nails:
- Start by cleaning and shaping your nails.
- Apply a base coat to protect your natural nails and ensure the vibrant colors apply smoothly.
- Apply the Base Colors:
- Paint each nail with a different bright color. You can alternate colors or create an ombre effect with similar shades. Allow each coat to dry completely before applying the next.
- For an even more eye-catching look, you can create a rainbow gradient by blending two or more colors on each nail.
- Add Festive Patterns:
- Use nail art brushes or dotting tools to create fun patterns like polka dots, stripes, zigzags, or confetti-like splashes on each nail. You can mix and match patterns to make each nail unique.
- Ideas for Patterns:
- Polka Dots: Use contrasting colors to make the dots pop against the base color.
- Stripes: Create diagonal, vertical, or horizontal stripes in various colors.
- Confetti: Add small, random dots or shapes in different colors to mimic confetti.
- Add Glitter and Embellishments:
- Apply a layer of glitter polish over one or more nails for extra sparkle.
- If you want to go all out, add nail art stickers or rhinestones to accent nails. These could be carnival-themed designs like masks, feathers, or stars.
- Seal the Design:
- Apply a top coat over each nail to protect the design and add a glossy finish. This step will also help keep your vibrant colors and patterns looking fresh.
- Finish Up:
- Allow your nails to dry completely before using your hands to avoid smudging the design.
Tips:
- Color Combinations: Don’t be afraid to mix and match bright colors—carnivals are all about fun and creativity!
- Accent Nails: Consider making one or two nails stand out with extra glitter, a unique pattern, or a larger rhinestone or charm.
- Layering: For more intricate designs, layer different patterns and colors on top of each other to create depth and visual interest.
Vibrant Carnival Nail Fiesta is a perfect way to express your love for color and celebration. This lively nail design will definitely turn heads and add a festive touch to any occasion, making it ideal for parties, festivals, or any time you want to bring a little joy to your look!
6. Playful Pink Palette: Mix ‘n’ Match Nail Patterns
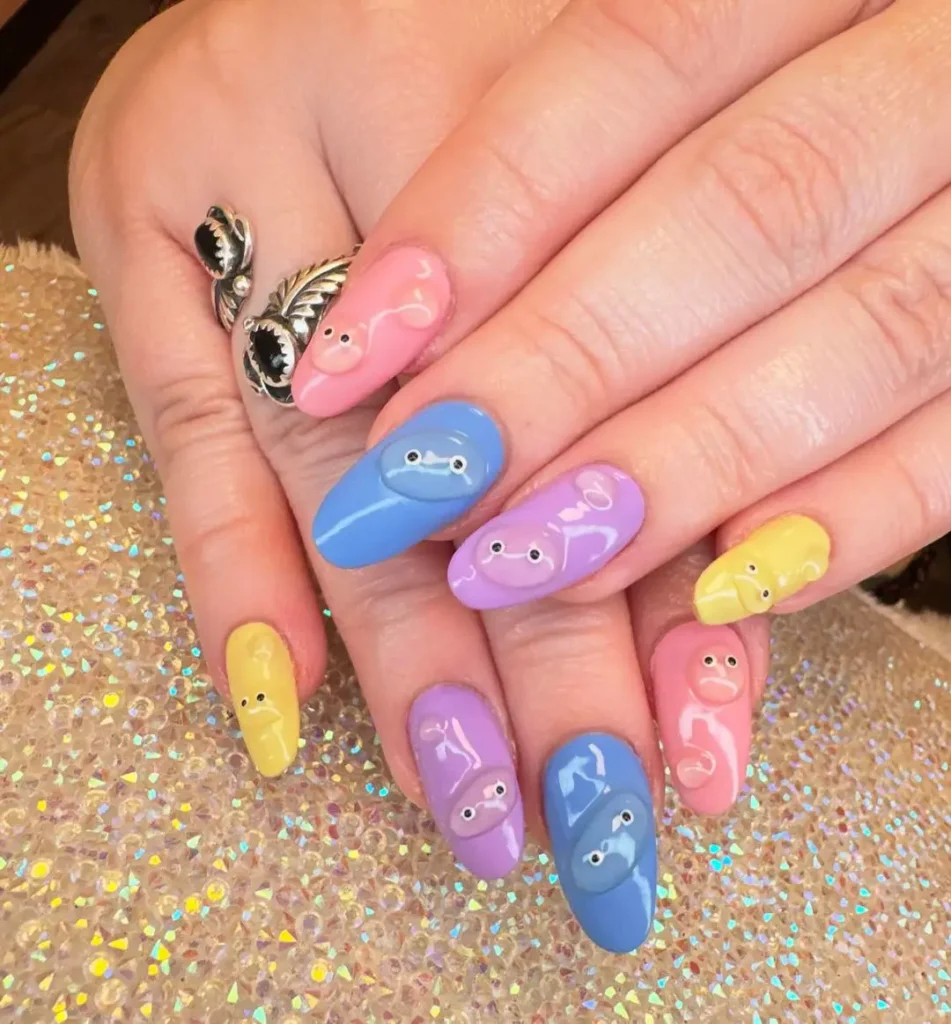
Playful Pink Palette: Mix ‘n’ Match Nail Patterns is a fun and vibrant nail design that celebrates the versatility of pink in all its shades. This look features a variety of pink tones and patterns, allowing you to create a unique and playful manicure. Here’s how to achieve this eye-catching design:
Materials Needed:
- Various Shades of Pink Nail Polish: Choose a range of pink tones from soft pastels to bright fuchsias.
- White Nail Polish: For creating patterns and accents.
- Glitter Polish (Optional): For added sparkle.
- Base Coat: To protect your natural nails.
- Top Coat: To seal the design and add shine.
- Nail Art Brushes or Dotting Tools: For creating patterns.
- Striping Tape or Nail Art Stickers (Optional): For precise patterns.
Steps to Achieve the Look:
- Prepare Your Nails:
- Clean and shape your nails.
- Apply a base coat to protect your natural nails and let it dry completely.
- Apply the Base Colors:
- Paint each nail with a different shade of pink, or create a gradient effect by blending multiple shades on each nail. Allow each coat to dry completely.
- Add Fun Patterns:
- Polka Dots: Use a dotting tool to create polka dots in contrasting pink shades or white. Apply dots randomly or in a pattern on one or more nails.
- Stripes: Use striping tape or a fine brush to paint horizontal or vertical stripes in different shades of pink or white.
- Geometric Shapes: Create geometric patterns like triangles or diamonds using nail art tape or a brush. Fill in the shapes with different shades of pink.
- Abstract Art: Use a brush to create abstract designs with swirls, lines, or splashes in various pink tones.
- Add Glitter (Optional):
- Apply a layer of glitter polish to one or two accent nails or over specific patterns for added sparkle and dimension.
- Seal the Design:
- Apply a top coat over the entire nail to protect the design and add a glossy finish. This will also help your manicure last longer.
- Finish Up:
- Allow your nails to dry completely before touching anything to avoid smudging the design.
Tips:
- Color Combinations: Mix different shades of pink to create depth and interest. Don’t be afraid to combine pastel pinks with bright fuchsias or magentas.
- Pattern Variety: Experiment with different patterns on each nail for a playful, mismatched look or keep patterns consistent across all nails for a more cohesive design.
- Glitter Application: For a more intense glitter effect, use a glitter top coat or apply loose glitter to specific areas of the nail.
Playful Pink Palette: Mix ‘n’ Match Nail Patterns is all about embracing creativity and having fun with your nail art. This design allows you to experiment with various shades and patterns, making it a versatile choice for any occasion where you want to showcase your playful side.
7. Soft Pink Serenity
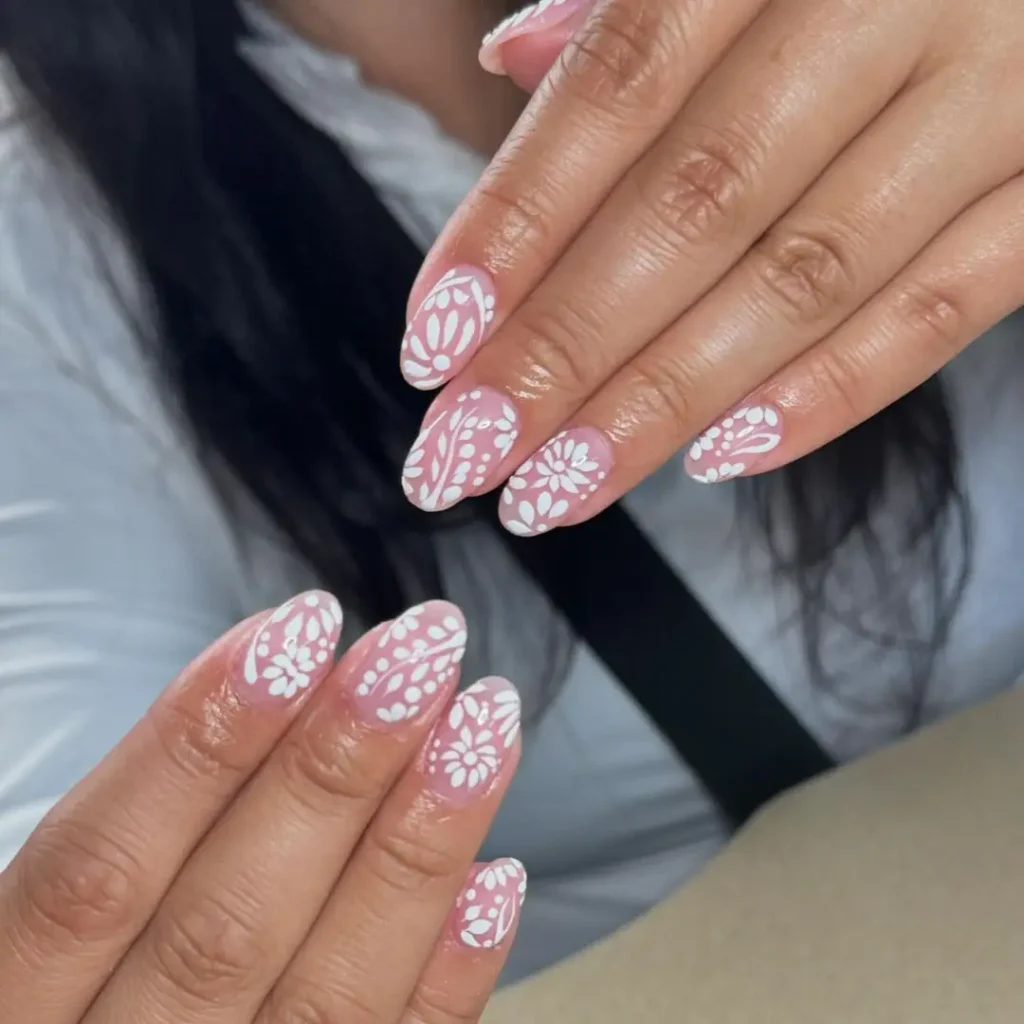
Soft Pink Serenity is a delicate and elegant nail design that features gentle shades of pink for a calm and refined look. This design is perfect for anyone who loves understated beauty and a subtle touch of sophistication. Here’s how to achieve this serene and sophisticated nail look:
Materials Needed:
- Soft Pink Nail Polish: Choose a light, pastel pink shade for the base.
- White Nail Polish: For accents or patterns.
- Glitter Polish (Optional): For a touch of sparkle.
- Base Coat: To protect your natural nails.
- Top Coat: To seal the design and add shine.
- Nail Art Brush or Dotting Tool: For creating patterns.
Steps to Achieve the Look:
- Prepare Your Nails:
- Clean and shape your nails.
- Apply a base coat to protect your natural nails and let it dry completely.
- Apply the Base Color:
- Apply one or two coats of soft pink nail polish to all your nails. This will be your base color and should be light and subtle. Allow each coat to dry completely.
- Add Subtle Accents:
- White French Tips: For a classic touch, apply a thin line of white polish to the tips of each nail.
- Minimalist Patterns: Use a nail art brush or dotting tool to create small, delicate patterns like tiny dots or simple lines in white or a complementary shade of pink.
- Glitter Accent: Apply a light layer of glitter polish to one or two accent nails for a gentle sparkle. Choose a fine glitter for a soft, elegant look.
- Seal the Design:
- Apply a top coat over the entire nail to protect the design and add a glossy finish. This will help your manicure last longer and give it a polished look.
- Finish Up:
- Allow your nails to dry completely before touching anything to avoid smudging or disturbing the design.
Tips:
- Softness: Keep the design light and soft to maintain the serene quality of the look. Avoid bold patterns or heavy glitter.
- Accent Nails: If using glitter or patterns, limit them to one or two nails to keep the overall look subtle and elegant.
- Clean Lines: For the best results, ensure that all lines and patterns are neat and precise.
Soft Pink Serenity is a timeless and graceful nail design that brings a sense of calm and sophistication to your look. It’s perfect for everyday wear, special occasions, or whenever you want a touch of elegance with a soft, pink palette.
8. Mesmerizing Metallic Blue Manicure
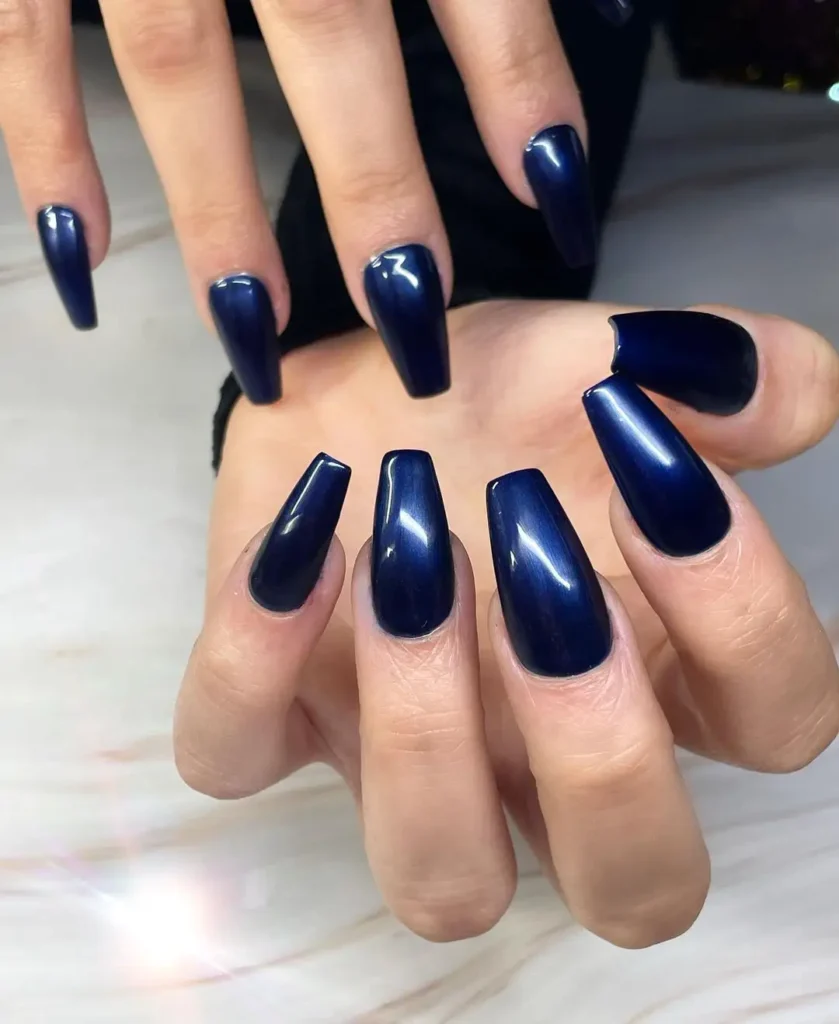
Mesmerizing Metallic Blue Manicure is a striking and eye-catching nail design that features bold metallic blue hues for a modern and sophisticated look. This design highlights the dynamic shine and depth of metallic finishes, creating a captivating and glamorous effect. Here’s how to achieve this dazzling manicure:
Materials Needed:
- Metallic Blue Nail Polish: Choose a rich, vibrant metallic blue shade.
- Base Coat: To protect your natural nails and ensure a smooth application.
- Top Coat: To seal the design and add extra shine.
- Nail Art Tape or Stickers (Optional): For creating precise patterns or designs.
- Nail Polish Remover and Clean-Up Brush: To fix any mistakes.
Steps to Achieve the Look:
- Prepare Your Nails:
- Clean and shape your nails.
- Apply a base coat to protect your natural nails and create a smooth base for the metallic polish. Allow it to dry completely.
- Apply the Metallic Blue Polish:
- Apply one or two coats of metallic blue nail polish to all your nails. Metallic polishes often have a unique formula, so make sure to apply it evenly to showcase its shine and depth. Allow each coat to dry completely.
- Create a Mesmerizing Effect:
- Full Metallic Shine: For a sleek look, you can leave your nails with just the metallic blue polish and a top coat for a glossy finish.
- Accent Designs: If you want to add some flair, use nail art tape or stickers to create geometric patterns, stripes, or chevrons. Apply the tape before adding any additional colors or patterns.
- Gradient Effect: For a more dramatic effect, you can create a gradient by blending the metallic blue with a darker or lighter blue. Use a makeup sponge to dab the colors onto your nails for a smooth gradient effect.
- Seal the Design:
- Apply a top coat over the entire nail to protect the metallic polish and enhance its shine. This will also help the manicure last longer.
- Finish Up:
- Allow your nails to dry completely before touching anything to avoid smudging the design.
Tips:
- Even Application: Metallic polishes can sometimes show brush strokes. Apply the polish in smooth, even strokes to minimize streaks and achieve a flawless finish.
- Clean Edges: Use a clean-up brush dipped in nail polish remover to clean any polish that may have gotten onto your skin or cuticles.
- Glitter Additions: For extra sparkle, you can layer a glitter top coat over the metallic blue polish.
Mesmerizing Metallic Blue Manicure is perfect for making a bold statement with your nails. Its high-shine finish and vibrant color make it ideal for special occasions, nights out, or whenever you want to add a touch of glamour to your look.
9. Charming Daisy Chain Nail Art
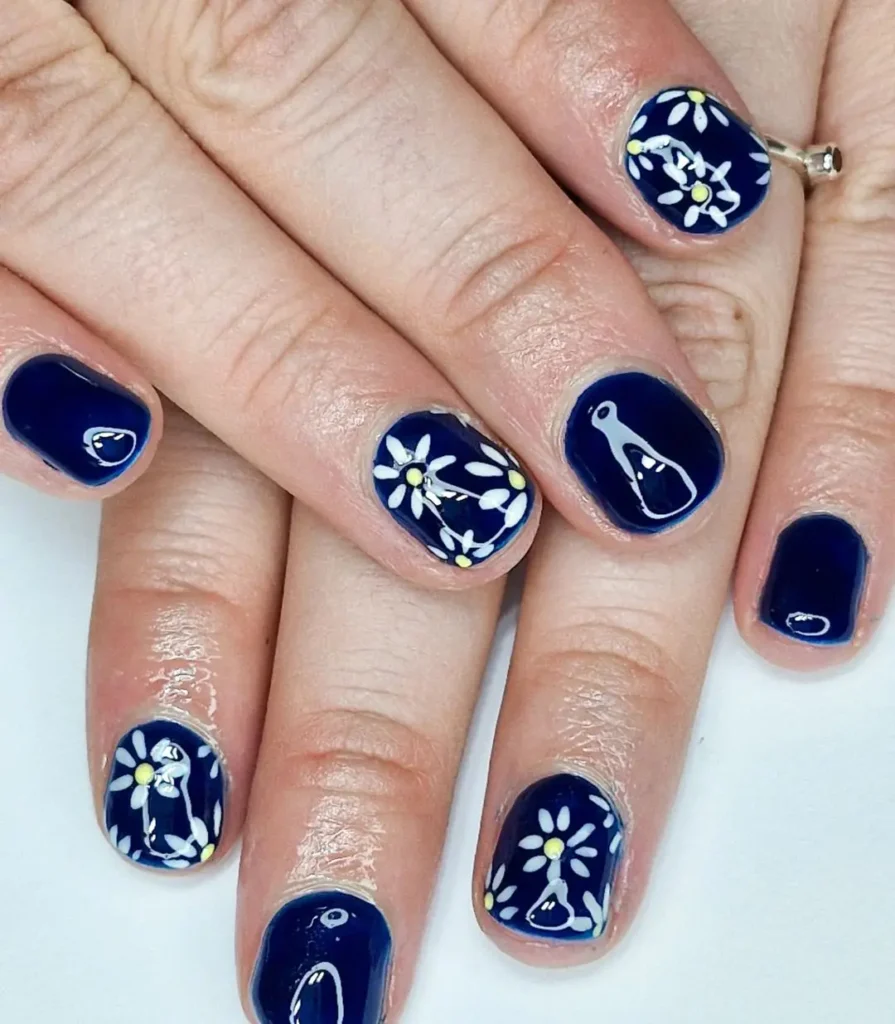
Charming Daisy Chain Nail Art is a delightful and whimsical design that features dainty daisy flowers linked together in a chain-like pattern. This nail art is perfect for adding a touch of spring or summer cheer to your manicure. Here’s how to create this charming and floral look:
Materials Needed:
- Base Color Polish: Choose a light, neutral color like pastel pink, white, or soft blue for the background.
- White Nail Polish: For the daisy petals.
- Yellow Nail Polish: For the daisy centers.
- Green Nail Polish: For the leaves and stems.
- Base Coat: To protect your natural nails.
- Top Coat: To seal the design and add shine.
- Nail Art Brush or Dotting Tool: For creating the daisy flowers.
- Nail Art Tape (Optional): For creating clean lines and patterns.
Steps to Achieve the Look:
- Prepare Your Nails:
- Clean and shape your nails.
- Apply a base coat to protect your natural nails and let it dry completely.
- Apply the Base Color:
- Paint all your nails with a light, neutral base color. This will serve as the backdrop for your daisy chain. Allow it to dry completely before moving on to the next step.
- Create the Daisy Chain:
- Daisy Flowers: Use a nail art brush or dotting tool to create daisy flowers. Start by painting small white petals around a central yellow dot on each nail. You can use a dotting tool to create the center and petals, or a fine brush for more detailed work.
- Chain Design: To create the chain effect, position the daisies so they appear to be connected by tiny green stems. Paint thin green lines or curves between the flowers to mimic a chain. You can also add small leaves along the stems for added detail.
- Add Details:
- Leaves and Stems: Add small green leaves to the design. Use a small brush to paint tiny leaf shapes along the stems of the daisy chain.
- Accent Nails: If desired, choose one or two accent nails to feature a more elaborate daisy chain design, while keeping the other nails simple with just a few daisy flowers.
- Seal the Design:
- Apply a top coat over the entire nail to protect the design and add a glossy finish. This will also help to prevent chipping and ensure your design lasts longer.
- Finish Up:
- Allow your nails to dry completely before touching anything to avoid smudging the design.
Tips:
- Petal Shape: For best results, ensure that the daisy petals are even and symmetrical. You can practice on a piece of paper or a nail wheel if you’re new to nail art.
- Precision: Use a fine brush or dotting tool for precise and clean lines, especially when creating the daisy petals and stems.
- Dry Time: Allow each layer of polish to dry completely before adding more details to avoid smudging.
Charming Daisy Chain Nail Art adds a touch of whimsy and freshness to your manicure, perfect for spring or summer. Its delicate floral pattern and playful chain design make it a charming choice for any occasion where you want to showcase a bit of floral flair.
10. Bold Blue & Pink Nail Artistry
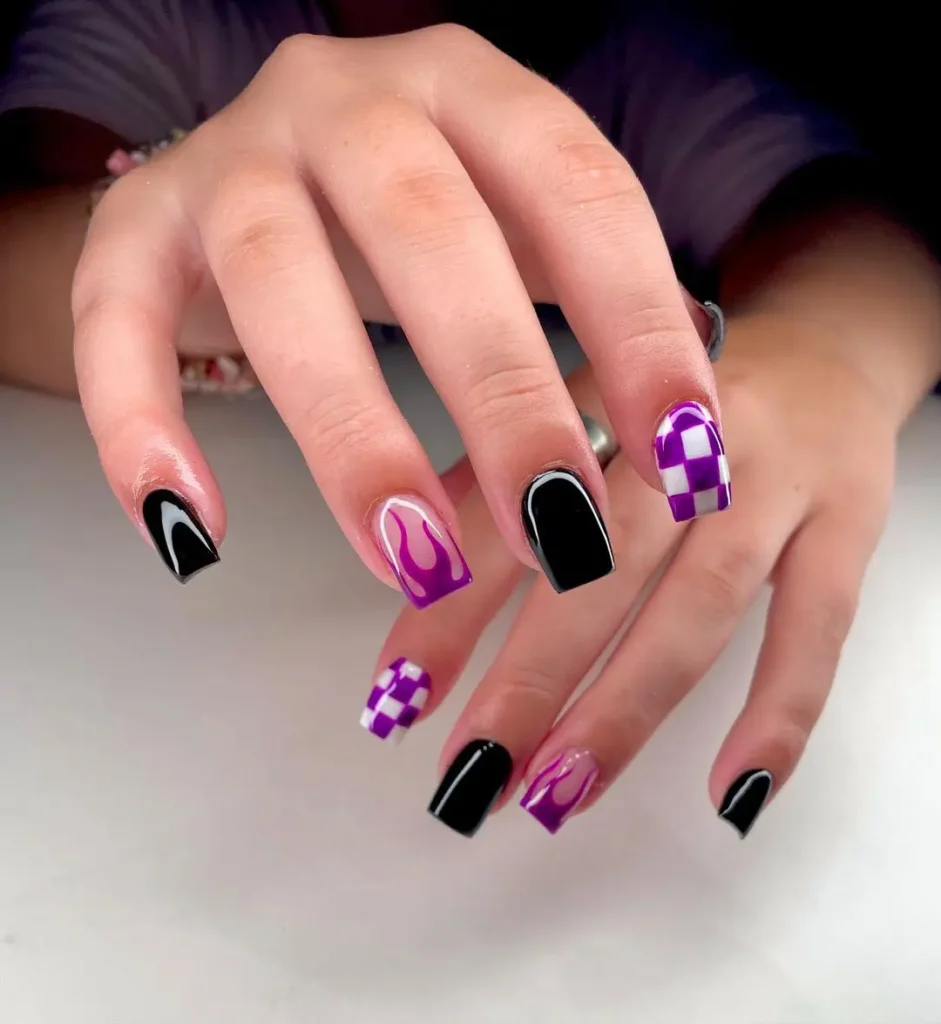
Bold Blue & Pink Nail Artistry is a vibrant and dynamic design that combines striking shades of blue and pink to create a stunning and energetic look. This manicure is perfect for those who love bold colors and want to make a statement with their nails. Here’s how to achieve this eye-catching design:
Materials Needed:
- Bold Blue Nail Polish: Choose a bright or deep blue shade.
- Vibrant Pink Nail Polish: Opt for a bright pink or fuchsia.
- White Nail Polish: For creating accents and patterns.
- Glitter Polish (Optional): For added sparkle.
- Base Coat: To protect your natural nails.
- Top Coat: To seal the design and add shine.
- Nail Art Brushes or Dotting Tools: For detailed patterns.
- Nail Art Tape or Stickers (Optional): For clean lines and patterns.
Steps to Achieve the Look:
- Prepare Your Nails:
- Clean and shape your nails.
- Apply a base coat to protect your natural nails and allow it to dry completely.
- Apply Base Colors:
- Blue Base: Paint one or two coats of bold blue polish on half of your nails or on alternate nails. Allow it to dry completely.
- Pink Base: Paint the remaining nails with vibrant pink polish. Allow it to dry completely.
- Create Bold Patterns:
- Geometric Patterns: Use nail art tape or a fine brush to create geometric patterns such as stripes, triangles, or chevrons. For example, you could create diagonal stripes of blue and pink on each nail or alternate the colors in a chevron pattern.
- Accent Designs: Add white accents to enhance the design. For instance, you could paint small dots, stars, or lines in white over the blue and pink bases.
- Glitter Accents: Apply glitter polish to one or two accent nails for added sparkle. You can use a contrasting glitter color that complements the blue and pink, such as silver or gold.
- Add Details:
- Abstract Art: For a more artistic look, use a brush or dotting tool to create abstract patterns or splashes of blue and pink. This can give your nails a unique and creative touch.
- Gradient Effect: Create a gradient effect by blending blue and pink together. Use a makeup sponge to dab the colors onto your nails, blending them where they meet for a smooth transition.
- Seal the Design:
- Apply a top coat over the entire nail to protect the design and add a glossy finish. This will also help to prevent chipping and ensure your design lasts longer.
- Finish Up:
- Allow your nails to dry completely before touching anything to avoid smudging the design.
Tips:
- Color Placement: Experiment with the placement of blue and pink to see what combination works best for you. You can choose to alternate colors on each nail or use a mix of both on the same nail.
- Precision: For sharp and clean lines, use nail art tape to create geometric patterns or accents. Ensure each layer of polish is fully dry before applying tape to avoid smudging.
- Glitter Application: Apply glitter polish sparingly for a touch of sparkle or use a glitter top coat for a more uniform sparkle effect.
Bold Blue & Pink Nail Artistry is all about embracing vibrant colors and creating a fun, energetic look. This design is perfect for making a bold statement and showcasing your creativity. Whether you choose geometric patterns, abstract art, or glitter accents, your nails will definitely stand out with this striking color combination.
11. Glitzy Gemstone Nail Glamour
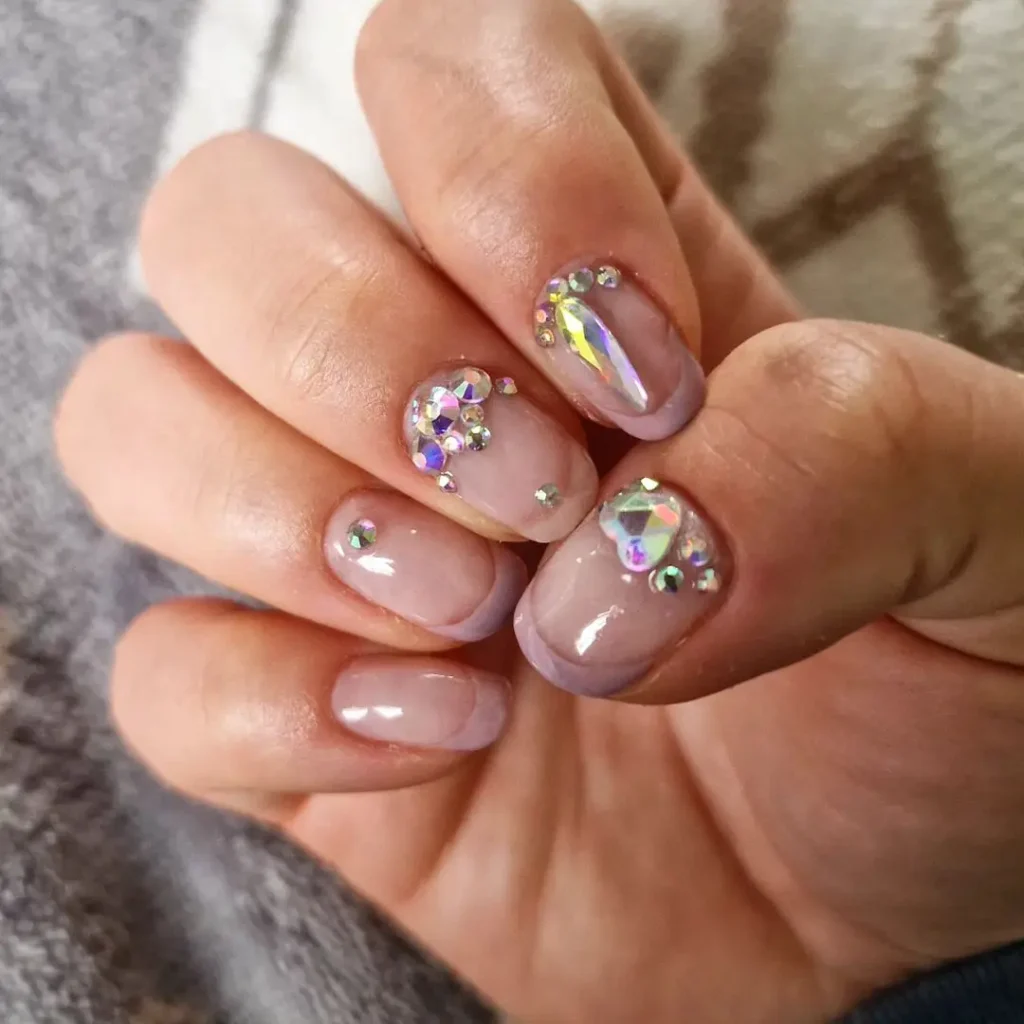
Glitzy Gemstone Nail Glamour is a dazzling and luxurious nail design that features the sparkle and sophistication of gemstone-inspired accents. This manicure combines rich colors with sparkling details to create a glamorous and eye-catching look. Here’s how to achieve this opulent design:
Materials Needed:
- Base Color Polish: Choose a rich color such as deep blue, emerald green, or burgundy for the base.
- Glitter Polish: Select a glitter polish that complements your base color.
- Gemstone Nail Art Stickers or Rhinestones: For adding the gem effect.
- Top Coat: To seal the design and add shine.
- Base Coat: To protect your natural nails.
- Nail Art Glue (Optional): For securing rhinestones or gemstones.
- Dotting Tool or Nail Art Brush: For detailed application.
Steps to Achieve the Look:
- Prepare Your Nails:
- Clean and shape your nails.
- Apply a base coat to protect your natural nails and let it dry completely.
- Apply the Base Color:
- Paint your nails with a rich base color of your choice. Apply one or two coats for an even finish. Allow the base color to dry completely.
- Add Glitter for Extra Sparkle:
- Apply a layer of glitter polish over the base color, focusing on either the tips or the entire nail for a more dramatic effect. Let it dry thoroughly.
- Apply Gemstone Accents:
- Position Gemstones: Use nail art glue or top coat to apply rhinestones or gemstone stickers to your nails. Place them in a pattern or design that you like, such as a cluster at the base of the nail, a line down the center, or scattered across the nail.
- Secure Gemstones: If using loose rhinestones, you may need to use nail art glue to secure them in place. Gently press each gemstone onto the nail, and allow the glue to dry completely.
- Add Details:
- Enhance the Design: You can further embellish the design with small dots of glitter polish around the gemstones or add a thin line of contrasting polish around the gems for a polished look.
- Top Coat: Apply a top coat over the entire nail, being careful not to disturb the gemstones. The top coat will help seal the design and add a glossy finish.
- Finish Up:
- Allow your nails to dry completely before touching anything to avoid smudging the design or shifting the gemstones.
Tips:
- Precision: Use a fine brush or dotting tool to apply gemstone accents for precise placement.
- Gemstone Placement: Experiment with different arrangements of gemstones to see what looks best. A symmetrical pattern or a random scatter can both create a stunning effect.
- Long-Lasting: To ensure that the gemstones stay in place longer, use a good quality nail art glue and apply a generous layer of top coat around the gemstones.
Glitzy Gemstone Nail Glamour is perfect for adding a touch of luxury and sparkle to your manicure. This design is ideal for special occasions, parties, or anytime you want to make a glamorous statement with your nails. With its rich colors and sparkling accents, your nails will surely stand out with this sophisticated and dazzling look.
12. Nude Almond Sophistication
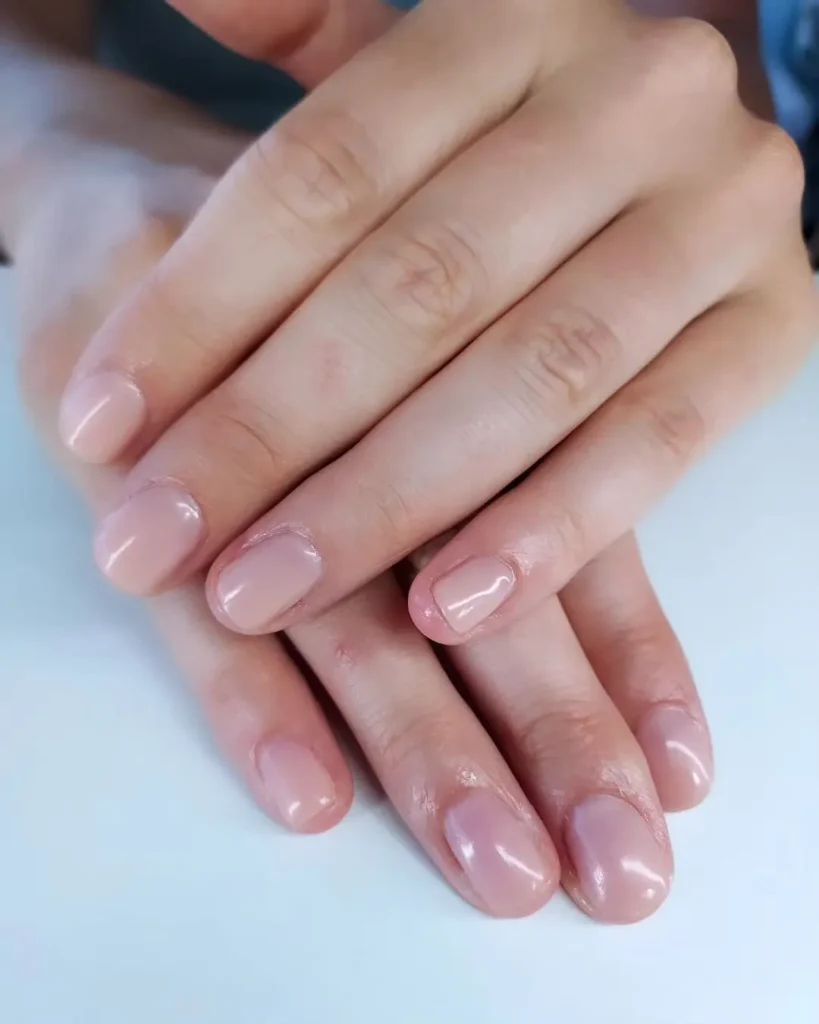
Nude Almond Sophistication is a chic and elegant nail design featuring a subtle nude shade with an almond-shaped nail for a sophisticated and timeless look. This manicure combines classic elegance with a modern twist, perfect for any occasion. Here’s how to achieve this refined and stylish design:
Materials Needed:
- Nude Nail Polish: Choose a nude shade that complements your skin tone.
- Base Coat: To protect your natural nails and create a smooth surface.
- Top Coat: To seal the design and add shine.
- Nail File and Buffer: For shaping and smoothing the nails.
- Cuticle Oil: To keep cuticles healthy and moisturized.
Steps to Achieve the Look:
- Prepare Your Nails:
- Clean and shape your nails. Use a nail file to shape them into an almond shape—slightly tapered at the tip with rounded edges.
- Buff the surface of your nails to create a smooth base for the polish.
- Apply a base coat to protect your natural nails and let it dry completely.
- Apply the Nude Polish:
- Paint your nails with the nude polish. Apply one or two coats for an even finish. Choose a shade that blends seamlessly with your skin tone for a sophisticated look. Allow each coat to dry completely.
- Add Shine:
- Apply a top coat over the nude polish to add a glossy finish and protect the design. This will also help your manicure last longer and prevent chipping.
- Finishing Touches:
- Cuticle Care: Apply cuticle oil around your nails to keep your cuticles healthy and moisturized. This will enhance the overall look of your manicure.
- Nail Buffing: For an ultra-smooth finish, gently buff the surface of your nails after applying the top coat, if needed.
Tips:
- Perfect Shape: Almond-shaped nails are elegant and elongate the fingers. Make sure to file and shape them consistently to maintain the almond shape.
- Color Matching: Choose a nude polish that closely matches your skin tone for a seamless and sophisticated look. Test a few shades to find the perfect match.
- Maintenance: Regularly apply cuticle oil and keep your nails filed and shaped to maintain the elegance of your manicure.
Nude Almond Sophistication is a versatile and polished look that works well for both everyday wear and special occasions. Its understated elegance makes it a timeless choice, while the almond shape adds a touch of modern refinement.
13. Starry Pink Dreamscape
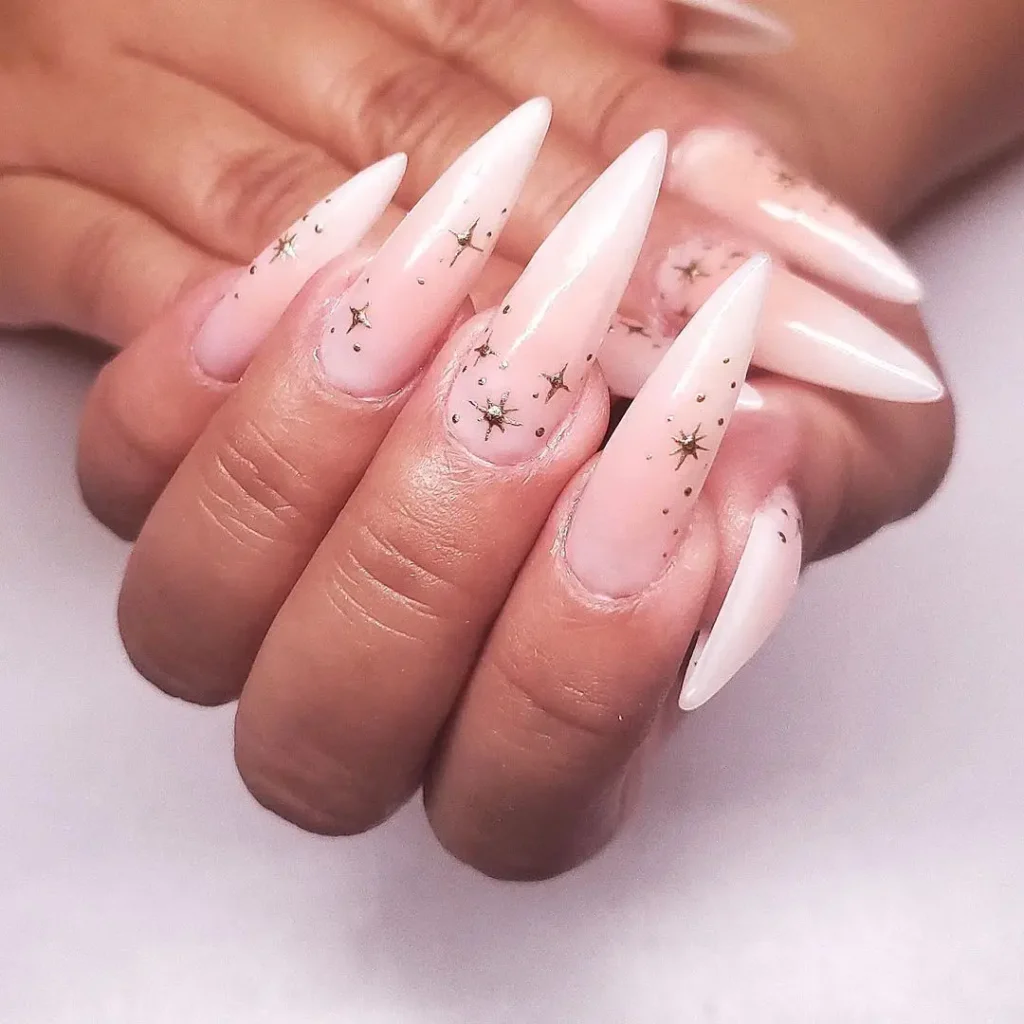
Starry Pink Dreamscape is a dreamy and enchanting nail design that features a soft pink base with celestial-inspired accents. This manicure combines a delicate pink shade with sparkling stars and a touch of glitter for a whimsical and magical look. Here’s how to achieve this dreamy design:
Materials Needed:
- Soft Pink Nail Polish: Choose a pastel or light pink shade for the base.
- White Nail Polish: For creating star accents.
- Silver or Gold Glitter Polish: For adding a touch of sparkle.
- Base Coat: To protect your natural nails.
- Top Coat: To seal the design and add shine.
- Nail Art Brush or Dotting Tool: For creating star patterns.
- Makeup Sponge (Optional): For blending glitter.
Steps to Achieve the Look:
- Prepare Your Nails:
- Clean and shape your nails.
- Apply a base coat to protect your natural nails and let it dry completely.
- Apply the Base Color:
- Paint your nails with a soft pink polish. Apply one or two coats to achieve a smooth, even finish. Allow each coat to dry completely.
- Create the Starry Accents:
- Stars: Use a nail art brush or dotting tool to paint small white stars on your nails. You can create simple star shapes or use star stickers for an easier application. Place the stars randomly or in a pattern that you like.
- Glitter: Apply silver or gold glitter polish to enhance the starry effect. You can use a makeup sponge to dab glitter onto your nails for a more blended look or apply it directly over the stars for a sparkling accent.
- Add a Dreamy Finish:
- Blend Glitter: For a more ethereal look, use a makeup sponge to blend glitter from the tips of your nails towards the base, creating a gradient effect.
- Top Coat: Apply a top coat over the entire nail to protect the design and add a glossy finish. This will help seal the glitter and stars in place.
- Finish Up:
- Allow your nails to dry completely before touching anything to avoid smudging the design.
Tips:
- Star Placement: Randomly placing stars can create a more natural, starry sky effect, while arranging them in a specific pattern can add a unique touch.
- Glitter Application: For a subtle sparkle, apply a light layer of glitter. For a more intense effect, build up layers or use a chunky glitter polish.
- Precision: Ensure that the white stars are neat and evenly spaced for a clean, starry appearance.
Starry Pink Dreamscape is a charming and whimsical nail design that adds a touch of magic to your manicure. Its soft pink base combined with sparkling stars and glitter creates a dreamy and enchanting look perfect for special occasions or whenever you want to feel a bit more magical.
14. Sweetheart Tips: Romantic French Manicure Upgrade

Sweetheart Tips: Romantic French Manicure Upgrade is a modern and romantic twist on the classic French manicure, incorporating delicate details and charming elements to create a more personalized and elegant look. This design adds a touch of romance to the traditional French tips, making it perfect for special occasions or whenever you want a refined, feminine touch. Here’s how to achieve this upgraded manicure:
Materials Needed:
- Nude or Light Pink Nail Polish: For the base color.
- White Nail Polish: For the tips.
- Soft Pink or Red Nail Polish: For added romantic accents.
- Heart Nail Art Stickers or Small Heart Stencils: For creating heart shapes.
- Base Coat: To protect your natural nails.
- Top Coat: To seal the design and add shine.
- Nail Art Brush or Dotting Tool: For detailed work.
Steps to Achieve the Look:
- Prepare Your Nails:
- Clean and shape your nails. You can opt for a classic almond or square shape for the French manicure.
- Apply a base coat to protect your natural nails and let it dry completely.
- Apply the Base Color:
- Paint your nails with a nude or light pink polish. Apply one or two coats for a smooth, even finish. Allow each coat to dry completely.
- Create the French Tips:
- White Tips: Use a small brush or nail art tape to carefully apply white polish to the tips of your nails, creating a clean, classic French tip. You can make the tips slightly wider or narrower depending on your preference. Allow the tips to dry completely.
- Add Romantic Details:
- Hearts: Use heart nail art stickers or stencils to add small heart shapes to your nails. You can place hearts at the base of the nails, on the tips, or randomly across the nail. If using a brush or dotting tool, paint small hearts in soft pink or red polish.
- Accent Nails: Consider using a soft pink or red polish to add small heart patterns or details on one or two accent nails for a subtle pop of color.
- Enhance the Design:
- Glitter: For added romance, you can apply a thin layer of clear or pink glitter polish over the entire nail or just over the hearts to give a subtle sparkle.
- Top Coat: Apply a top coat over the entire nail to protect the design and add a glossy finish. This will also help to prevent chipping and enhance the overall look.
- Finish Up:
- Allow your nails to dry completely before touching anything to avoid smudging the design.
Tips:
- Precision: Use nail art tape or a fine brush for clean and precise French tips. Ensure that each layer is fully dry before applying additional details to avoid smudging.
- Heart Placement: You can vary the size and placement of the hearts to create a unique and personalized look. Experiment with different patterns to see what you like best.
- Maintenance: Regularly apply cuticle oil and keep your nails well-maintained to enhance the overall appearance of your manicure.
Sweetheart Tips: Romantic French Manicure Upgrade combines the elegance of the classic French manicure with romantic and playful elements, creating a refined and charming look. This design is perfect for special occasions, date nights, or any time you want to add a touch of romance to your style.
15. Elegant Jeweled Nail Design
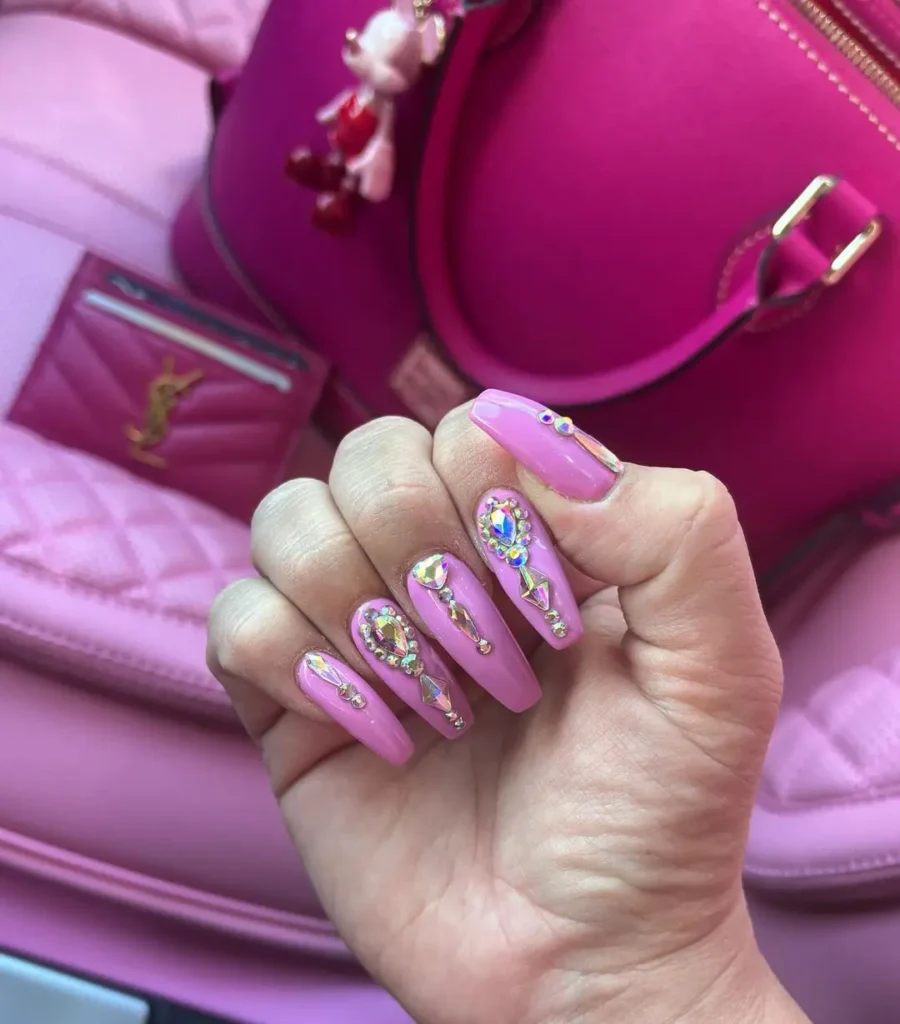
Elegant Jeweled Nail Design is a sophisticated manicure featuring the sparkle and allure of jewel-inspired accents. This design combines rich, luxurious colors with gem-like embellishments to create a polished and glamorous look. Here’s how to achieve this elegant nail design:
Materials Needed:
- Base Color Polish: Choose a rich, elegant color such as deep burgundy, navy blue, or emerald green.
- Metallic Nail Polish: Gold or silver for accents.
- Rhinestones or Gemstone Nail Art Stickers: For adding jewel-like embellishments.
- Base Coat: To protect your natural nails.
- Top Coat: To seal the design and add shine.
- Nail Art Glue (Optional): For securing rhinestones.
- Dotting Tool or Nail Art Brush: For precise placement of jewels.
Steps to Achieve the Look:
- Prepare Your Nails:
- Clean and shape your nails. Opt for a classic shape such as square or almond.
- Apply a base coat to protect your natural nails and allow it to dry completely.
- Apply the Base Color:
- Paint your nails with the base color polish. Apply one or two coats for an even finish. Choose a deep, rich color to create a luxurious backdrop for the jeweled accents. Allow each coat to dry completely.
- Add Metallic Accents:
- Accent Lines or Patterns: Use metallic polish (gold or silver) to create thin lines, dots, or geometric patterns on your nails. This will provide a striking contrast against the base color and enhance the overall elegance of the design.
- Layering: For a more sophisticated look, you can layer the metallic accents over the base color in intricate patterns or designs.
- Apply Jeweled Accents:
- Position Rhinestones: Use nail art glue or a top coat to apply rhinestones or gemstone stickers to your nails. Place them strategically for a balanced look, such as at the base of the nail, along the tips, or in a central design. You can also create clusters or lines of rhinestones for added glamour.
- Secure Jeweled Accents: Gently press each rhinestone into place. If using loose rhinestones, ensure they are securely attached with nail art glue.
- Finish the Design:
- Top Coat: Apply a top coat over the entire nail, carefully sealing the jewels in place. This will help to protect the design and add a glossy finish. Make sure not to disturb the placement of the rhinestones.
- Drying: Allow your nails to dry completely before touching anything to avoid smudging or shifting the embellishments.
Tips:
- Placement: Be strategic with the placement of rhinestones to create a balanced and elegant design. Avoid overcrowding the nails to maintain a sophisticated look.
- Rhinestone Size: Use a mix of small and medium-sized rhinestones to add depth and interest to the design.
- Precision: For a clean and precise look, use a dotting tool or a fine brush to place the rhinestones and metallic accents.
Elegant Jeweled Nail Design is perfect for special occasions, formal events, or anytime you want to add a touch of luxury to your style. The combination of rich base colors with sparkling jeweled accents creates a glamorous and sophisticated manicure that will definitely stand out.
16. Sculpted Elegance in Pink and White
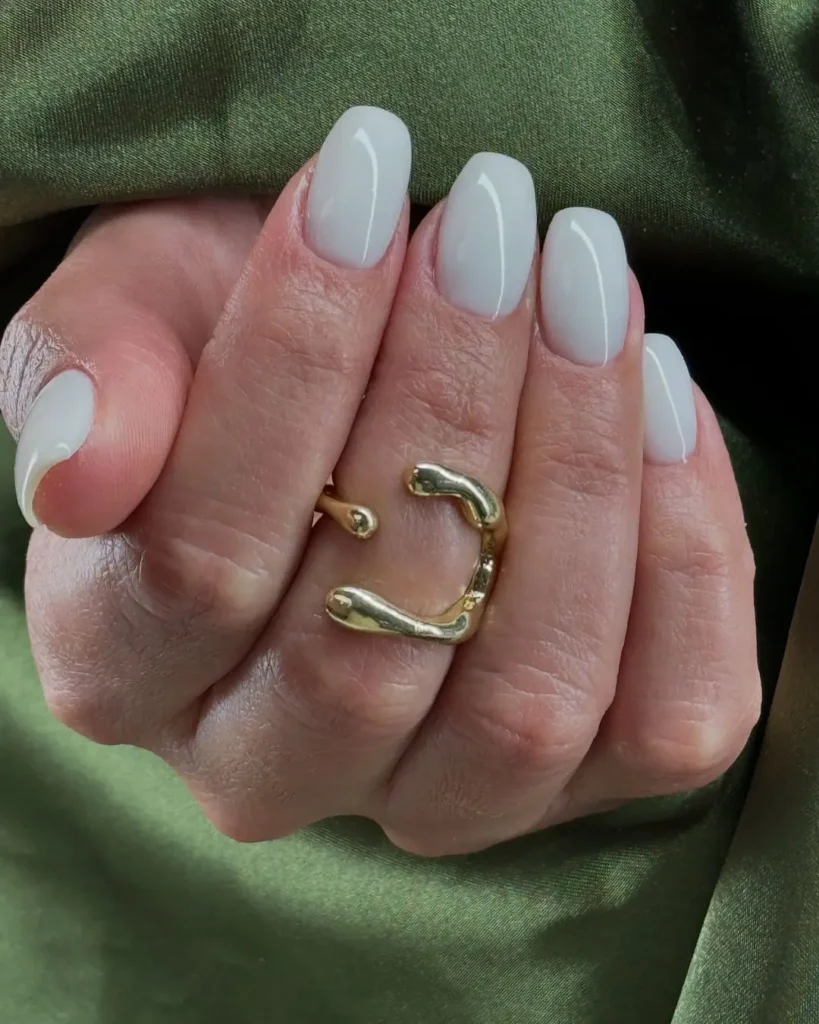
Sculpted Elegance in Pink and White is a refined and artistic nail design featuring a sophisticated blend of pink and white with sculpted elements. This manicure combines the timeless elegance of pink and white with intricate sculpted details to create a stunning and graceful look. Here’s how to achieve this elegant design:
Materials Needed:
- Base Color Polish: Soft pink and pure white.
- Nail Sculpting Gel or Acrylic (Optional): For creating sculpted elements.
- Base Coat: To protect your natural nails.
- Top Coat: To seal the design and add shine.
- Nail Art Brush or Dotting Tool: For detailed work.
- Nail Forms or Tips (Optional): If using sculpting gel or acrylic.
Steps to Achieve the Look:
- Prepare Your Nails:
- Clean and shape your nails. Choose a classic shape such as square or almond.
- Apply a base coat to protect your natural nails and let it dry completely.
- Apply the Base Colors:
- Pink Base: Paint most of your nails with a soft pink polish. Apply one or two coats for an even finish. Allow each coat to dry completely.
- White Base: You can also apply white polish to a few accent nails or create a French tip effect with white polish.
- Create Sculpted Elements:
- Sculpting Gel or Acrylic: If you’re using sculpting gel or acrylic, apply it to the nails to create 3D designs, such as floral patterns, swirls, or abstract shapes. Follow the product instructions for curing and shaping.
- Nail Forms or Tips: Use nail forms or tips if necessary to achieve the desired sculpted shape. Sculpt the gel or acrylic into elegant shapes, such as roses or delicate swirls.
- Add Pink and White Details:
- Pink Sculpting: Use pink sculpting gel or acrylic to add delicate sculpted elements on top of the base color. This could include pink roses, bows, or abstract designs.
- White Details: Use white polish or sculpting gel to create elegant white accents, such as intricate lace patterns or fine lines. Apply these details over the pink base or as standalone elements.
- Finish the Design:
- Top Coat: Apply a top coat over the entire nail to seal the design and add a glossy finish. This will help protect the sculpted elements and enhance the overall shine of the manicure.
- Drying: Allow your nails to dry completely before touching anything to avoid smudging or disturbing the sculpted elements.
Tips:
- Sculpting Precision: For the best results, ensure that your sculpted elements are neatly shaped and well-defined. Use a fine brush or sculpting tool for detailed work.
- Layering: Layering different colors and sculpting materials can create a rich and textured design. Be sure to let each layer dry or cure before applying additional elements.
- Maintenance: Regularly apply cuticle oil and keep your nails well-maintained to enhance the overall appearance of your manicure.
Sculpted Elegance in Pink and White is a sophisticated and artistic nail design that combines the classic beauty of pink and white with intricate sculpted details. This manicure is perfect for special occasions, formal events, or anytime you want to add a touch of elegance and artistry to your style.
17. Refreshing Mint Green Tranquility
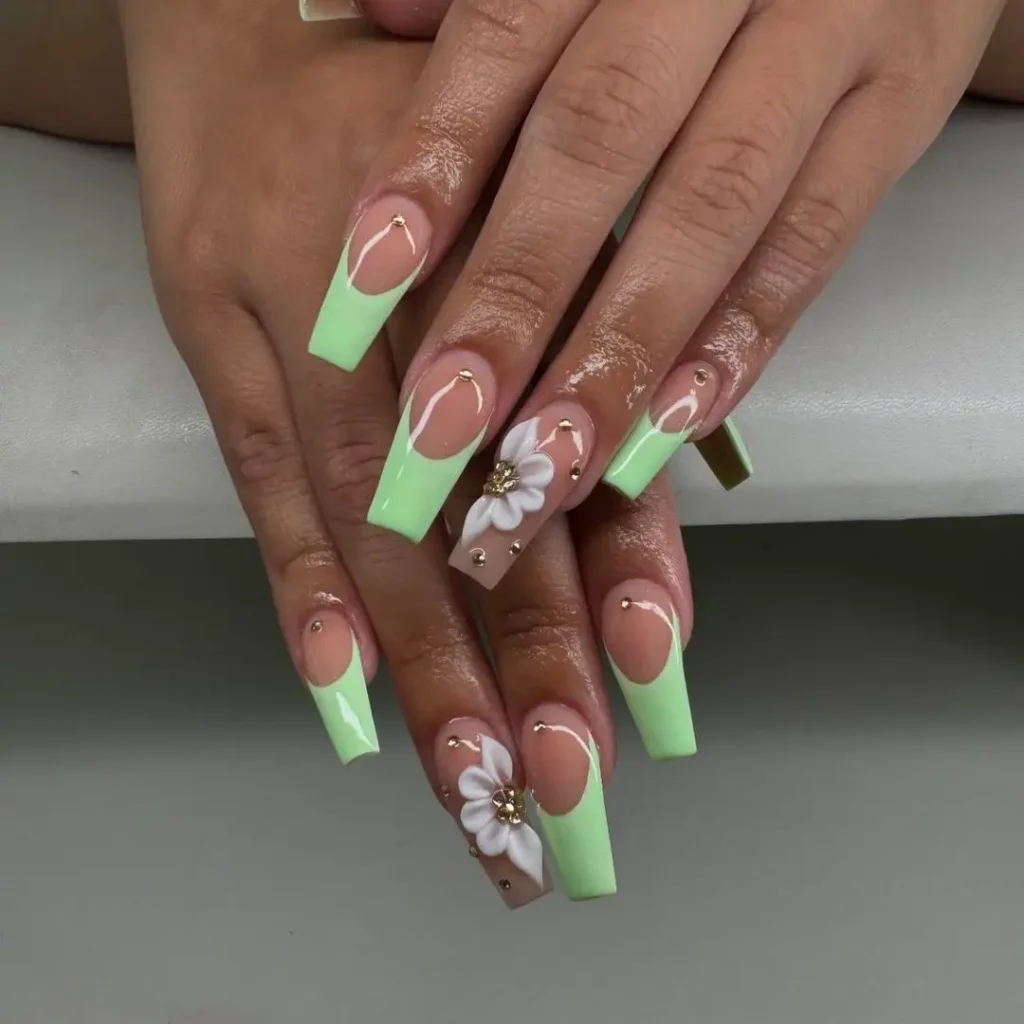
Refreshing Mint Green Tranquility is a calming and stylish nail design featuring a soothing mint green color that evokes a sense of tranquility and freshness. This manicure is perfect for a serene and elegant look, offering a subtle yet sophisticated appearance. Here’s how to achieve this refreshing design:
Materials Needed:
- Mint Green Nail Polish: For the base color.
- White or Silver Nail Polish (Optional): For accent details.
- Base Coat: To protect your natural nails.
- Top Coat: To seal the design and add shine.
- Nail Art Brush or Dotting Tool (Optional): For creating detailed accents.
- Cuticle Oil: To keep your cuticles healthy and moisturized.
Steps to Achieve the Look:
- Prepare Your Nails:
- Clean and shape your nails. You can choose a classic shape such as oval, square, or almond.
- Apply a base coat to protect your natural nails and let it dry completely.
- Apply the Mint Green Base:
- Paint your nails with mint green polish. Apply one or two coats for a smooth, even finish. Allow each coat to dry completely.
- Add Optional Accents:
- White or Silver Details: If you want to add a touch of detail, use white or silver polish to create subtle accents. This could include delicate dots, thin stripes, or minimalistic geometric patterns. Use a nail art brush or dotting tool for precision.
- Accent Nail: You can also choose to have one or two accent nails with a slightly different design, such as a mint green base with white or silver glitter, or a simple mint green stripe.
- Finish the Design:
- Top Coat: Apply a top coat over the entire nail to seal the design and add a glossy finish. This will help protect the mint green color and any added accents from chipping.
- Drying: Allow your nails to dry completely before touching anything to avoid smudging.
- Final Touches:
- Cuticle Care: Apply cuticle oil around your nails to keep your cuticles healthy and moisturized. This will enhance the overall look of your manicure and keep your nails looking neat.
Tips:
- Color Consistency: Make sure the mint green polish is well-mixed and applied evenly to avoid streaks or uneven color.
- Accents: Keep the accents minimal to maintain the tranquility of the design. Simple patterns or tiny details can add a touch of sophistication without overwhelming the mint green base.
- Maintenance: Regularly apply cuticle oil and keep your nails in good shape to maintain the fresh look of your manicure.
Refreshing Mint Green Tranquility is a soothing and stylish manicure that brings a touch of elegance and calmness to your look. Its subtle mint green color and optional accents make it a versatile choice for everyday wear or special occasions, providing a clean and serene appearance.
18. Abstract Color Fusion Nail Art
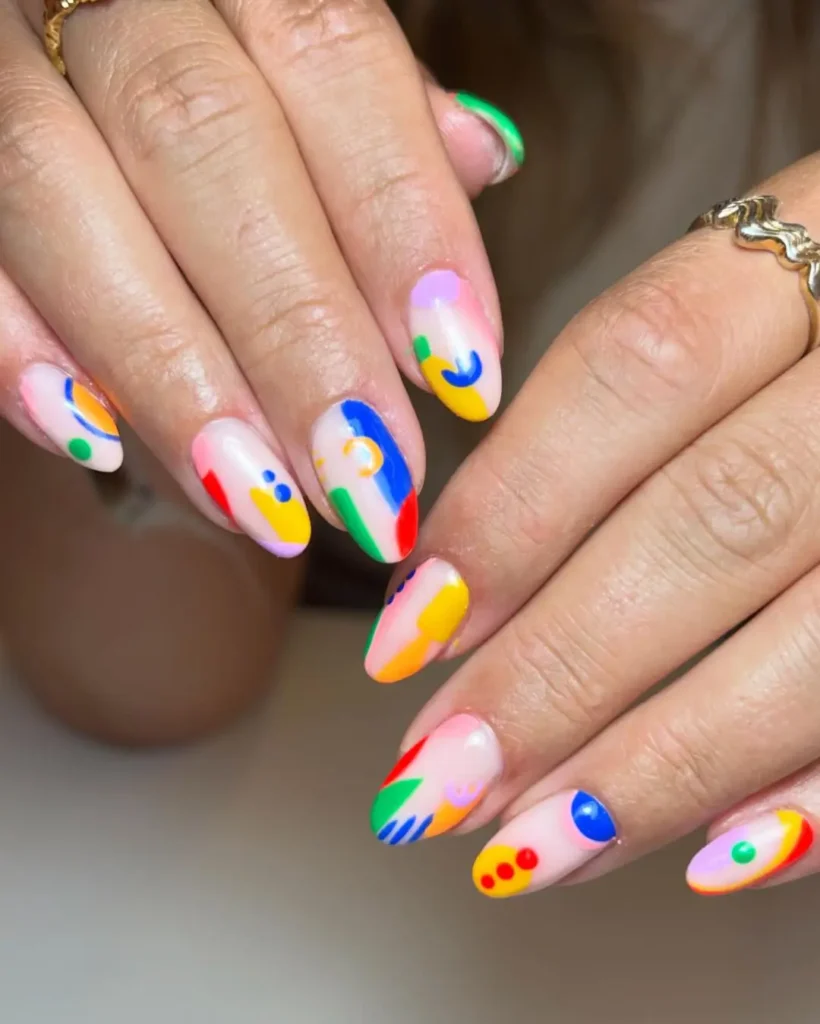
Abstract Color Fusion Nail Art is a vibrant and artistic manicure that combines bold colors and abstract designs to create a unique and eye-catching look. This design celebrates creativity and individuality with a blend of different hues and abstract shapes. Here’s how to achieve this dynamic nail art:
Materials Needed:
- Base Colors: Choose several vibrant nail polishes in different colors (e.g., turquoise, fuchsia, yellow, purple).
- White or Black Nail Polish: For contrast and outlines.
- Nail Art Brushes or Sponges: For blending and detailing.
- Base Coat: To protect your natural nails.
- Top Coat: To seal the design and add shine.
- Nail Art Tape (Optional): For clean lines and geometric shapes.
Steps to Achieve the Look:
- Prepare Your Nails:
- Clean and shape your nails. Opt for a shape that suits your style, such as square, almond, or oval.
- Apply a base coat to protect your natural nails and let it dry completely.
- Apply the Base Colors:
- Base Color Application: Paint your nails with one of your chosen vibrant colors as a base. This will be the foundation for your abstract design. Apply one or two coats for an even finish and allow each coat to dry completely.
- Create the Abstract Design:
- Color Fusion: Use nail art brushes or sponges to apply different colors in abstract patterns. You can blend colors together or create sharp lines and shapes. To achieve a gradient or ombre effect, use a sponge to dab different colors onto the nails and blend them together.
- Abstract Shapes: Add geometric or freeform shapes with a contrasting color (white or black) using a fine nail art brush. This could include lines, dots, triangles, or irregular shapes. You can use nail art tape to help create clean, geometric lines if desired.
- Add Details and Highlights:
- Outlines: Outline your abstract shapes with black or white polish to make them stand out more. This adds definition and contrast to the design.
- Additional Accents: You can also add small details, such as dots or thin lines, to enhance the abstract design.
- Finish the Design:
- Top Coat: Apply a top coat over the entire nail to seal the design and add a glossy finish. This will help protect your abstract nail art and enhance its vibrancy.
- Drying: Allow your nails to dry completely before touching anything to avoid smudging the design.
Tips:
- Experiment with Colors: Don’t be afraid to mix and match bold colors to create a dynamic and visually interesting design. Try using complementary or contrasting colors for added impact.
- Blending Techniques: Use a sponge for smooth transitions between colors or a brush for more precise application. Experiment with different techniques to see what works best for your desired look.
- Clean Edges: Use nail polish remover and a small brush to clean up any excess polish around the edges of your nails for a neat finish.
Abstract Color Fusion Nail Art is a creative and bold design that allows for endless customization and personal expression. By blending vibrant colors and abstract shapes, you can create a one-of-a-kind manicure that stands out and showcases your artistic side.
19. Lavender Dreams: Iridescent Stiletto Nail Art
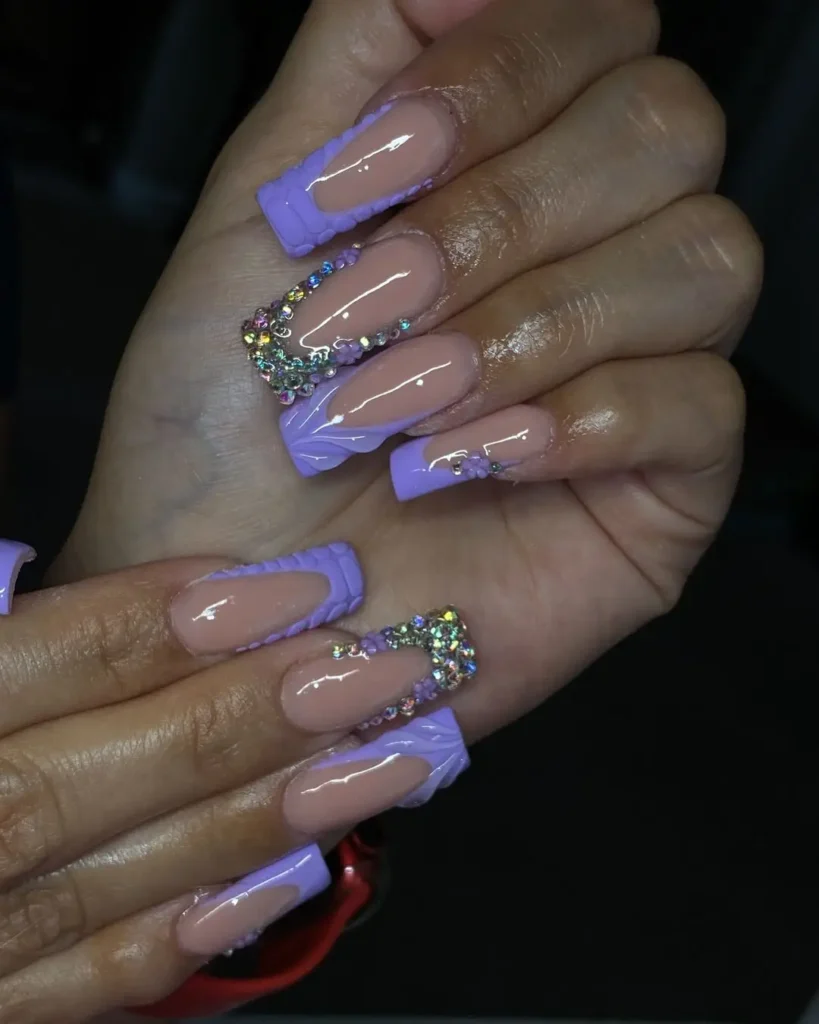
Lavender Dreams: Iridescent Stiletto Nail Art is a dreamy and elegant manicure featuring a soft lavender base with iridescent accents on stiletto-shaped nails. This design combines the sophistication of stiletto nails with the ethereal beauty of iridescence, creating a chic and captivating look. Here’s how to achieve this enchanting nail art:
Materials Needed:
- Lavender Nail Polish: For the base color.
- Iridescent Top Coat or Glitter: To add a shimmering, multicolored effect.
- Base Coat: To protect your natural nails.
- Top Coat: To seal the design and add shine.
- Nail Art Brush or Sponge (Optional): For blending and detailing.
- Cuticle Oil: To keep your cuticles healthy.
Steps to Achieve the Look:
- Prepare Your Nails:
- Clean and shape your nails into a stiletto shape. This shape is elongated with a pointed tip, offering a dramatic and elegant appearance.
- Apply a base coat to protect your natural nails and let it dry completely.
- Apply the Lavender Base:
- Paint your nails with lavender polish. Apply one or two coats for a smooth, even finish. Allow each coat to dry completely.
- Add Iridescent Accents:
- Iridescent Top Coat: Apply an iridescent top coat over the lavender base. This will give your nails a shimmering, color-shifting effect that catches the light beautifully.
- Iridescent Glitter (Optional): For additional sparkle, you can apply iridescent glitter or flakes on top of the lavender base before applying the top coat. Gently press the glitter into the wet polish and allow it to dry before sealing with the top coat.
- Finish the Design:
- Top Coat: Apply a top coat over the entire nail to seal the iridescent accents and add a glossy finish. This will help protect the design and enhance the iridescence.
- Drying: Allow your nails to dry completely before touching anything to avoid smudging.
- Final Touches:
- Cuticle Care: Apply cuticle oil around your nails to keep your cuticles healthy and moisturized, which will enhance the overall look of your manicure.
Tips:
- Iridescent Effect: The iridescent top coat or glitter should reflect a range of colors to complement the lavender base. Choose products that have a color-shifting effect for the best result.
- Blending: If using iridescent glitter, make sure it’s evenly distributed on the nails for a consistent look. You can use a sponge to gently blend the glitter into the base color.
- Maintenance: Regularly apply cuticle oil and keep your nails in good shape to maintain the pristine appearance of your manicure.
Lavender Dreams: Iridescent Stiletto Nail Art combines the soft elegance of lavender with the enchanting shimmer of iridescent accents, creating a sophisticated and mesmerizing look. Perfect for special occasions or anytime you want to add a touch of glamour and elegance to your style, this design highlights the beauty of stiletto nails with a dreamy and iridescent twist.
20. Classic Burgundy Elegance
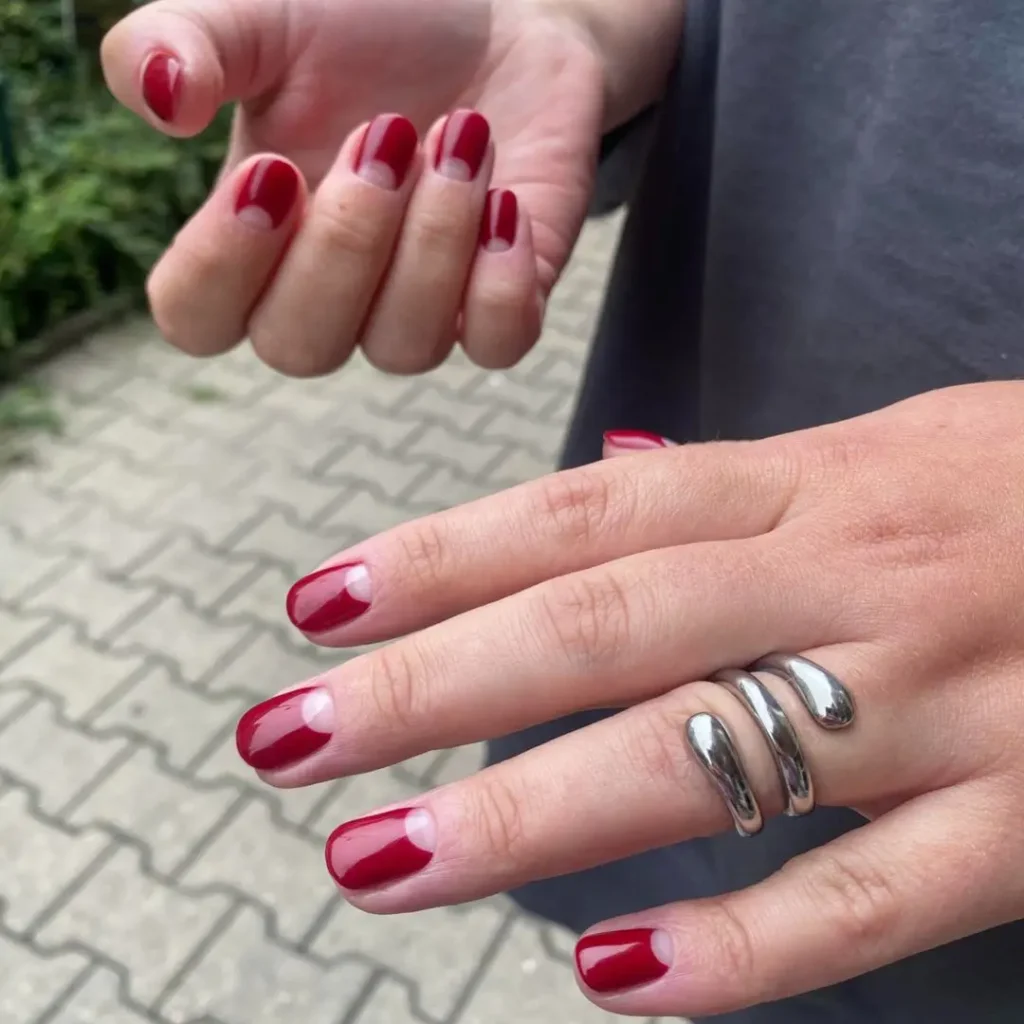
Classic Burgundy Elegance is a timeless and sophisticated nail design featuring a rich burgundy color that exudes refinement and style. This manicure is perfect for those who appreciate classic beauty with a touch of elegance. Here’s how to achieve this classic look:
Materials Needed:
- Burgundy Nail Polish: For the base color.
- Base Coat: To protect your natural nails.
- Top Coat: To seal the design and add shine.
- Nail Art Brush (Optional): For adding details if desired.
- Cuticle Oil: To keep your cuticles healthy.
Steps to Achieve the Look:
- Prepare Your Nails:
- Clean and shape your nails into your preferred shape, such as square, oval, or almond.
- Apply a base coat to protect your natural nails and let it dry completely.
- Apply the Burgundy Base:
- Paint your nails with burgundy polish. Apply one or two coats for a smooth, even finish. Ensure each coat dries completely before applying the next one.
- Finish the Design:
- Top Coat: Apply a top coat over the entire nail to seal the burgundy polish and add a glossy finish. This will enhance the richness of the burgundy color and provide a sleek, polished look.
- Drying: Allow your nails to dry completely before touching anything to avoid smudging.
- Final Touches:
- Cuticle Care: Apply cuticle oil around your nails to keep your cuticles healthy and moisturized. This will enhance the overall look of your manicure and keep your nails looking neat.
Tips:
- Color Consistency: Make sure the burgundy polish is well-mixed and applied evenly to avoid streaks or uneven color.
- Glossy Finish: For a truly elegant look, ensure your top coat is applied smoothly and evenly to maximize the shine and depth of the burgundy polish.
- Maintenance: Regularly apply cuticle oil and keep your nails in good shape to maintain the classic elegance of your manicure.
Classic Burgundy Elegance is a sophisticated and versatile nail design that brings out the rich, deep tones of burgundy. Its simplicity and timeless appeal make it suitable for any occasion, whether it’s a formal event or everyday wear, adding a touch of refinement and style to your overall look.
21. Lavender Love with a Floral Touch
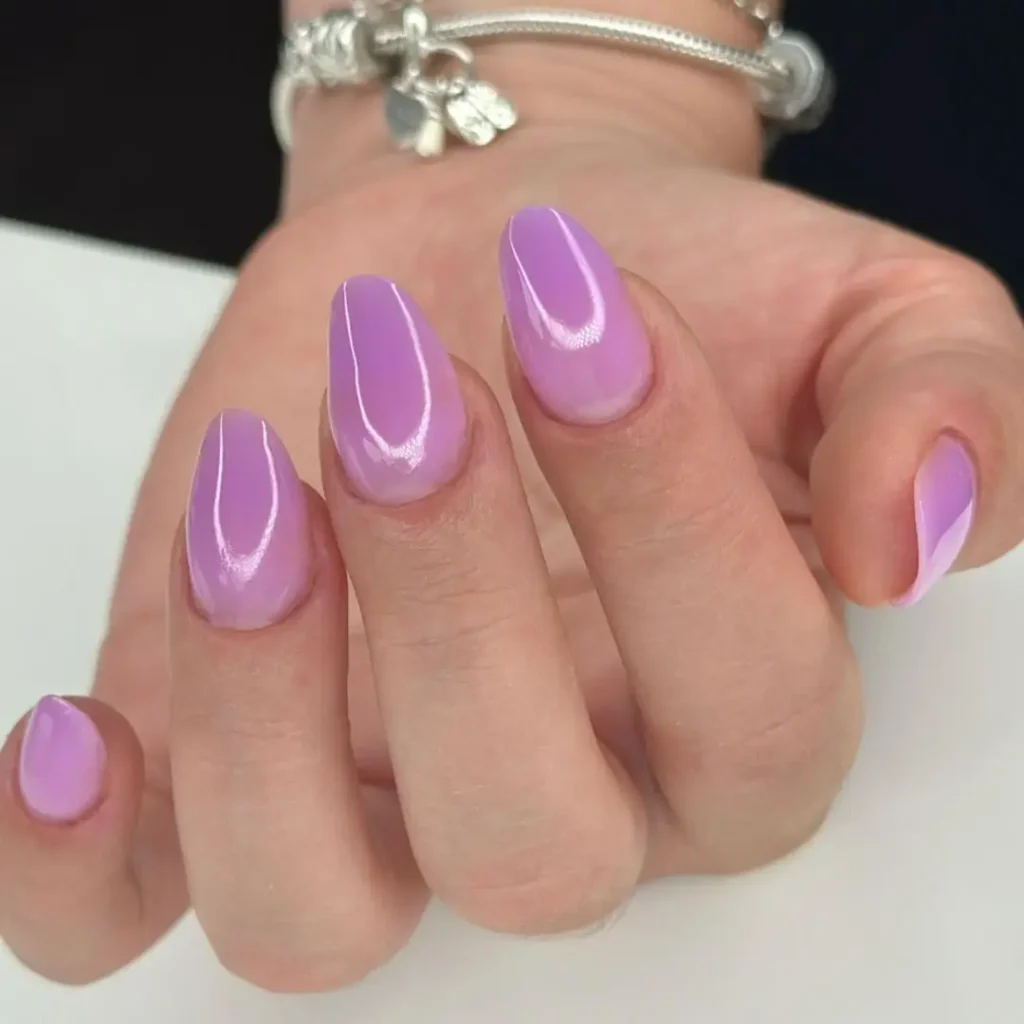
Lavender Love with a Floral Touch is a beautifully delicate nail design that combines a soft lavender base with elegant floral accents. This manicure offers a romantic and fresh look, perfect for those who appreciate subtle beauty with a hint of artistic flair. Here’s how to achieve this charming design:
Materials Needed:
- Lavender Nail Polish: For the base color.
- White or Light Pink Nail Polish: For floral details.
- Base Coat: To protect your natural nails.
- Top Coat: To seal the design and add shine.
- Nail Art Brush or Dotting Tool: For creating floral patterns.
- Cuticle Oil: To keep your cuticles healthy.
Steps to Achieve the Look:
- Prepare Your Nails:
- Clean and shape your nails into your desired shape, such as oval, square, or almond.
- Apply a base coat to protect your natural nails and let it dry completely.
- Apply the Lavender Base:
- Paint your nails with lavender polish. Apply one or two coats for a smooth, even finish. Allow each coat to dry completely.
- Add Floral Accents:
- Floral Design: Using a nail art brush or dotting tool, create delicate floral patterns on your lavender base. You can use white or light pink polish for the flowers. Consider simple designs like tiny roses, daisies, or abstract floral shapes.
- Technique: For a classic flower, create small dots in the center and add petals around them. For more detail, use a fine brush to add outlines or additional petals.
- Placement: You can apply floral accents to all nails or just a few accent nails for a balanced look.
- Floral Design: Using a nail art brush or dotting tool, create delicate floral patterns on your lavender base. You can use white or light pink polish for the flowers. Consider simple designs like tiny roses, daisies, or abstract floral shapes.
- Finish the Design:
- Top Coat: Apply a top coat over the entire nail to seal the floral design and add a glossy finish. This will enhance the lavender base and protect the floral accents.
- Drying: Allow your nails to dry completely before touching anything to avoid smudging.
- Final Touches:
- Cuticle Care: Apply cuticle oil around your nails to keep your cuticles healthy and moisturized. This will enhance the overall look of your manicure and keep your nails looking neat.
Tips:
- Floral Details: Keep the floral designs delicate and well-defined for a refined look. Avoid overcrowding the design to maintain a clean and elegant appearance.
- Color Coordination: Ensure that the floral colors contrast well with the lavender base to make the designs stand out. Light pink and white are gentle yet noticeable against a lavender backdrop.
- Nail Art Tools: Use a fine nail art brush or dotting tool for precision when creating floral patterns. This will help achieve neat and intricate designs.
Lavender Love with a Floral Touch combines the soft elegance of lavender with the romantic charm of floral designs, creating a refined and enchanting manicure. This design is perfect for adding a touch of femininity and grace to your look, making it ideal for special occasions or simply as a beautiful everyday style.
22. Playful Pink with Red Heart Accents
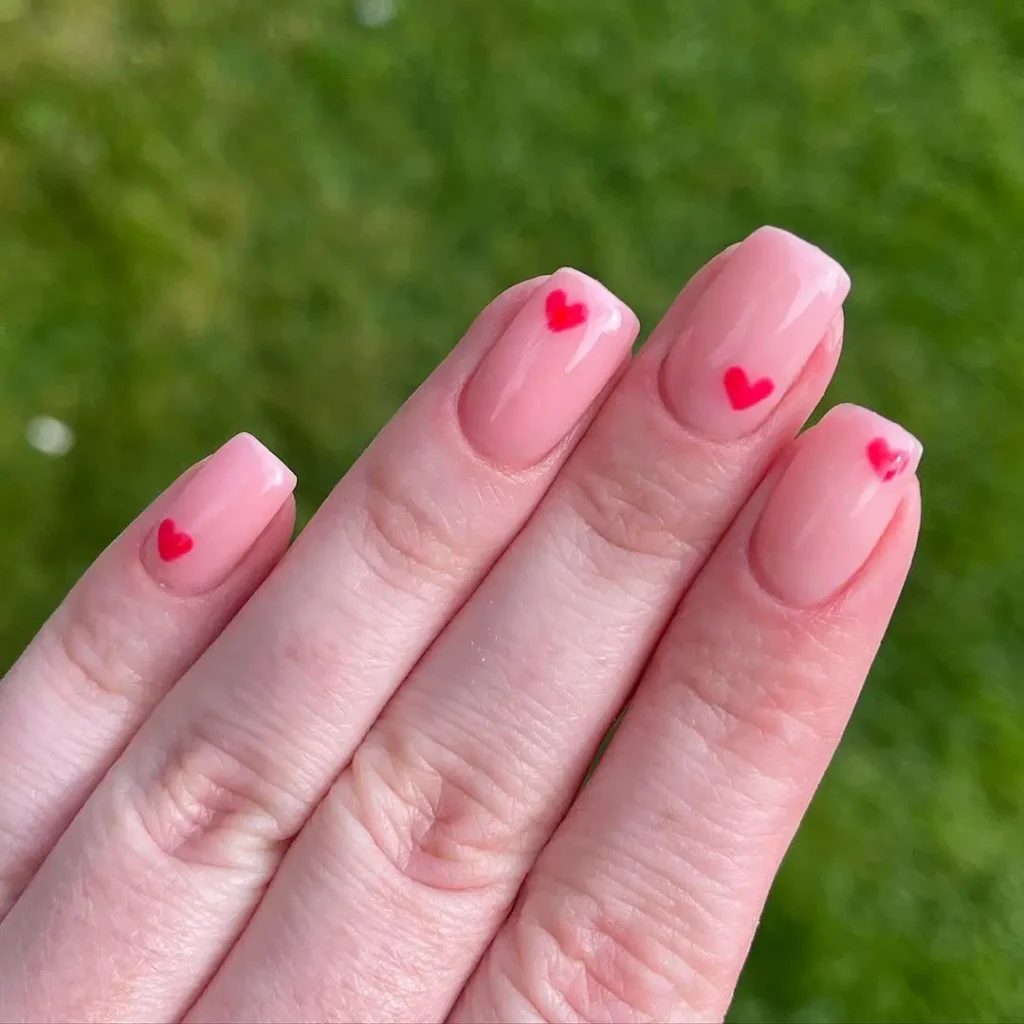
Playful Pink with Red Heart Accents is a fun and flirty nail design that combines a sweet pink base with vibrant red heart accents. This manicure is perfect for adding a touch of romance and playfulness to your look, making it ideal for special occasions like Valentine’s Day or any time you want to express a cheerful, loving vibe. Here’s how to achieve this charming design:
Materials Needed:
- Pink Nail Polish: For the base color.
- Red Nail Polish: For the heart accents.
- Base Coat: To protect your natural nails.
- Top Coat: To seal the design and add shine.
- Nail Art Brush or Dotting Tool: For creating heart shapes.
- Cuticle Oil: To keep your cuticles healthy.
Steps to Achieve the Look:
- Prepare Your Nails:
- Clean and shape your nails into your desired shape, such as square, oval, or almond.
- Apply a base coat to protect your natural nails and let it dry completely.
- Apply the Pink Base:
- Paint your nails with pink polish. Apply one or two coats for a smooth, even finish. Allow each coat to dry completely.
- Add Red Heart Accents:
- Heart Design: Using a nail art brush or dotting tool, create small red hearts on your pink base. You can place them on all nails or just on a few accent nails.
- Technique: To create hearts, use a dotting tool or a fine brush to draw two small dots close together, then connect them with a V shape. You can also use nail stickers or stamping tools for precise heart shapes.
- Placement: Consider placing hearts at the base of your nails, near the tips, or scattered randomly for a playful effect.
- Heart Design: Using a nail art brush or dotting tool, create small red hearts on your pink base. You can place them on all nails or just on a few accent nails.
- Finish the Design:
- Top Coat: Apply a top coat over the entire nail to seal the heart accents and add a glossy finish. This will enhance the pink base and protect the red hearts.
- Drying: Allow your nails to dry completely before touching anything to avoid smudging.
- Final Touches:
- Cuticle Care: Apply cuticle oil around your nails to keep your cuticles healthy and moisturized. This will enhance the overall look of your manicure and keep your nails looking neat.
Tips:
- Heart Size: Keep the heart shapes small and delicate for a cute, whimsical look. Larger hearts can be used for a bolder effect.
- Color Contrast: Ensure the red hearts contrast well with the pink base. Use a bright red for a striking effect or a deeper red for a more subtle look.
- Design Variation: Experiment with different heart placements and sizes to find the combination that best suits your style.
Playful Pink with Red Heart Accents is a delightful and cheerful manicure that brings together the sweetness of pink with the romance of red hearts. It’s a versatile design that can brighten up your day and add a touch of fun to your look, perfect for expressing love and affection or just enjoying a playful and stylish manicure.
23. Neon Lime Green Energy
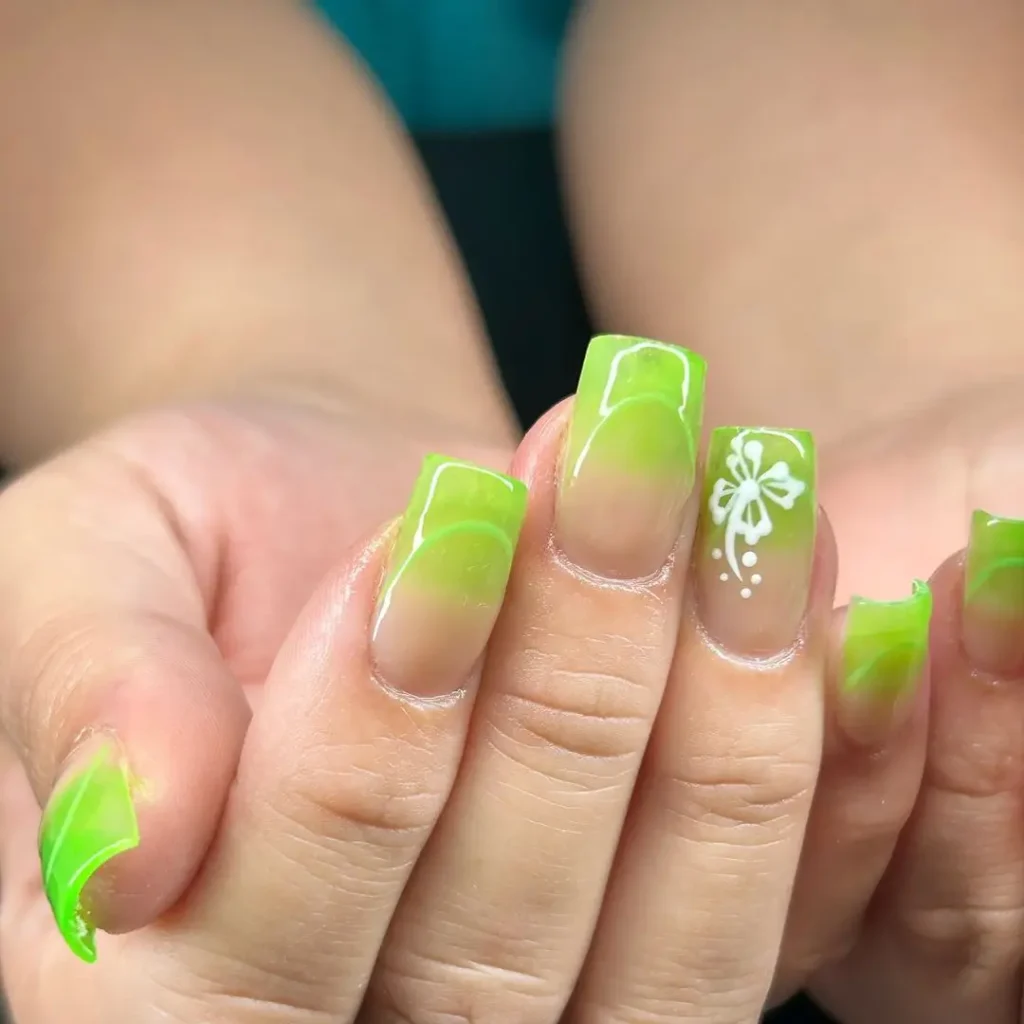
Neon Lime Green Energy is an electrifying nail design that combines a vibrant neon lime green base with bold, eye-catching accents. This manicure is perfect for those who love a high-impact, energetic look and want to make a statement with their nails. Here’s how to achieve this vibrant design:
Materials Needed:
- Neon Lime Green Nail Polish: For the base color.
- Black Nail Polish or White Nail Polish: For contrasting accents (optional).
- Base Coat: To protect your natural nails.
- Top Coat: To seal the design and add shine.
- Nail Art Brushes or Dotting Tools: For creating designs and details.
- Cuticle Oil: To keep your cuticles healthy.
Steps to Achieve the Look:
- Prepare Your Nails:
- Clean and shape your nails into your desired shape, such as square, oval, or almond.
- Apply a base coat to protect your natural nails and let it dry completely.
- Apply the Neon Lime Green Base:
- Paint your nails with neon lime green polish. Apply one or two coats for a bold, even finish. Neon colors often require multiple coats to achieve full opacity, so ensure each coat dries completely before applying the next one.
- Add Contrasting Accents (Optional):
- Design Details: Use black or white nail polish to create striking designs or patterns on your neon base. You can add geometric shapes, stripes, or dots for a dynamic look.
- Technique: Use a nail art brush or dotting tool to create your designs. For geometric patterns, tape can be used to achieve clean lines. For dots or abstract shapes, a dotting tool will help you get precise placements.
- Placement: You can create accent designs on all nails or just on a few accent nails for a balanced look.
- Design Details: Use black or white nail polish to create striking designs or patterns on your neon base. You can add geometric shapes, stripes, or dots for a dynamic look.
- Finish the Design:
- Top Coat: Apply a top coat over the entire nail to seal the neon polish and any additional designs. This will enhance the vibrancy of the neon color and add a glossy finish.
- Drying: Allow your nails to dry completely before touching anything to avoid smudging.
- Final Touches:
- Cuticle Care: Apply cuticle oil around your nails to keep your cuticles healthy and moisturized. This will enhance the overall look of your manicure and keep your nails looking neat.
Tips:
- Neon Polish: Neon colors can be quite striking and may need a white base coat underneath for the brightest effect. If you find your neon lime green isn’t as vibrant as you’d like, consider applying a white base before the neon polish.
- Design Contrast: Use contrasting colors like black or white to create designs that stand out against the neon green. This adds depth and interest to the manicure.
- Top Coat Application: Neon polishes can sometimes dry to a matte finish. Ensure your top coat is applied smoothly to maintain the glossy, vibrant appearance of the neon color.
Neon Lime Green Energy is a bold and dynamic manicure that captures attention with its vibrant color and striking accents. This design is perfect for those who enjoy making a statement with their nails and want to add a burst of energy and excitement to their look.
24. Glitter Edged Pink Heart Tips
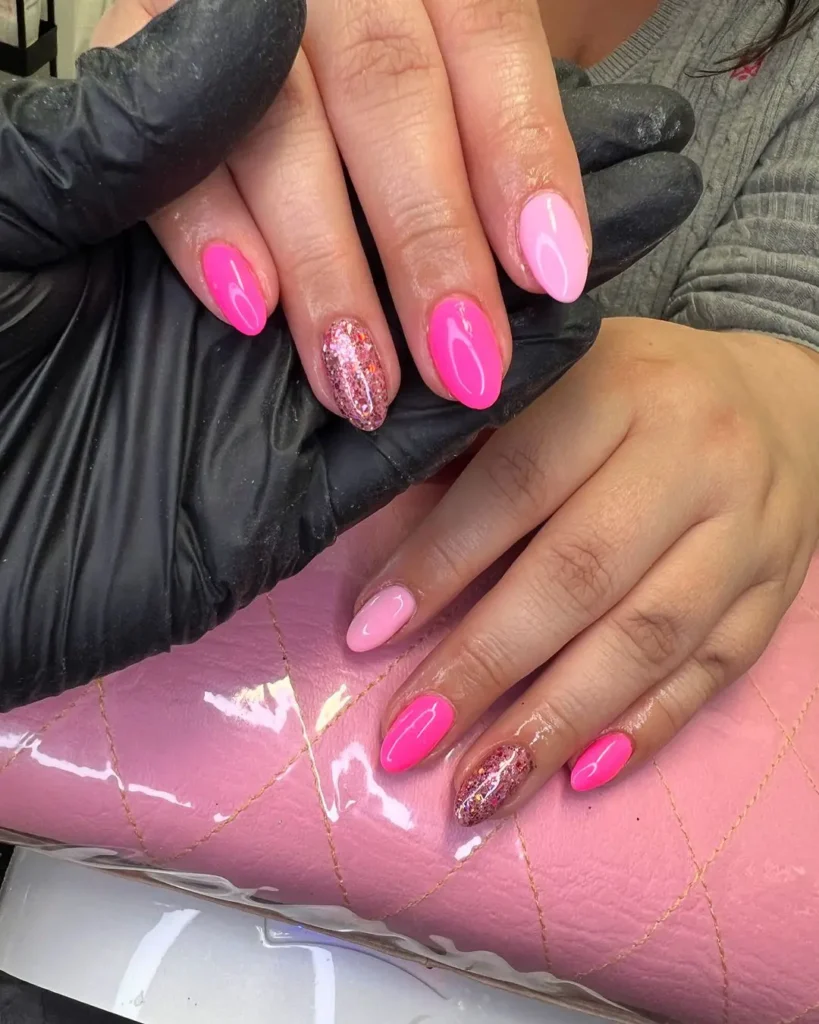
Glitter Edged Pink Heart Tips is a charming and sparkling nail design that features soft pink nails with heart-shaped tips adorned with glitter. This manicure blends playful romance with a touch of sparkle, making it perfect for special occasions or just to add a bit of fun to your everyday look. Here’s how to achieve this dazzling design:
Materials Needed:
- Pink Nail Polish: For the base color.
- Glitter Nail Polish or Loose Glitter: For the glittery tips.
- Base Coat: To protect your natural nails.
- Top Coat: To seal the design and add shine.
- Heart Nail Stickers or Nail Art Brush: For creating heart shapes.
- Nail Art Tape or Striping Tape: To help with precise glitter application (optional).
- Cuticle Oil: To keep your cuticles healthy.
Steps to Achieve the Look:
- Prepare Your Nails:
- Clean and shape your nails into your desired shape, such as square, oval, or almond.
- Apply a base coat to protect your natural nails and let it dry completely.
- Apply the Pink Base:
- Paint your nails with pink polish. Apply one or two coats for a smooth, even finish. Allow each coat to dry completely.
- Create the Heart Tips:
- Heart Shape: Use a heart nail sticker or a nail art brush to create heart shapes at the tips of your nails. If using stickers, apply them carefully to the tips of your nails.
- Glitter Application: Apply glitter nail polish or loose glitter to the heart shapes. If using loose glitter, gently press it onto the wet polish for even coverage. You can also use nail art tape to create clean lines for the glitter application.
- Technique: For a more defined edge, use nail art tape to create a straight line at the tip of your nail where the glitter will be applied. Remove the tape carefully to reveal a clean line of glitter.
- Finish the Design:
- Top Coat: Apply a top coat over the entire nail to seal the glitter and add a glossy finish. This will enhance the shine of the glitter and protect the design.
- Drying: Allow your nails to dry completely before touching anything to avoid smudging.
- Final Touches:
- Cuticle Care: Apply cuticle oil around your nails to keep your cuticles healthy and moisturized. This will enhance the overall look of your manicure and keep your nails looking neat.
Tips:
- Glitter Placement: Ensure the glitter is evenly applied and covers the heart shapes completely. For a more precise application, use a small brush or a nail art tool.
- Heart Design: If creating hearts with a brush, practice the shape on a piece of paper first to get the technique right. You can also use heart-shaped nail decals for a more uniform look.
- Top Coat Application: To avoid glitter from dulling or shifting, apply the top coat gently and avoid pressing too hard.
Glitter Edged Pink Heart Tips is a sweet and sparkling manicure that combines the softness of pink with the romantic charm of heart shapes and the dazzling effect of glitter. This design is perfect for adding a touch of whimsy and glamour to any look, making it ideal for special occasions or just to brighten up your day.
25. Pastel French Tip Elegance
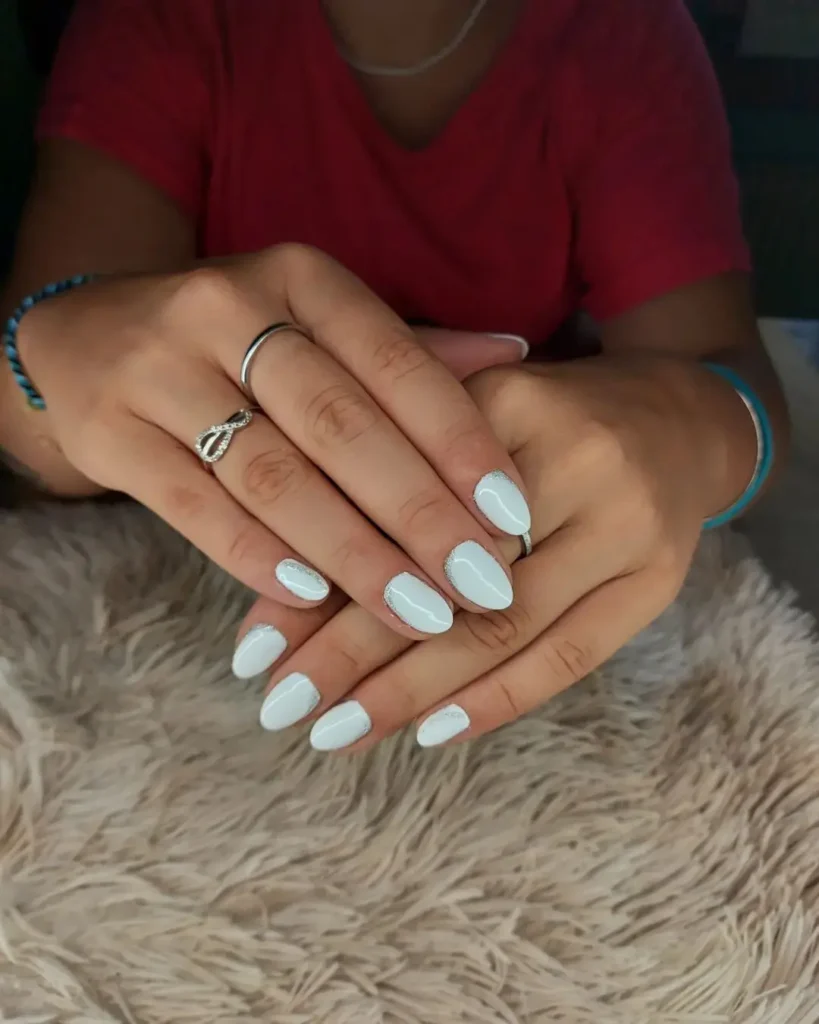
Pastel French Tip Elegance is a refined and modern twist on the classic French manicure, featuring soft pastel tips for a fresh and sophisticated look. This design combines the timeless elegance of the French manicure with the gentle charm of pastel colors, making it perfect for any occasion. Here’s how to achieve this chic and elegant look:
Materials Needed:
- Base Coat: To protect your natural nails.
- Pastel Nail Polishes: Soft pastel shades for the tips (e.g., pastel pink, blue, lavender, mint green).
- Neutral Nail Polish: A light, sheer shade for the base.
- Top Coat: To seal the design and add shine.
- Nail Art Tape or French Tip Guides: For creating clean lines.
- Nail Art Brush (Optional): For precise application.
- Cuticle Oil: To keep your cuticles healthy.
Steps to Achieve the Look:
- Prepare Your Nails:
- Clean and shape your nails into your desired shape, such as square, oval, or almond.
- Apply a base coat to protect your natural nails and let it dry completely.
- Apply the Neutral Base:
- Paint your nails with a neutral, sheer polish. This will be the base color for your manicure. Apply one or two coats for a smooth finish and allow it to dry completely.
- Create the Pastel French Tips:
- Tip Guides: Apply nail art tape or French tip guides along the edge of your nails to create clean lines. Make sure the tape is firmly pressed down to prevent polish from seeping underneath.
- Pastel Polish Application: Choose a pastel shade and carefully paint the tips of your nails. Apply one or two coats for an even, opaque finish. Allow each coat to dry completely.
- Technique: For a smooth application, use a small nail art brush to clean up any mistakes along the edges. Remove the tape or guides carefully to reveal a clean, sharp line.
- Finish the Design:
- Top Coat: Apply a top coat over the entire nail to seal the pastel tips and add a glossy finish. This will enhance the look and protect your manicure.
- Drying: Allow your nails to dry completely before touching anything to avoid smudging.
- Final Touches:
- Cuticle Care: Apply cuticle oil around your nails to keep your cuticles healthy and moisturized. This will enhance the overall look of your manicure and keep your nails looking neat.
Tips:
- Pastel Colors: Choose pastel shades that complement each other for a harmonious look. You can also experiment with different pastel colors for each nail for a playful effect.
- French Tip Guides: Ensure the guides are properly aligned and firmly attached to achieve clean, crisp lines.
- Application Precision: Use a fine brush to tidy up the edges if needed, especially if you find that some pastel polish has bled under the tape.
Pastel French Tip Elegance is a sophisticated and modern manicure that combines the classic French tip with soft pastel colors. This design offers a fresh and refined look, making it perfect for any occasion where you want to add a touch of understated elegance to your style.
26. Chic Black & Silver Textured Manicure
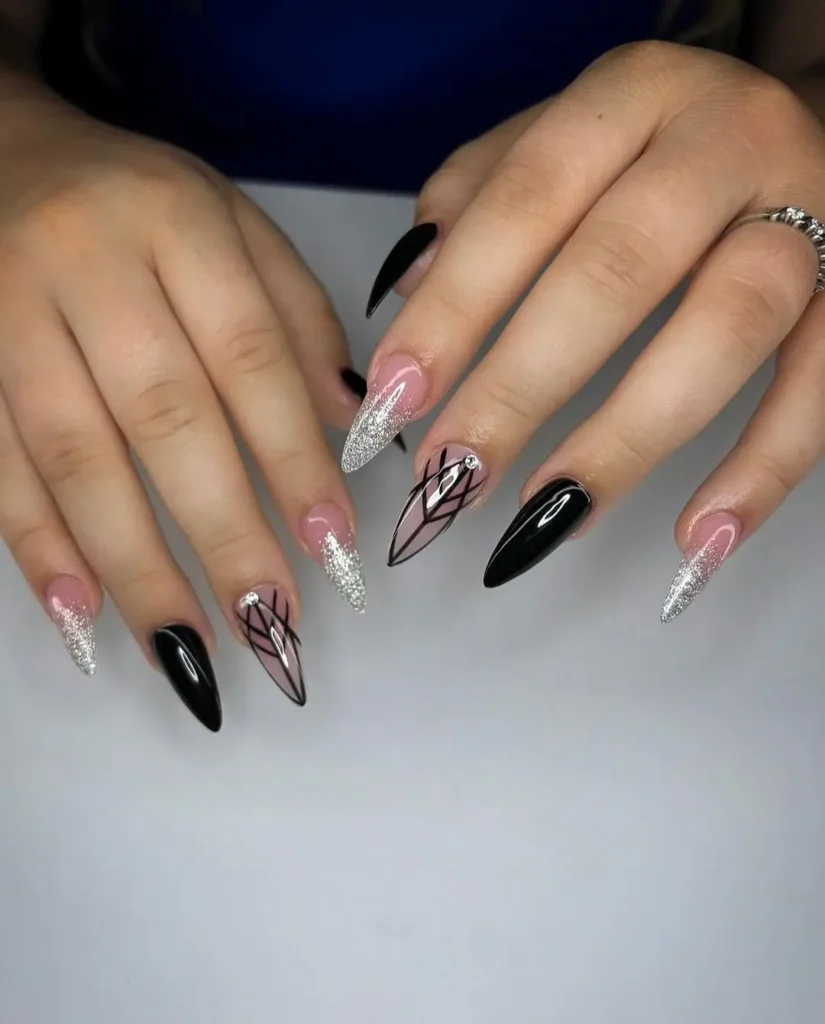
Chic Black & Silver Textured Manicure is a stylish and sophisticated nail design that combines the classic elegance of black with the modern allure of silver textures. This manicure is perfect for adding a touch of glamour and edge to your look, making it ideal for formal events or when you want to make a statement. Here’s how to achieve this chic and textured look:
Materials Needed:
- Black Nail Polish: For the base color.
- Silver Textured Polish or Silver Nail Powder: For the textured accents.
- Base Coat: To protect your natural nails.
- Top Coat: To seal the design and add shine.
- Nail Art Brush or Sponge: For applying textured polish or powder.
- Nail Art Tape (Optional): For clean lines and precise application.
- Cuticle Oil: To keep your cuticles healthy.
Steps to Achieve the Look:
- Prepare Your Nails:
- Clean and shape your nails into your desired shape, such as square, oval, or almond.
- Apply a base coat to protect your natural nails and let it dry completely.
- Apply the Black Base:
- Paint your nails with black polish. Apply one or two coats for a smooth, even finish. Allow each coat to dry completely.
- Add Silver Textured Accents:
- Silver Textured Polish: Apply silver textured polish to specific areas of your nails for a striking contrast against the black base. You can create patterns or shapes, such as stripes, dots, or geometric designs.
- Technique: Use a nail art brush to apply the textured polish, or use a sponge for a more diffused effect.
- Silver Nail Powder: Alternatively, use silver nail powder for a more intense texture. Apply a layer of clear polish where you want the powder, then press the powder onto the wet polish. Seal with a top coat.
- Technique: Apply a thin layer of clear polish, then sprinkle or press the silver powder onto the nail. Gently press with a sponge or your finger to ensure adhesion. Apply a top coat to seal the powder in place.
- Silver Textured Polish: Apply silver textured polish to specific areas of your nails for a striking contrast against the black base. You can create patterns or shapes, such as stripes, dots, or geometric designs.
- Finish the Design:
- Top Coat: Apply a top coat over the entire nail to seal the design and add a glossy finish. This will enhance the texture and protect your manicure.
- Drying: Allow your nails to dry completely before touching anything to avoid smudging.
- Final Touches:
- Cuticle Care: Apply cuticle oil around your nails to keep your cuticles healthy and moisturized. This will enhance the overall look of your manicure and keep your nails looking neat.
Tips:
- Texture Placement: Be creative with the placement of the silver textures. You can use tape to create clean lines or use a sponge for a more abstract look.
- Application Precision: For precise application of silver polish or powder, use a small brush or nail art tool to avoid messiness.
- Top Coat Application: Ensure the top coat is applied evenly to maintain the texture and shine of the silver accents.
Chic Black & Silver Textured Manicure offers a bold and elegant look by combining deep black with shimmering silver textures. This design is perfect for those who want to add a touch of sophistication and edge to their style, making it suitable for both formal events and everyday glamour.
27. Elegant White & Pink Floral Accents
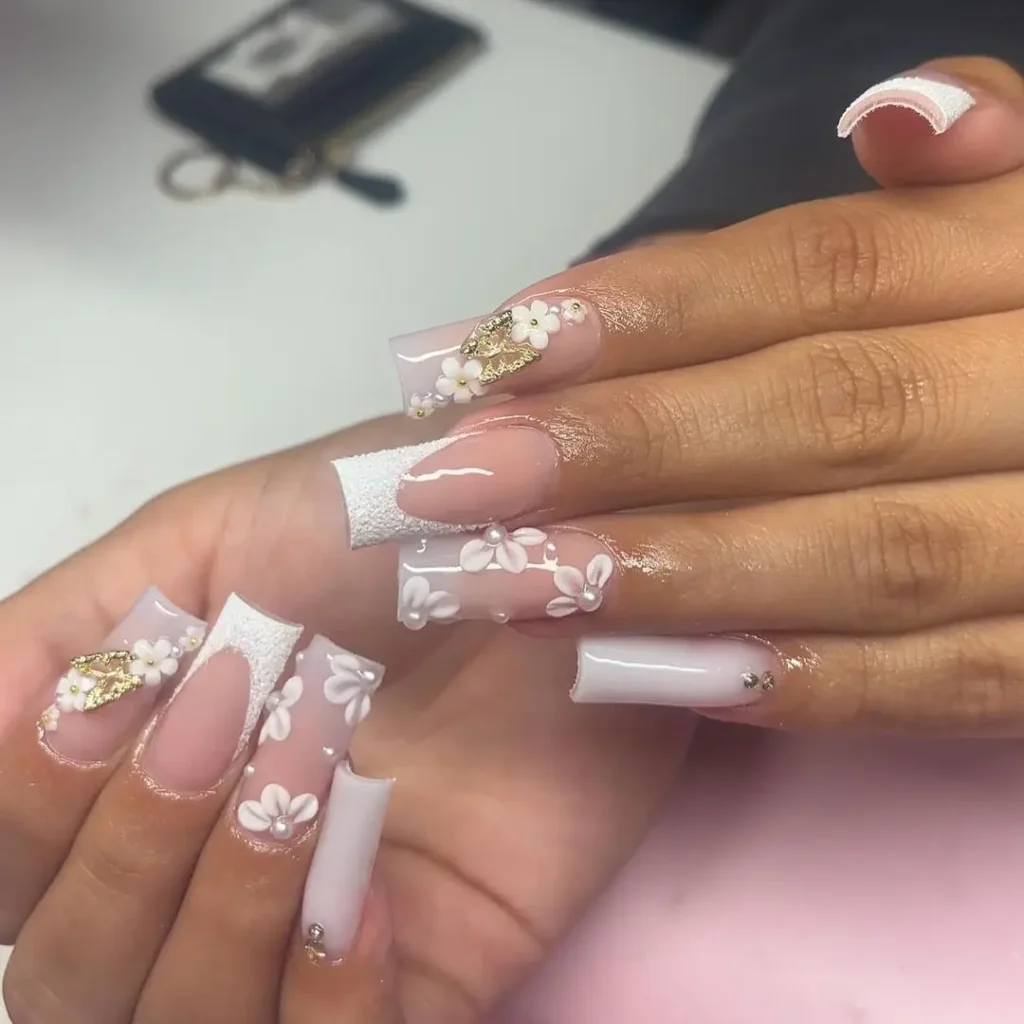
Elegant White & Pink Floral Accents is a sophisticated nail design that combines a pristine white base with delicate pink floral accents. This manicure is perfect for adding a touch of elegance and romance to your look, making it ideal for weddings, special occasions, or anytime you want a refined, feminine touch. Here’s how to achieve this elegant design:
Materials Needed:
- White Nail Polish: For the base color.
- Pink Nail Polish: For the floral accents.
- Base Coat: To protect your natural nails.
- Top Coat: To seal the design and add shine.
- Nail Art Brush or Dotting Tool: For creating floral designs.
- Nail Art Tape (Optional): For clean lines and precise application.
- Cuticle Oil: To keep your cuticles healthy.
Steps to Achieve the Look:
- Prepare Your Nails:
- Clean and shape your nails into your desired shape, such as square, oval, or almond.
- Apply a base coat to protect your natural nails and let it dry completely.
- Apply the White Base:
- Paint your nails with white polish. Apply one or two coats for a smooth, even finish. Allow each coat to dry completely.
- Create Pink Floral Accents:
- Floral Design: Use a nail art brush or dotting tool to create delicate pink flowers on your white base. You can opt for simple flower shapes or more intricate designs, such as roses or daisies.
- Technique: To create flowers, start with small dots for the center of the flower and then add petals around the center. You can use a fine brush for detailed work or a dotting tool for a more rounded flower.
- Placement: Add floral accents to all nails for a uniform look or choose one or two accent nails to feature the floral designs for a more balanced style.
- Floral Design: Use a nail art brush or dotting tool to create delicate pink flowers on your white base. You can opt for simple flower shapes or more intricate designs, such as roses or daisies.
- Finish the Design:
- Top Coat: Apply a top coat over the entire nail to seal the floral accents and add a glossy finish. This will enhance the design and protect your manicure.
- Drying: Allow your nails to dry completely before touching anything to avoid smudging.
- Final Touches:
- Cuticle Care: Apply cuticle oil around your nails to keep your cuticles healthy and moisturized. This will enhance the overall look of your manicure and keep your nails looking neat.
Tips:
- Floral Design: Experiment with different shades of pink to create depth and variation in your floral designs. You can also add small details, like green leaves or dots, to complement the flowers.
- Application Precision: Use a fine brush for detailed floral designs and a dotting tool for creating petals and flower centers. Practice on a piece of paper if needed.
- Top Coat Application: Apply the top coat gently to avoid smudging the floral designs.
Elegant White & Pink Floral Accents offers a beautiful and refined look by combining a classic white base with charming pink floral details. This design provides a graceful and feminine touch, making it ideal for adding elegance and romance to any occasion.
28. Delicate Floral Elegance
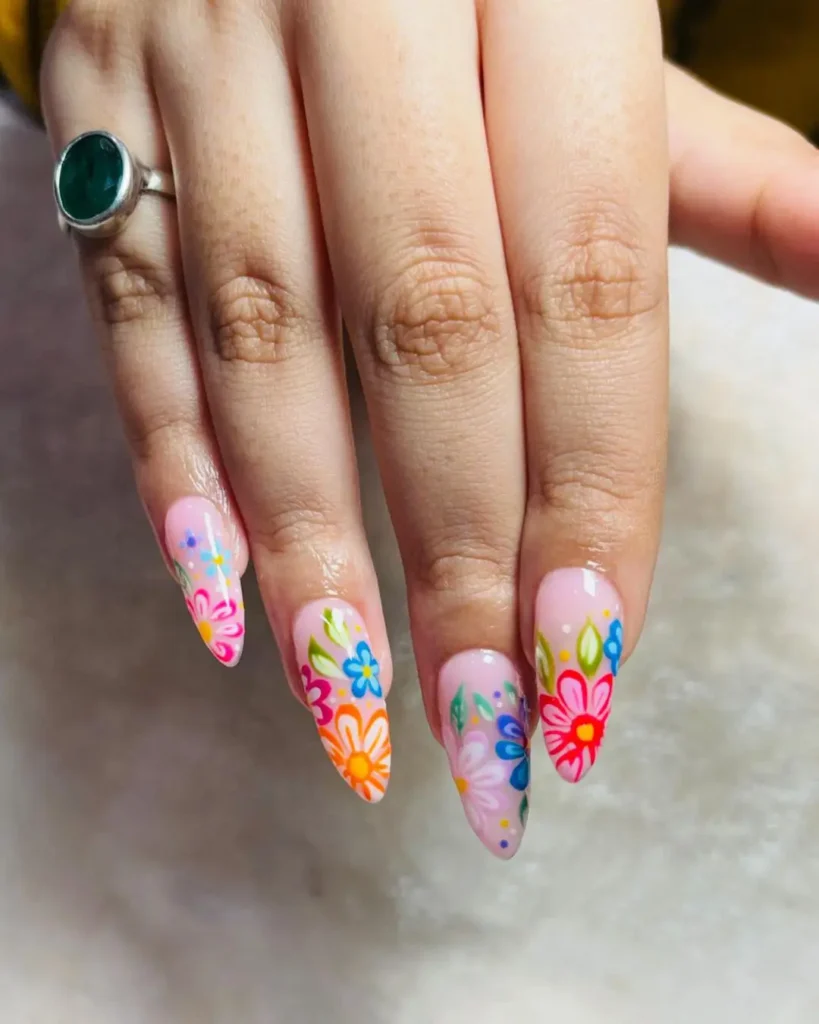
Delicate Floral Elegance is a refined and graceful nail design that features soft floral patterns on a neutral or pastel base. This manicure combines subtlety with sophistication, making it perfect for any occasion where you want a touch of elegance and charm. Here’s how to achieve this delicate and elegant look:
Materials Needed:
- Neutral or Pastel Nail Polish: For the base color (e.g., beige, light pink, lavender, or mint green).
- Floral Nail Art Polish or Brush: For creating floral designs.
- Base Coat: To protect your natural nails.
- Top Coat: To seal the design and add shine.
- Nail Art Brush or Dotting Tool: For detailed floral designs.
- Nail Art Tape (Optional): For clean lines and precise application.
- Cuticle Oil: To keep your cuticles healthy.
Steps to Achieve the Look:
- Prepare Your Nails:
- Clean and shape your nails into your desired shape, such as square, oval, or almond.
- Apply a base coat to protect your natural nails and let it dry completely.
- Apply the Base Color:
- Paint your nails with a neutral or pastel polish. Apply one or two coats for a smooth, even finish. Allow each coat to dry completely.
- Create Delicate Floral Designs:
- Floral Patterns: Use a nail art brush or dotting tool to create delicate floral patterns on your base. You can choose to paint small flowers, such as daisies, roses, or lavender sprigs.
- Technique: Start with small dots or brush strokes to form the flower centers and petals. For a more intricate design, add tiny details like leaves or additional petals.
- Placement: Add floral designs to all nails for a consistent look or select one or two accent nails to feature the floral patterns for a more subtle approach.
- Floral Patterns: Use a nail art brush or dotting tool to create delicate floral patterns on your base. You can choose to paint small flowers, such as daisies, roses, or lavender sprigs.
- Finish the Design:
- Top Coat: Apply a top coat over the entire nail to seal the floral designs and add a glossy finish. This will enhance the look and protect your manicure.
- Drying: Allow your nails to dry completely before touching anything to avoid smudging.
- Final Touches:
- Cuticle Care: Apply cuticle oil around your nails to keep your cuticles healthy and moisturized. This will enhance the overall look of your manicure and keep your nails looking neat.
Tips:
- Floral Design: Use a variety of pastel colors for the flowers to add depth and dimension. You can also experiment with different flower shapes and sizes for a more intricate design.
- Application Precision: For the most delicate designs, use a fine brush and take your time to ensure each flower is well-defined. Practice on a piece of paper if needed.
- Top Coat Application: Apply the top coat gently to avoid smudging the floral designs. A quick-drying top coat can help speed up the process.
Delicate Floral Elegance provides a timeless and sophisticated look by combining a soft base color with intricate floral patterns. This manicure offers a gentle yet elegant touch, making it perfect for special occasions or any day you want to feel refined and stylish.
29. Sleek Pink Ombré Perfection
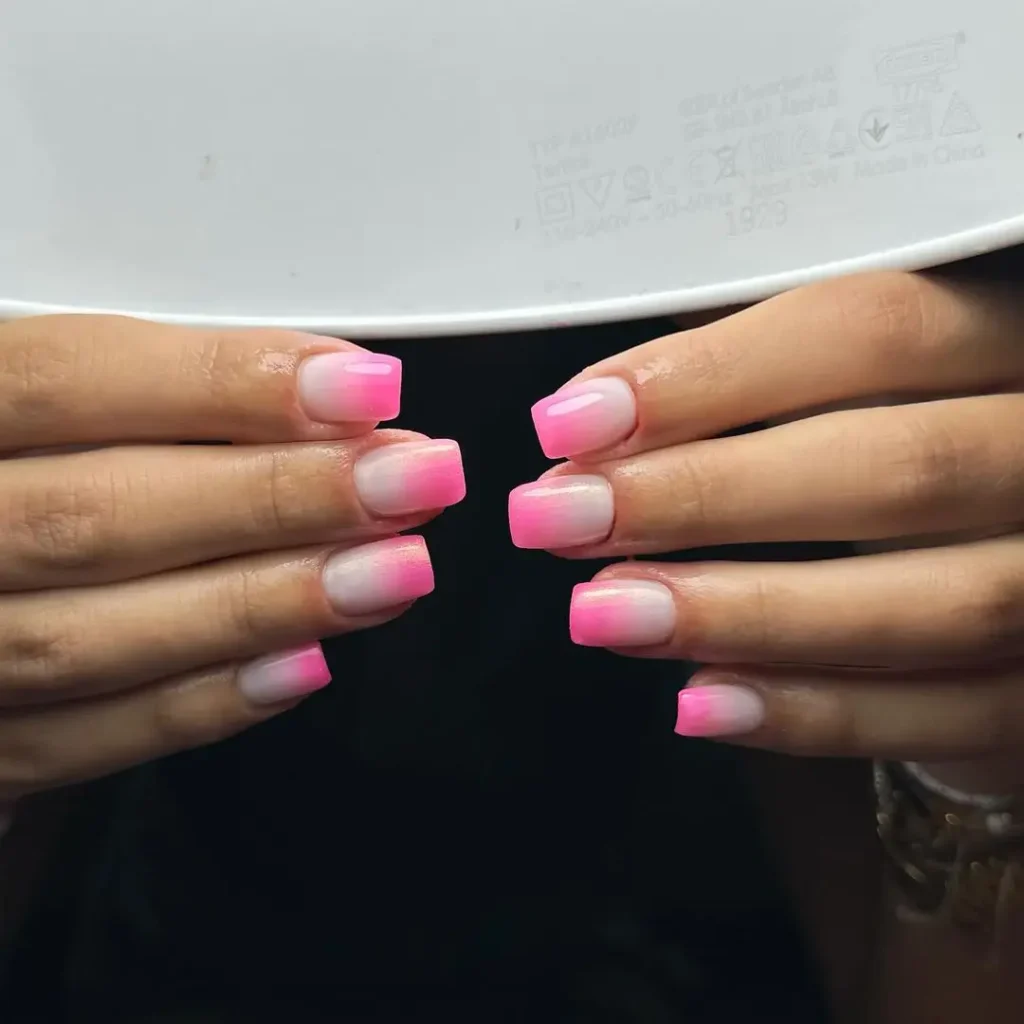
Sleek Pink Ombré Perfection is a stunning nail design that features a smooth gradient of pink shades, transitioning seamlessly from light to dark or vice versa. This manicure creates a chic and elegant look with a soft and sophisticated touch, ideal for any occasion where you want to make a refined statement. Here’s how to achieve this perfect ombré effect:
Materials Needed:
- Light Pink Nail Polish: For the base of the ombré.
- Dark Pink Nail Polish: For the gradient transition.
- Sponge: For blending the colors.
- Base Coat: To protect your natural nails.
- Top Coat: To seal the design and add shine.
- Nail Art Brush (Optional): For blending and clean-up.
- Cuticle Oil: To keep your cuticles healthy.
Steps to Achieve the Look:
- Prepare Your Nails:
- Clean and shape your nails into your desired shape, such as square, oval, or almond.
- Apply a base coat to protect your natural nails and let it dry completely.
- Apply the Base Colors:
- Paint your nails with the light pink polish as the base color. Apply one or two coats for a smooth, even finish. Allow each coat to dry completely.
- Create the Ombré Effect:
- Blend Colors: Using a makeup sponge, apply a small amount of both light pink and dark pink polish to the sponge. Lightly dab the sponge onto your nails, starting from the tip and working your way down to blend the two shades together. Repeat the process as needed to achieve a smooth gradient.
- Technique: For best results, use a gentle dabbing motion to avoid streaks. You can also use a small nail art brush to blend any harsh lines if needed.
- Transition: Ensure the transition between the two pink shades is seamless. You can adjust the amount of polish on the sponge to control the gradient effect.
- Blend Colors: Using a makeup sponge, apply a small amount of both light pink and dark pink polish to the sponge. Lightly dab the sponge onto your nails, starting from the tip and working your way down to blend the two shades together. Repeat the process as needed to achieve a smooth gradient.
- Finish the Design:
- Top Coat: Apply a top coat over the entire nail to seal the ombré design and add a glossy finish. This will enhance the gradient and protect your manicure.
- Drying: Allow your nails to dry completely before touching anything to avoid smudging.
- Final Touches:
- Cuticle Care: Apply cuticle oil around your nails to keep your cuticles healthy and moisturized. This will enhance the overall look of your manicure and keep your nails looking neat.
Tips:
- Sponge Application: Use a new or clean sponge for each gradient to avoid color mixing. Dampen the sponge slightly to help blend the colors more smoothly.
- Color Intensity: Adjust the intensity of the gradient by varying the amount of dark pink polish applied to the sponge.
- Clean-Up: Use a small brush dipped in nail polish remover to clean up any excess polish around the edges of your nails.
Sleek Pink Ombré Perfection provides a sophisticated and stylish look with a smooth gradient effect in pink shades. This manicure is versatile and elegant, making it perfect for both everyday wear and special occasions.
30. Blossoming Blues: Floral Accent Nail Inspiration
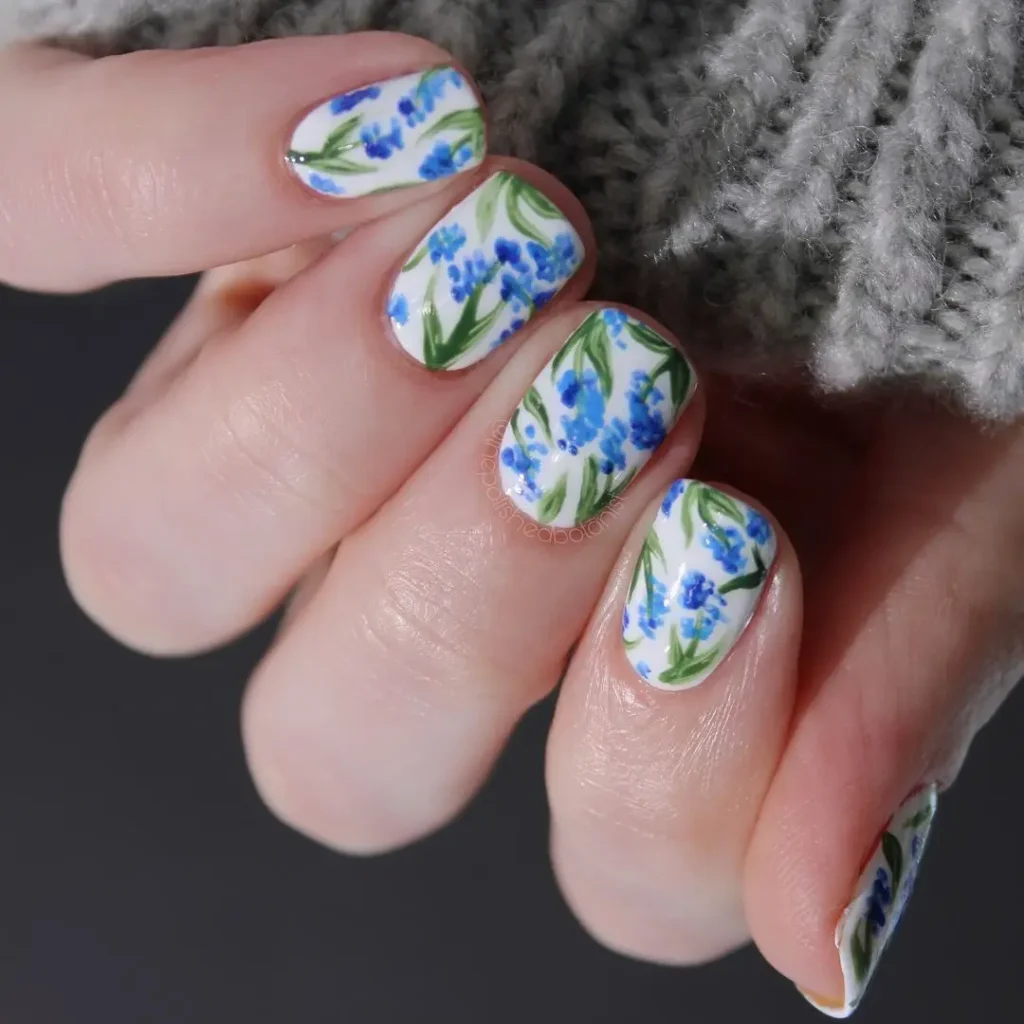
Blossoming Blues: Floral Accent Nail Inspiration is a vibrant and elegant design that combines various shades of blue with delicate floral accents. This manicure brings a refreshing and artistic touch to your nails, ideal for adding a pop of color and a hint of sophistication. Here’s how to create this beautiful look:
Materials Needed:
- Base Blue Nail Polishes: A selection of blue shades (e.g., light blue, navy, teal) for the main color.
- White Nail Polish: For the floral accents.
- Base Coat: To protect your natural nails.
- Top Coat: To seal the design and add shine.
- Nail Art Brush or Dotting Tool: For creating floral designs.
- Nail Art Tape (Optional): For clean lines and precise application.
- Cuticle Oil: To keep your cuticles healthy.
Steps to Achieve the Look:
- Prepare Your Nails:
- Clean and shape your nails into your desired shape, such as square, oval, or almond.
- Apply a base coat to protect your natural nails and let it dry completely.
- Apply the Base Color:
- Main Blue Color: Paint your nails with your chosen shade of blue. Apply one or two coats for a smooth, even finish. Allow each coat to dry completely.
- Accent Nails: Choose one or two nails per hand to be the accent nails. Paint these nails with a contrasting or complementary shade of blue.
- Create Floral Accents:
- Floral Design: Use a nail art brush or dotting tool to create delicate floral patterns on your accent nails. You can design small flowers, such as daisies or roses, in white or a contrasting color.
- Technique: For the flowers, start with small dots for the centers and then add petals around the center. Use a fine brush to create detailed petals or leaves. Add details like small dots or lines to enhance the design.
- Placement: Arrange the floral designs artistically on the accent nails. You can place them in a corner, along the edges, or in the center of the nail.
- Floral Design: Use a nail art brush or dotting tool to create delicate floral patterns on your accent nails. You can design small flowers, such as daisies or roses, in white or a contrasting color.
- Finish the Design:
- Top Coat: Apply a top coat over the entire nail to seal the floral accents and add a glossy finish. This will enhance the design and protect your manicure.
- Drying: Allow your nails to dry completely before touching anything to avoid smudging.
- Final Touches:
- Cuticle Care: Apply cuticle oil around your nails to keep your cuticles healthy and moisturized. This will enhance the overall look of your manicure and keep your nails looking neat.
Tips:
- Color Variations: Experiment with different shades of blue for a more dynamic look. You can also add shimmer or metallic blues for extra flair.
- Floral Design: If you prefer a more intricate design, use a variety of colors for the flowers and leaves to create a more vibrant and detailed look.
- Application Precision: Use a small brush for detailed floral designs and a dotting tool for round shapes and smaller details.
Blossoming Blues: Floral Accent Nail Inspiration offers a striking and elegant look by combining rich blue shades with delicate floral accents. This design provides a sophisticated and refreshing touch, perfect for adding a burst of color and artistry to any occasion.
31. Festive Frenzy Nail Art

Festive Frenzy Nail Art is a fun and vibrant design that captures the excitement and cheer of festive occasions. Whether it’s for a holiday, celebration, or just to add a splash of joy to your everyday look, this nail art combines bright colors, sparkles, and playful patterns. Here’s how to create this lively and festive manicure:
Materials Needed:
- Bright Nail Polishes: Choose a selection of vibrant colors (e.g., red, green, blue, gold, silver).
- Glitter Nail Polish or Glitter: For added sparkle and festivity.
- Base Coat: To protect your natural nails.
- Top Coat: To seal the design and add shine.
- Nail Art Brushes or Dotting Tools: For creating patterns and details.
- Nail Art Tape or Stickers (Optional): For clean lines and precise application.
- Cuticle Oil: To keep your cuticles healthy.
Steps to Achieve the Look:
- Prepare Your Nails:
- Clean and shape your nails into your desired shape, such as square, oval, or almond.
- Apply a base coat to protect your natural nails and let it dry completely.
- Apply Base Colors:
- Choose a Base Color: Apply a bright and festive base color to your nails. You can use different colors on different nails or stick to one color for a uniform look. Apply one or two coats for an even finish and let it dry completely.
- Add Festive Patterns:
- Patterns and Designs: Use nail art brushes or dotting tools to create festive patterns. Consider designs like snowflakes, stars, stripes, or confetti. You can also create fun patterns like holiday-themed shapes or abstract designs.
- Technique: For detailed patterns, use a fine brush for precise lines and shapes. For a more playful look, use a dotting tool to add small dots or accents.
- Glitter Accents: Apply glitter polish or loose glitter to specific areas for added sparkle. You can use glitter to create ombré effects, accents, or to highlight parts of your festive design.
- Technique: For a scattered glitter effect, dab a small amount of glitter polish or loose glitter onto a sponge and press it onto your nails. For more defined glitter accents, use a brush to apply glitter in specific areas.
- Patterns and Designs: Use nail art brushes or dotting tools to create festive patterns. Consider designs like snowflakes, stars, stripes, or confetti. You can also create fun patterns like holiday-themed shapes or abstract designs.
- Finish the Design:
- Top Coat: Apply a top coat over the entire nail to seal in the design and add a glossy finish. This will enhance the glitter and patterns, as well as protect your manicure.
- Drying: Allow your nails to dry completely before touching anything to avoid smudging.
- Final Touches:
- Cuticle Care: Apply cuticle oil around your nails to keep your cuticles healthy and moisturized. This will enhance the overall look of your manicure and keep your nails looking neat.
Tips:
- Color Combinations: Experiment with different combinations of bright colors to achieve a festive look. You can mix and match colors or stick to a themed palette.
- Glitter Application: Apply glitter carefully to avoid excess buildup. Use a small brush to place glitter precisely where you want it.
- Pattern Precision: For intricate patterns, practice on a piece of paper first to perfect your technique.
Festive Frenzy Nail Art is a lively and joyous design that brings a touch of celebration to your nails. With bright colors, playful patterns, and sparkling glitter, this manicure is perfect for adding a burst of festivity and fun to any special occasion.
32. Celestial Whimsy: Pastel Nail Art Magic
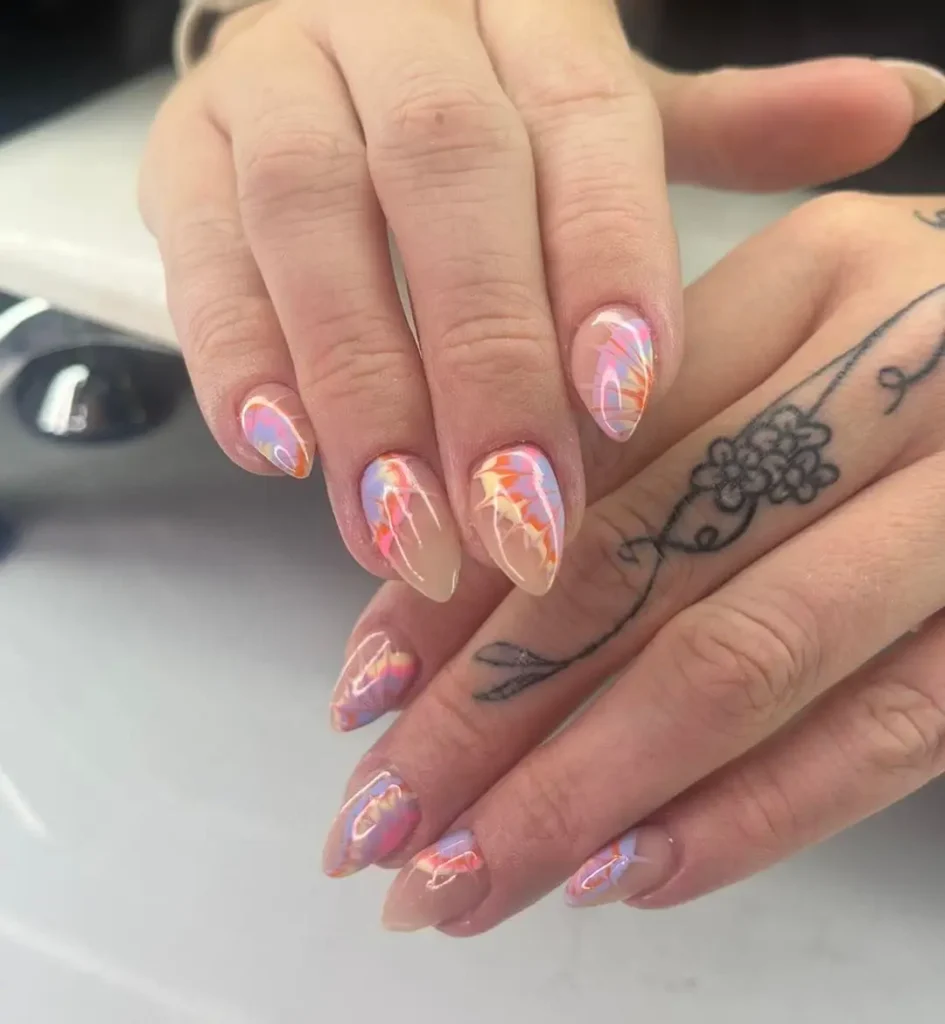
Celestial Whimsy: Pastel Nail Art Magic is a dreamy and enchanting design that combines soft pastel shades with celestial motifs. This manicure creates a whimsical and ethereal look, perfect for adding a touch of magic and elegance to your nails. Here’s how to achieve this beautiful and otherworldly look:
Materials Needed:
- Pastel Nail Polishes: Choose soft pastel shades (e.g., light blue, lavender, mint green, pale pink).
- White or Silver Nail Polish: For celestial motifs like stars and moons.
- Base Coat: To protect your natural nails.
- Top Coat: To seal the design and add shine.
- Nail Art Brush or Dotting Tool: For creating celestial designs.
- Nail Art Tape or Stickers (Optional): For clean lines and precise application.
- Cuticle Oil: To keep your cuticles healthy.
Steps to Achieve the Look:
- Prepare Your Nails:
- Clean and shape your nails into your desired shape, such as square, oval, or almond.
- Apply a base coat to protect your natural nails and let it dry completely.
- Apply Base Colors:
- Pastel Base: Paint your nails with a pastel shade of your choice. You can use a single pastel color for all nails or mix and match different pastels for a more varied look. Apply one or two coats for a smooth, even finish and let it dry completely.
- Create Celestial Motifs:
- Celestial Designs: Use a nail art brush or dotting tool to create celestial patterns. Consider designs like stars, moons, and clouds in white or silver.
- Technique: For stars, create small dots and connect them with tiny lines to form star shapes. For moons, use a brush to paint crescent shapes. You can also add small dots or twinkling stars around the main motifs to enhance the celestial theme.
- Placement: Distribute the celestial designs evenly across your nails or choose a few accent nails for the motifs. Create a balanced and whimsical pattern that suits your style.
- Celestial Designs: Use a nail art brush or dotting tool to create celestial patterns. Consider designs like stars, moons, and clouds in white or silver.
- Add Special Touches:
- Glitter Accents (Optional): For extra sparkle, add a touch of glitter polish over the celestial designs. Apply glitter to specific areas or use it sparingly to enhance the magical effect.
- Technique: Use a small brush or sponge to apply glitter gently over the nail or on top of the celestial motifs.
- Finish the Design:
- Top Coat: Apply a top coat over the entire nail to seal the celestial designs and add a glossy finish. This will enhance the pastel colors and protect your manicure.
- Drying: Allow your nails to dry completely before touching anything to avoid smudging.
- Final Touches:
- Cuticle Care: Apply cuticle oil around your nails to keep your cuticles healthy and moisturized. This will enhance the overall look of your manicure and keep your nails looking neat.
Tips:
- Color Combinations: Use a variety of pastel shades to create a harmonious and dreamy effect. You can also experiment with different pastel combinations to find what suits you best.
- Celestial Precision: Use a fine brush for detailed celestial designs and a dotting tool for small stars and moons. Practice on a piece of paper if needed.
- Glitter Application: Apply glitter carefully to avoid overloading. A little glitter can go a long way in adding a magical touch.
Celestial Whimsy: Pastel Nail Art Magic offers a beautifully enchanting look with soft pastels and celestial designs. This manicure provides a whimsical and ethereal touch, perfect for adding a bit of magic and charm to your everyday style or special occasions.
33. Rosy Mauve and Glitter Elegance
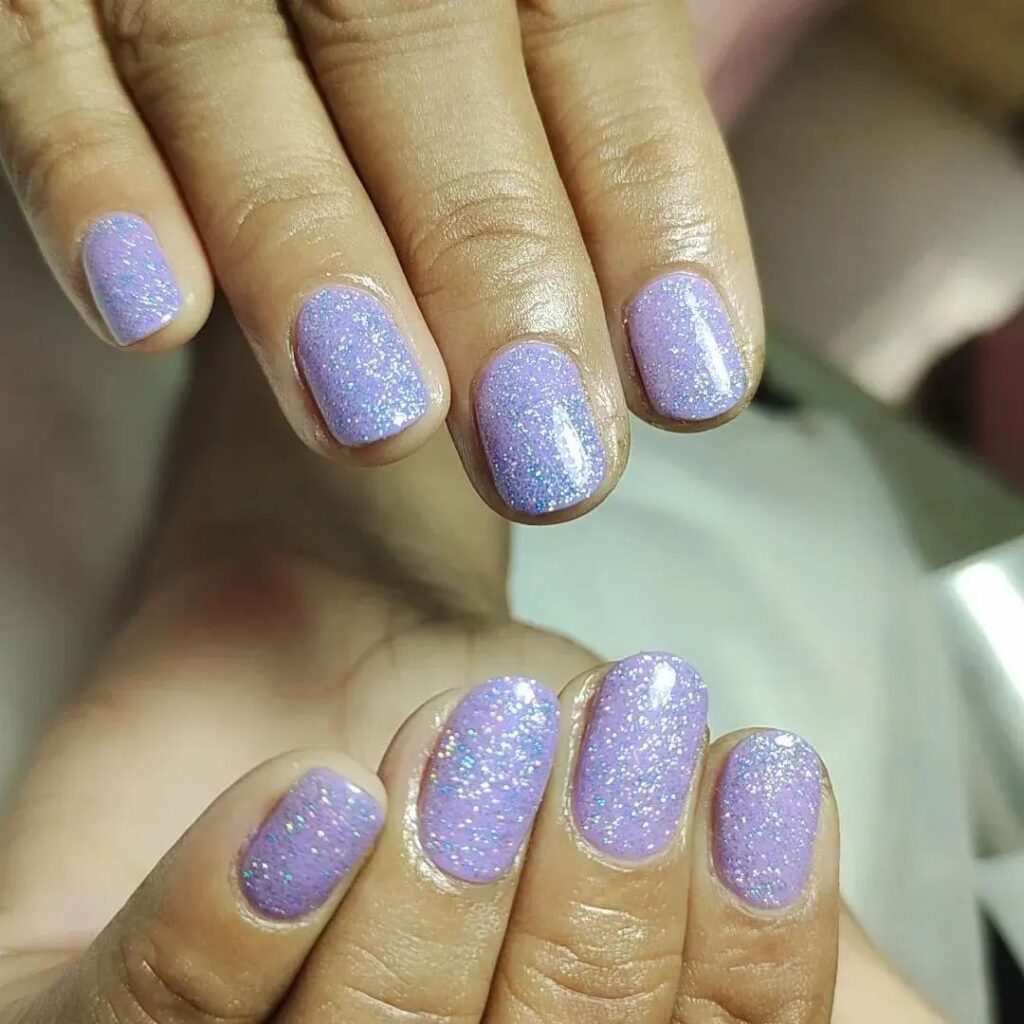
Rosy Mauve and Glitter Elegance is a sophisticated and stylish nail design that combines the soft, romantic tones of rosy mauve with sparkling glitter accents. This manicure exudes elegance and charm, making it perfect for any special occasion or simply to add a touch of luxury to your everyday look. Here’s how to create this stunning design:
Materials Needed:
- Rosy Mauve Nail Polish: For the main base color.
- Clear or Silver Glitter Nail Polish: For adding sparkle.
- Base Coat: To protect your natural nails.
- Top Coat: To seal the design and add shine.
- Nail Art Brush or Sponge: For applying glitter.
- Cuticle Oil: To keep your cuticles healthy.
Steps to Achieve the Look:
- Prepare Your Nails:
- Clean and shape your nails into your desired shape, such as square, oval, or almond.
- Apply a base coat to protect your natural nails and let it dry completely.
- Apply the Base Color:
- Rosy Mauve Base: Paint your nails with the rosy mauve nail polish. Apply one or two coats for an even and smooth finish. Let it dry completely before proceeding to the next step.
- Add Glitter Accents:
- Glitter Application: Apply clear or silver glitter polish over the rosy mauve base to add a touch of sparkle.
- Technique: For a gradient effect, use a makeup sponge to gently dab glitter polish onto the tips of your nails, fading it down towards the base. For a more defined glitter look, apply glitter directly to the tips or specific areas of your nails.
- Placement: You can choose to add glitter to all nails, or just a few accent nails for a more elegant touch. For accent nails, apply glitter to one or two nails on each hand, or create a glittery French tip.
- Glitter Application: Apply clear or silver glitter polish over the rosy mauve base to add a touch of sparkle.
- Finish the Design:
- Top Coat: Apply a top coat over the entire nail to seal in the glitter and add a glossy finish. This will enhance the sparkle and protect your manicure.
- Drying: Allow your nails to dry completely before touching anything to avoid smudging.
- Final Touches:
- Cuticle Care: Apply cuticle oil around your nails to keep your cuticles healthy and moisturized. This will enhance the overall look of your manicure and keep your nails looking neat.
Tips:
- Glitter Control: Use a small brush or sponge to control the amount of glitter and ensure even distribution. For a more subtle sparkle, use less glitter polish or apply it sparingly.
- Base Color Variations: Experiment with different shades of rosy mauve if you prefer a slightly different tone. You can also try different types of glitter, such as holographic or metallic, for a unique effect.
- Application Precision: Ensure the glitter is evenly applied and avoid overloading to prevent a bulky look.
Rosy Mauve and Glitter Elegance offers a beautifully refined look with a combination of soft rosy mauve and sparkling glitter. This design provides a touch of sophistication and glamour, perfect for any event where you want to make a stylish statement.
34. Metallic Confetti Celebration Nails
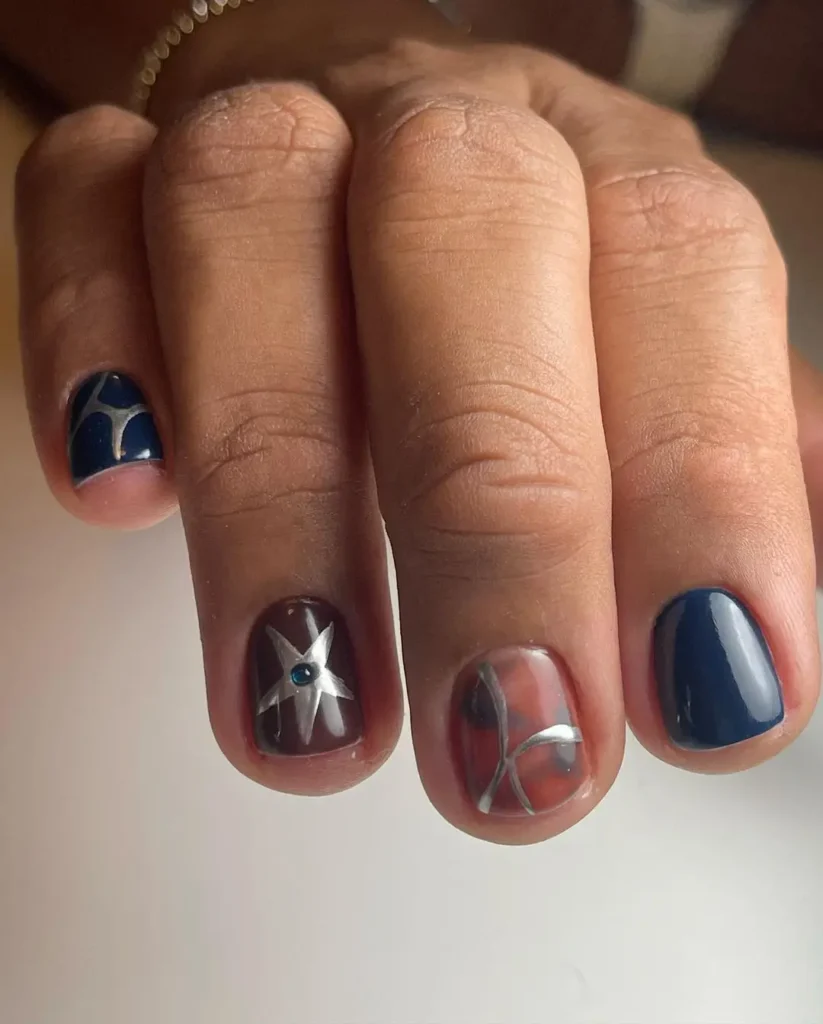
Metallic Confetti Celebration Nails are a fun and eye-catching design that incorporates vibrant metallic confetti for a festive and celebratory look. This manicure is perfect for special occasions, parties, or any time you want to add a splash of sparkle and excitement to your nails. Here’s how to create this dazzling design:
Materials Needed:
- Base Nail Polish Color: Choose a base color that complements the metallic confetti (e.g., black, white, or a neutral shade).
- Metallic Confetti Nail Polish: For the confetti effect (available in various colors like gold, silver, or multi-colored).
- Base Coat: To protect your natural nails.
- Top Coat: To seal the design and add shine.
- Nail Art Brush or Sponge: For applying confetti polish.
- Cuticle Oil: To keep your cuticles healthy.
Steps to Achieve the Look:
- Prepare Your Nails:
- Clean and shape your nails into your desired shape, such as square, oval, or almond.
- Apply a base coat to protect your natural nails and let it dry completely.
- Apply the Base Color:
- Base Color: Paint your nails with a base color of your choice. A neutral shade like white, black, or a soft pastel works well to make the metallic confetti stand out. Apply one or two coats for an even and smooth finish. Let it dry completely.
- Apply Metallic Confetti:
- Confetti Application: Apply the metallic confetti nail polish over the base color. Choose a confetti polish with vibrant, reflective pieces for a striking effect.
- Technique: For a full confetti coverage, apply a generous coat of confetti polish directly onto the nails. For a more controlled look, use a small brush or a sponge to apply the confetti in specific areas, such as the tips or an accent nail.
- Placement: You can opt for an all-over confetti look or create accent nails with a concentrated confetti design. To highlight certain areas, apply more confetti to specific parts of the nail or use a gradient effect.
- Confetti Application: Apply the metallic confetti nail polish over the base color. Choose a confetti polish with vibrant, reflective pieces for a striking effect.
- Finish the Design:
- Top Coat: Apply a top coat over the entire nail to seal the confetti and add a glossy finish. This will enhance the shine and protect your manicure.
- Drying: Allow your nails to dry completely before touching anything to avoid smudging.
- Final Touches:
- Cuticle Care: Apply cuticle oil around your nails to keep your cuticles healthy and moisturized. This will enhance the overall look of your manicure and keep your nails looking neat.
Tips:
- Confetti Control: Use a small brush or sponge to control the placement of the confetti for a more precise look. Avoid overloading the nails with too much confetti to keep the design clean.
- Base Color Variations: Experiment with different base colors to complement or contrast with the metallic confetti. Darker bases make the confetti pop, while lighter bases create a more subtle effect.
- Confetti Types: Choose confetti with varying shapes and sizes (e.g., hexagonal, square) for a more dynamic and textured look.
Metallic Confetti Celebration Nails offer a vibrant and festive design that brings excitement and glamour to your manicure. With its combination of a solid base color and sparkling metallic confetti, this design is perfect for any celebration or event where you want to make a standout impression.
35. Stargazer’s Dream in Navy and Silver
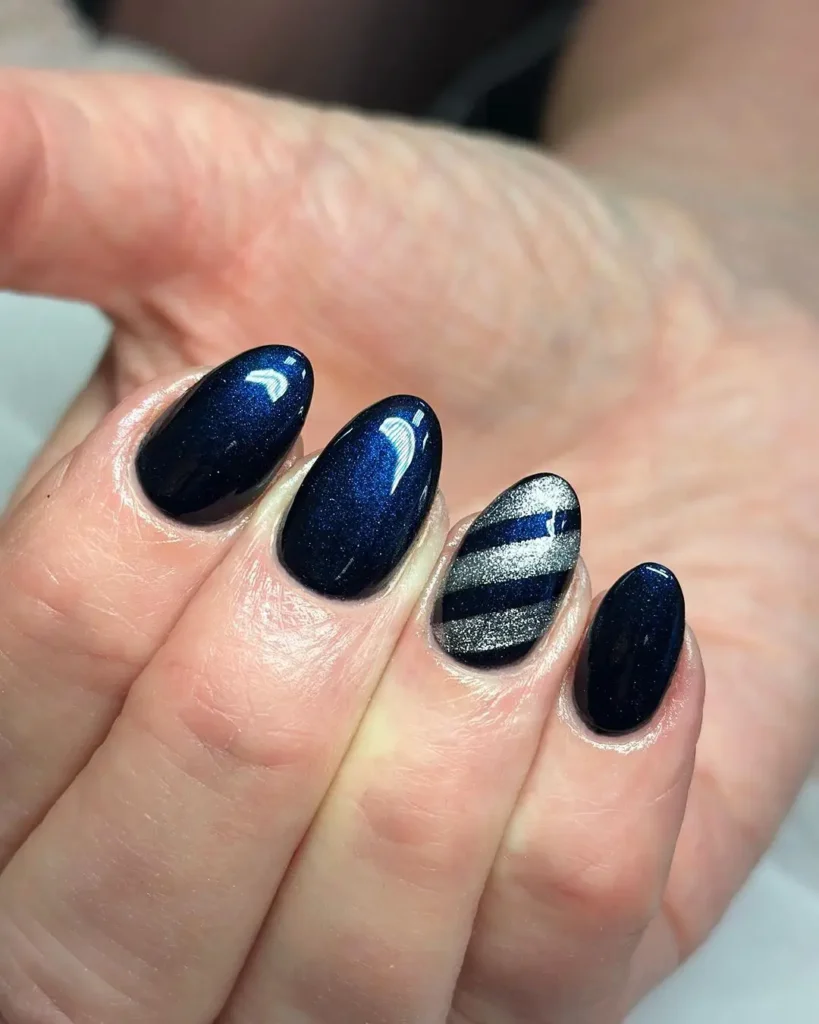
Stargazer’s Dream in Navy and Silver is a stunning nail design that evokes the elegance and mystery of a starry night sky. This manicure combines deep navy blue with sparkling silver accents to create a celestial, dreamy look. Here’s how to achieve this beautiful design:
Materials Needed:
- Navy Blue Nail Polish: For the base color.
- Silver Nail Polish: For stars and accents.
- Base Coat: To protect your natural nails.
- Top Coat: To seal the design and add shine.
- Nail Art Brush or Dotting Tool: For creating star patterns.
- Cuticle Oil: To keep your cuticles healthy.
Steps to Achieve the Look:
- Prepare Your Nails:
- Clean and shape your nails into your desired shape, such as square, oval, or almond.
- Apply a base coat to protect your natural nails and let it dry completely.
- Apply the Base Color:
- Navy Blue Base: Paint your nails with the navy blue nail polish. Apply one or two coats for an even and deep finish. Let it dry completely before moving on to the next step.
- Create Silver Starry Accents:
- Star Patterns: Use a nail art brush or dotting tool to create star patterns in silver polish over the navy blue base.
- Technique: For stars, use the dotting tool to place small dots of silver polish and connect them with tiny lines to form star shapes. You can also use the brush to paint small stars or add glitter for extra sparkle.
- Placement: Distribute the stars evenly across your nails, or create a more concentrated star field on one or two accent nails. You can also create a gradient effect with the stars, placing more towards the tips of the nails and fewer towards the base.
- Star Patterns: Use a nail art brush or dotting tool to create star patterns in silver polish over the navy blue base.
- Add Extra Details (Optional):
- Silver Accents: For additional shimmer, you can add silver accents like thin lines, tiny dots, or small constellations around the star patterns.
- Technique: Use a fine brush to create delicate silver lines or dots, enhancing the celestial theme.
- Finish the Design:
- Top Coat: Apply a top coat over the entire nail to seal in the starry design and add a glossy finish. This will enhance the silver accents and protect your manicure.
- Drying: Allow your nails to dry completely before touching anything to avoid smudging.
- Final Touches:
- Cuticle Care: Apply cuticle oil around your nails to keep your cuticles healthy and moisturized. This will enhance the overall look of your manicure and keep your nails looking neat.
Tips:
- Star Precision: Use a fine brush or dotting tool for precise star patterns and delicate details. Practice on a piece of paper if needed.
- Color Contrast: The deep navy base provides a rich backdrop for the silver accents, making the stars stand out vividly. Experiment with different shades of navy and silver if you want a slightly different effect.
- Star Placement: Balance the placement of the stars across your nails to create a cohesive and visually appealing design.
Stargazer’s Dream in Navy and Silver captures the beauty and mystique of a night sky with its deep navy base and sparkling silver accents. This design is perfect for adding a touch of celestial elegance to your look, making it ideal for evening events, special occasions, or whenever you want to feel like you’re gazing at the stars.
36. Blossoming Pink Floral Nail Design
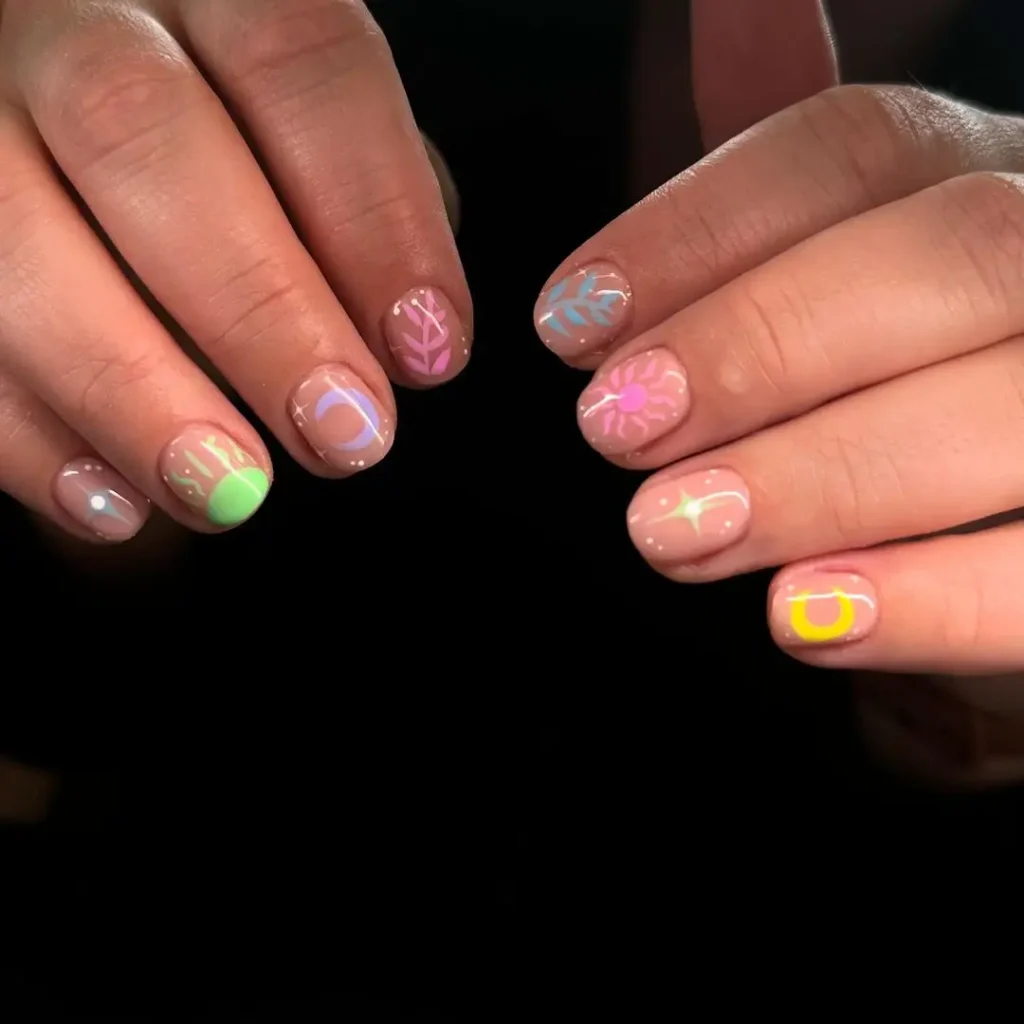
Blossoming Pink Floral Nail Design is a delicate and charming manicure that features soft pink shades adorned with beautiful floral patterns. This design is perfect for adding a touch of femininity and elegance to your nails, making it ideal for spring, summer, or any occasion where you want to showcase a floral-inspired look. Here’s how to achieve this pretty and refreshing design:
Materials Needed:
- Pink Nail Polishes: Various shades of pink, such as light pink, pastel pink, or a rosy hue, for the base and floral designs.
- White Nail Polish: For creating floral patterns.
- Base Coat: To protect your natural nails.
- Top Coat: To seal the design and add shine.
- Nail Art Brush or Dotting Tool: For creating floral designs.
- Cuticle Oil: To keep your cuticles healthy.
Steps to Achieve the Look:
- Prepare Your Nails:
- Clean and shape your nails into your desired shape, such as square, oval, or almond.
- Apply a base coat to protect your natural nails and let it dry completely.
- Apply the Base Color:
- Pink Base: Paint your nails with your chosen pink nail polish. For a more sophisticated look, you can use different shades of pink for different nails or create a gradient effect. Apply one or two coats for a smooth, even finish. Let it dry completely.
- Create Floral Designs:
- Floral Patterns: Use a nail art brush or dotting tool to create floral designs over the pink base. White polish works well for a classic look, but you can use other colors for the flowers if you prefer.
- Technique: For flowers, use a dotting tool to create small dots for the flower centers and petals. Connect the dots to form flower shapes. You can also use a fine brush to paint detailed floral designs.
- Placement: Add floral patterns to all nails or create accent nails with more detailed designs. You can also add tiny leaves or additional details to complement the flowers.
- Floral Patterns: Use a nail art brush or dotting tool to create floral designs over the pink base. White polish works well for a classic look, but you can use other colors for the flowers if you prefer.
- Add Extra Details (Optional):
- Leaves and Vines: Use a fine brush to add green leaves or vines to the floral designs for a more complete look.
- Technique: Paint small leaf shapes around the flowers and connect them with delicate vines for a natural and artistic effect.
- Finish the Design:
- Top Coat: Apply a top coat over the entire nail to seal in the floral design and add a glossy finish. This will protect your manicure and enhance the colors.
- Drying: Allow your nails to dry completely before touching anything to avoid smudging.
- Final Touches:
- Cuticle Care: Apply cuticle oil around your nails to keep your cuticles healthy and moisturized. This will enhance the overall look of your manicure and keep your nails looking neat.
Tips:
- Floral Precision: Use a fine brush or dotting tool for detailed floral patterns. Practice on a piece of paper if needed to perfect your technique.
- Color Variations: Experiment with different shades of pink and floral colors to match your personal style. Soft pinks and whites create a classic look, while vibrant pinks and multi-colored flowers can add a playful touch.
- Design Placement: Balance the floral designs across your nails for a cohesive and attractive look. Consider creating a few accent nails with more elaborate designs to highlight your manicure.
Blossoming Pink Floral Nail Design offers a beautiful and feminine touch to your manicure, with its soft pink shades and charming floral patterns. This design is perfect for adding a touch of elegance and romance to your look, making it ideal for any occasion where you want to showcase your love for florals.
37. Minimalist Matte Pink Perfection
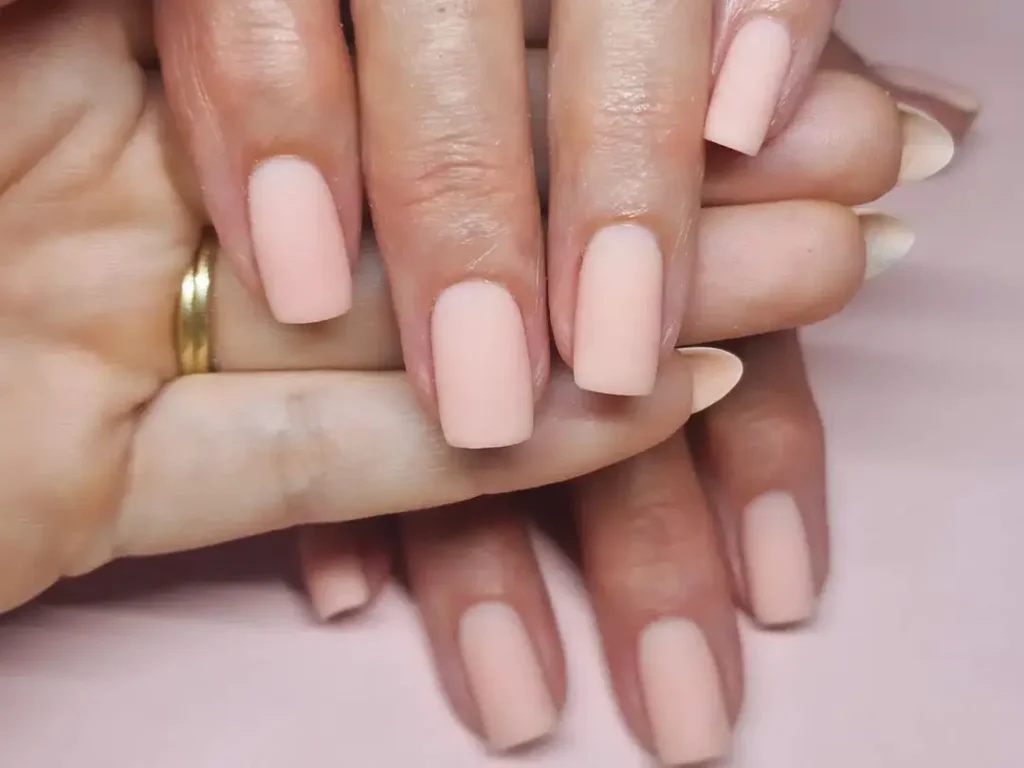
Minimalist Matte Pink Perfection is a chic and understated nail design that features a sleek matte finish in a soft pink shade. This manicure embodies simplicity and elegance, making it a perfect choice for everyday wear or for when you want a refined and modern look. Here’s how to achieve this stylish and minimalistic design:
Materials Needed:
- Matte Pink Nail Polish: For the base color.
- Base Coat: To protect your natural nails.
- Top Coat (Matte Finish): To seal the design and enhance the matte effect.
- Cuticle Oil: To keep your cuticles healthy.
- Nail Art Brush (Optional): For precise application.
Steps to Achieve the Look:
- Prepare Your Nails:
- Clean and shape your nails into your desired shape, such as square, oval, or almond.
- Apply a base coat to protect your natural nails and let it dry completely.
- Apply the Base Color:
- Matte Pink Base: Paint your nails with the matte pink nail polish. Apply one or two coats for a smooth, even finish. Allow the polish to dry completely to ensure the matte effect is achieved.
- Apply the Matte Top Coat:
- Matte Finish: Apply a matte top coat over the pink base to enhance the matte finish and ensure a smooth, non-shiny appearance. This step is crucial to achieving the minimalist matte look.
- Technique: Use a thin layer of the matte top coat to avoid any streaks or bubbles. Allow it to dry completely for the best results.
- Finish the Design:
- Drying: Ensure your nails are completely dry before touching anything to avoid smudging or denting the matte finish.
- Final Touches:
- Cuticle Care: Apply cuticle oil around your nails to keep your cuticles healthy and moisturized. This will enhance the overall look of your manicure and keep your nails looking neat.
Tips:
- Matte Polish: If you can’t find a matte pink polish, you can use a regular pink polish and apply a matte top coat for a similar effect.
- Application Precision: Ensure even application of both the base color and the matte top coat to achieve a flawless matte finish.
- Nail Care: Regularly maintain your nails and cuticles to keep your minimalist manicure looking polished and clean.
Minimalist Matte Pink Perfection combines a soft pink hue with a sleek matte finish to create a modern and elegant nail design. This understated look is perfect for anyone who loves minimalism and wants a sophisticated manicure that can be worn on any occasion.
38. Turquoise Flair Nail Design
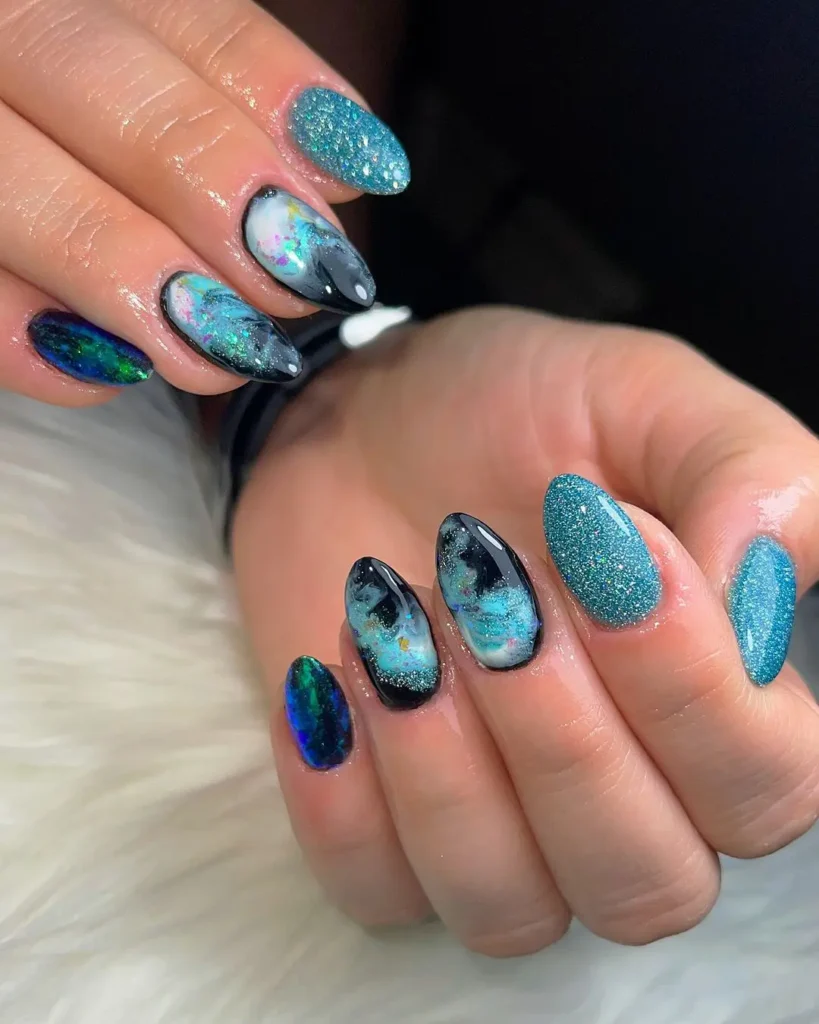
Turquoise Flair Nail Design is a vibrant and eye-catching manicure that showcases the stunning, lively hue of turquoise. This design can be styled in various ways to highlight the fresh and bold color of turquoise, making it perfect for adding a pop of color and flair to your look. Here’s how to achieve this striking and stylish design:
Materials Needed:
- Turquoise Nail Polish: For the base color.
- Accent Nail Polish (Optional): For additional details or complementary colors.
- Base Coat: To protect your natural nails.
- Top Coat: To seal the design and add shine.
- Nail Art Brush or Dotting Tool: For creating patterns or details.
- Cuticle Oil: To keep your cuticles healthy.
Steps to Achieve the Look:
- Prepare Your Nails:
- Clean and shape your nails into your desired shape, such as square, oval, or almond.
- Apply a base coat to protect your natural nails and let it dry completely.
- Apply the Base Color:
- Turquoise Base: Paint your nails with the turquoise nail polish. Apply one or two coats for an even, opaque finish. Allow the polish to dry completely.
- Add Flair (Optional):
- Accent Details: To enhance the turquoise base, consider adding accent details or patterns. Some ideas include:
- Gold or Silver Accents: Use a nail art brush or dotting tool to add gold or silver accents, such as stripes, dots, or geometric shapes.
- Glitter: Apply a glitter top coat or use a glitter polish to add sparkle and texture.
- Contrasting Colors: Incorporate complementary colors like coral or navy for additional flair.
- Technique: For precise application, use a fine brush or dotting tool to create clean and detailed designs. You can also use striping tape to create geometric patterns.
- Accent Details: To enhance the turquoise base, consider adding accent details or patterns. Some ideas include:
- Finish the Design:
- Top Coat: Apply a top coat over the entire nail to seal in the design and add a glossy finish. This will enhance the shine and protect your manicure.
- Drying: Allow your nails to dry completely before touching anything to avoid smudging.
- Final Touches:
- Cuticle Care: Apply cuticle oil around your nails to keep your cuticles healthy and moisturized. This will enhance the overall look of your manicure and keep your nails looking neat.
Tips:
- Color Combinations: Experiment with different combinations of turquoise and accent colors to find the look that best suits your style. Turquoise pairs well with both metallics and contrasting colors.
- Design Variations: Consider trying different designs, such as ombré effects, gradients, or nail art featuring tropical or beach-inspired themes.
- Glitter and Shine: For a more festive look, incorporate glitter or shiny accents into your design to make your turquoise nails stand out even more.
Turquoise Flair Nail Design is all about embracing the vibrant and lively shade of turquoise and adding a touch of flair to your manicure. Whether you opt for a simple turquoise base or add intricate designs and accents, this design is perfect for making a bold and stylish statement.
39. Chic Marbles: Metallic and Marble Nail Fusion
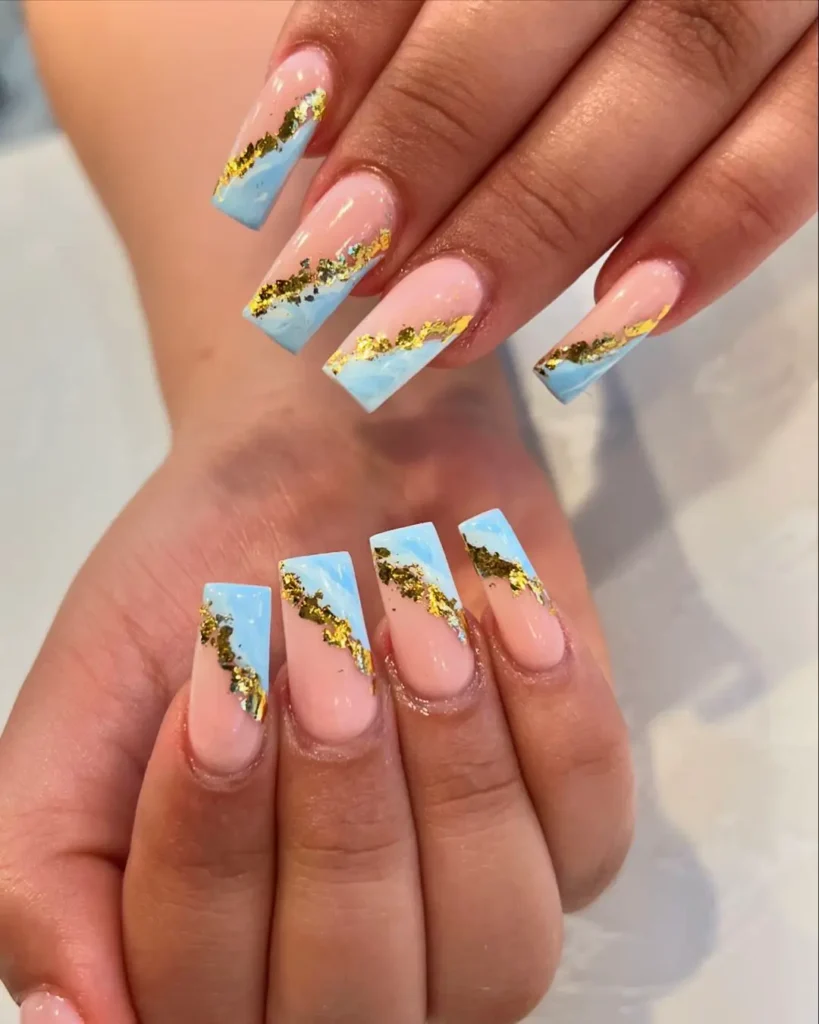
Chic Marbles: Metallic and Marble Nail Fusion combines the sophisticated elegance of marble patterns with the luxurious touch of metallic accents. This nail design creates a chic and modern look by blending the classic marble effect with striking metallic details, resulting in a glamorous and eye-catching manicure. Here’s how to achieve this stunning fusion:
Materials Needed:
- White Nail Polish: For the base marble color.
- Light Grey or Soft Beige Nail Polish: For additional marble tones.
- Metallic Nail Polish: Gold, silver, or copper for the metallic accents.
- Base Coat: To protect your natural nails.
- Top Coat: To seal the design and add shine.
- Nail Art Brush or Thin Liner Brush: For marble and metallic detailing.
- Sponge (Optional): For creating a marble effect.
- Cuticle Oil: To keep your cuticles healthy.
Steps to Achieve the Look:
- Prepare Your Nails:
- Clean and shape your nails into your desired shape, such as square, oval, or almond.
- Apply a base coat to protect your natural nails and let it dry completely.
- Apply the Base Color:
- White Base: Paint your nails with white nail polish as the base for the marble effect. Apply one or two coats for a solid foundation. Allow it to dry completely.
- Create the Marble Effect:
- Marble Design: Use a sponge or a thin brush to create the marble effect with light grey or soft beige polish.
- Technique: Apply a few drops of the grey or beige polish onto a makeup sponge, then lightly dab it onto the white base to create a marbled effect. For more intricate marble patterns, use a thin brush to add fine lines and swirls of the grey or beige polish over the white base.
- Blending: Blend the colors together by gently dabbing or swirling them to mimic the natural marble pattern. Allow the design to dry before moving on to the metallic accents.
- Marble Design: Use a sponge or a thin brush to create the marble effect with light grey or soft beige polish.
- Add Metallic Accents:
- Metallic Detailing: Use a thin liner brush or nail art brush to add metallic accents in gold, silver, or copper.
- Technique: Paint thin lines or small spots of metallic polish over the marble design to highlight certain areas. You can also create subtle metallic veins or geometric patterns to enhance the marble effect.
- Placement: Focus on areas where you want to add a touch of glamour, such as along the edges of the marble patterns or as accent lines.
- Metallic Detailing: Use a thin liner brush or nail art brush to add metallic accents in gold, silver, or copper.
- Finish the Design:
- Top Coat: Apply a top coat over the entire nail to seal in the marble and metallic design and add a glossy finish. This will enhance the shine and protect your manicure.
- Drying: Allow your nails to dry completely before touching anything to avoid smudging.
- Final Touches:
- Cuticle Care: Apply cuticle oil around your nails to keep your cuticles healthy and moisturized. This will enhance the overall look of your manicure and keep your nails looking neat.
Tips:
- Marble Precision: For a more realistic marble effect, use a combination of light and dark shades and blend them carefully. Practice on a piece of paper if needed to perfect your technique.
- Metallic Choices: Experiment with different metallic colors to match your personal style or outfit. Gold and silver are classic choices, while copper or rose gold can add a unique twist.
- Design Variations: Consider adding additional elements like subtle glitter or a matte top coat for different finishes and effects.
Chic Marbles: Metallic and Marble Nail Fusion offers a sophisticated and modern manicure that combines the timeless elegance of marble patterns with the luxurious touch of metallic accents. This design is perfect for making a bold yet refined statement on any occasion.
40. Pink Matte and Glitter Combo
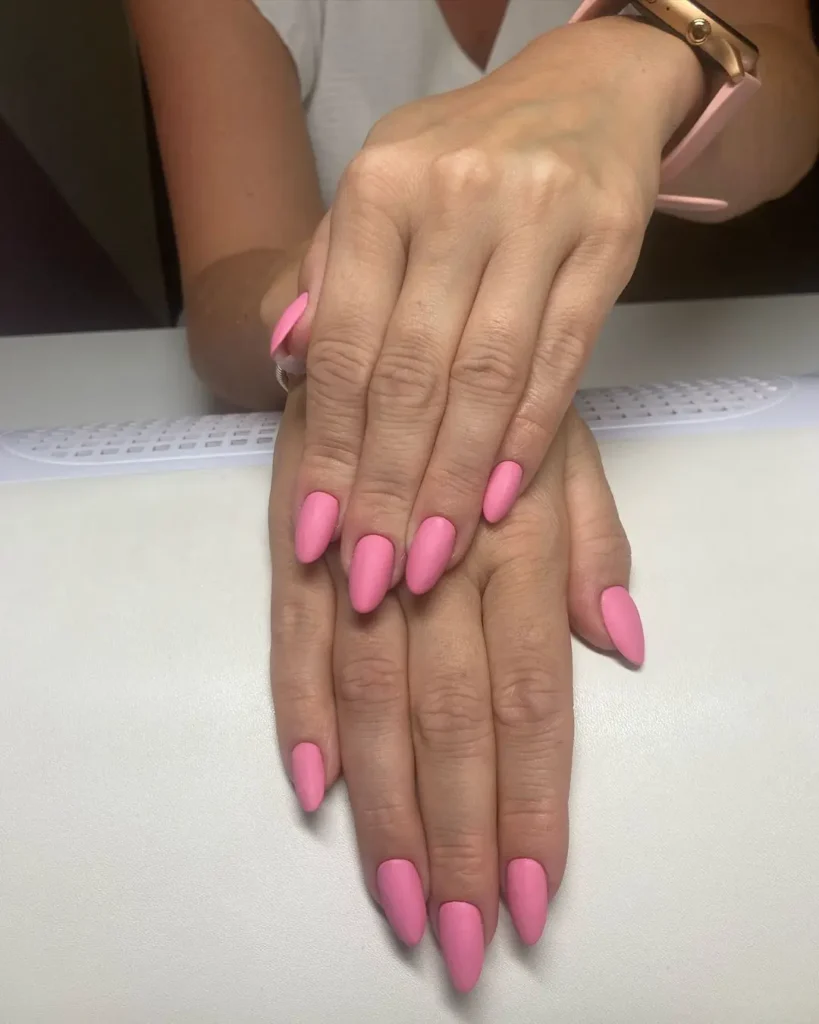
Pink Matte and Glitter Combo is a stylish nail design that combines the sleek elegance of matte pink with the sparkle and fun of glitter. This design creates a beautiful contrast between the smooth, sophisticated matte finish and the dazzling glitter accents. Here’s how to achieve this trendy and eye-catching manicure:
Materials Needed:
- Matte Pink Nail Polish: For the base color.
- Glitter Nail Polish: Choose a glitter polish that complements or contrasts with the matte pink base.
- Base Coat: To protect your natural nails.
- Top Coat: To seal the design and add shine.
- Nail Art Brush or Sponge (Optional): For precise application and blending.
- Cuticle Oil: To keep your cuticles healthy.
Steps to Achieve the Look:
- Prepare Your Nails:
- Clean and shape your nails into your desired shape, such as square, oval, or almond.
- Apply a base coat to protect your natural nails and let it dry completely.
- Apply the Base Color:
- Matte Pink Base: Paint your nails with the matte pink nail polish. Apply one or two coats for an even, opaque finish. Allow the polish to dry completely.
- Add Glitter Accents:
- Glitter Application: Apply glitter nail polish to create a sparkling contrast against the matte pink.
- Technique: You can apply glitter to all nails or use it as an accent. For a more uniform look, use a sponge to gently press glitter onto the nails or apply it directly from the bottle for a more concentrated effect.
- Accent Nails: Consider applying glitter to one or two accent nails for a balanced design, or create glitter tips for a chic, modern touch.
- Glitter Application: Apply glitter nail polish to create a sparkling contrast against the matte pink.
- Finish the Design:
- Top Coat: Apply a matte top coat over the entire nail design to maintain the matte finish. If you’ve used glitter, make sure to apply a generous layer to smooth out the glitter and add a uniform matte finish.
- Drying: Allow your nails to dry completely before touching anything to avoid smudging or denting the matte finish.
- Final Touches:
- Cuticle Care: Apply cuticle oil around your nails to keep your cuticles healthy and moisturized. This will enhance the overall look of your manicure and keep your nails looking neat.
Tips:
- Glitter Choices: Choose glitter that complements your matte pink base. For a subtle look, opt for fine glitter. For a bolder effect, use larger or multi-colored glitter.
- Application Precision: If using glitter, ensure even distribution to avoid clumping and achieve a smooth finish.
- Matte Finish Maintenance: Be careful with the matte top coat application, as it can sometimes cause glitter to lose its sparkle. Test on a small area first if unsure.
Pink Matte and Glitter Combo combines the chic elegance of matte pink with the playful sparkle of glitter, creating a manicure that is both sophisticated and fun. This design is perfect for special occasions or whenever you want to add a touch of glam to your everyday look.
41. Midnight Blue Winter Wonderland
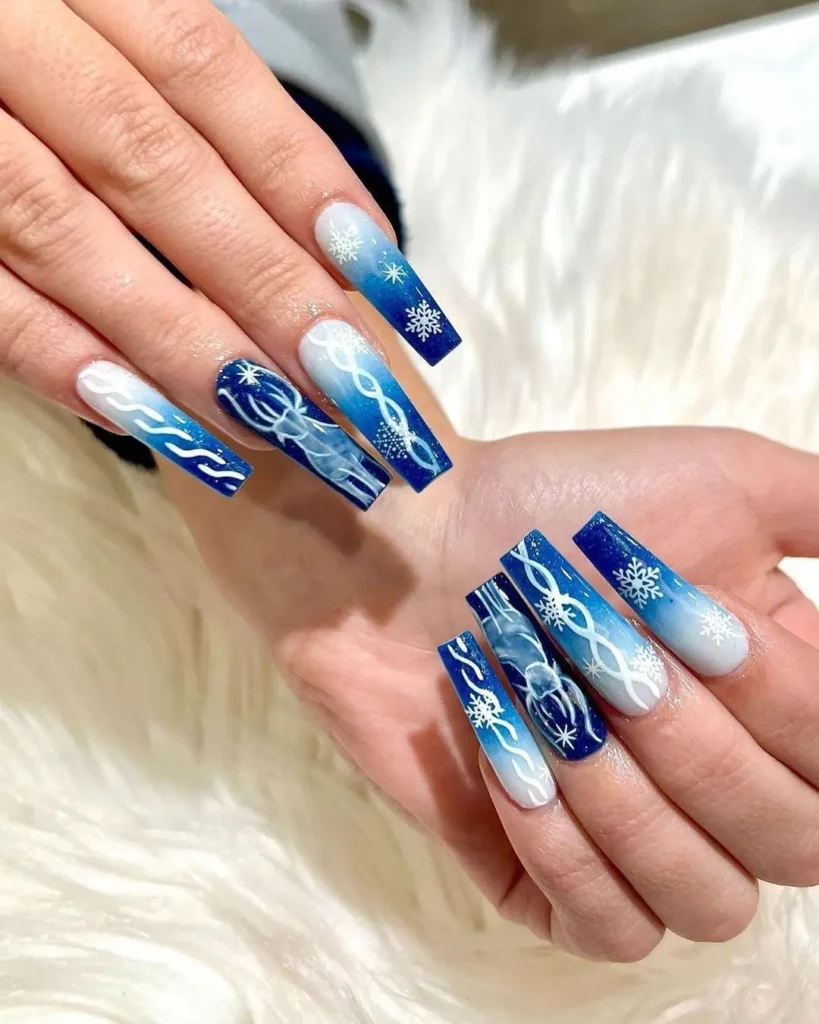
Midnight Blue Winter Wonderland is a stunning nail design that captures the magic and elegance of a winter night. Featuring deep, rich midnight blue paired with sparkling accents, this manicure evokes the serene and enchanting atmosphere of a winter wonderland. Here’s how to achieve this sophisticated and festive look:
Materials Needed:
- Midnight Blue Nail Polish: For the base color.
- Silver or White Glitter Nail Polish: For a sparkling effect.
- Base Coat: To protect your natural nails.
- Top Coat: To seal the design and add shine.
- Nail Art Brushes or Dotting Tools: For creating patterns and details.
- Cuticle Oil: To keep your cuticles healthy.
Steps to Achieve the Look:
- Prepare Your Nails:
- Clean and shape your nails into your desired shape, such as square, oval, or almond.
- Apply a base coat to protect your natural nails and let it dry completely.
- Apply the Base Color:
- Midnight Blue Base: Paint your nails with the midnight blue nail polish. Apply one or two coats for full opacity and a rich, deep color. Allow the polish to dry completely.
- Add Winter Wonderland Accents:
- Glitter Application: Apply silver or white glitter nail polish to create a sparkling effect that resembles snow or frost. You can add glitter to all nails or use it as an accent on one or two nails.
- Technique: Use a small brush or dotting tool to apply glitter in a scattered pattern or concentrate it at the tips for a snow-like effect.
- Winter Patterns: For additional detail, use nail art brushes or dotting tools to create snowflakes, stars, or other winter-themed designs in silver or white.
- Snowflakes: Create intricate snowflake patterns by drawing fine lines and dots. Place these designs randomly or on accent nails for a delicate touch.
- Glitter Application: Apply silver or white glitter nail polish to create a sparkling effect that resembles snow or frost. You can add glitter to all nails or use it as an accent on one or two nails.
- Finish the Design:
- Top Coat: Apply a top coat over the entire design to seal in the base color and glitter, and to add a glossy finish. This will also help to smooth out the glitter and enhance the shine.
- Drying: Allow your nails to dry completely before touching anything to avoid smudging or denting the design.
- Final Touches:
- Cuticle Care: Apply cuticle oil around your nails to keep your cuticles healthy and moisturized. This will enhance the overall look of your manicure and keep your nails looking neat.
Tips:
- Glitter Placement: For a more controlled glitter application, use a makeup sponge to press glitter onto your nails, focusing on the tips or specific areas for a more even effect.
- Pattern Precision: Use a fine nail art brush for detailed snowflake or star patterns to achieve a delicate and refined look.
- Layering: If applying multiple layers of glitter or polish, allow each layer to dry completely before adding another to avoid smudging.
Midnight Blue Winter Wonderland captures the serene beauty of a winter evening with its deep blue base and sparkling accents. This design is perfect for holiday events, winter gatherings, or whenever you want to add a touch of festive elegance to your look.
42. Lemon Zest Floral Nails
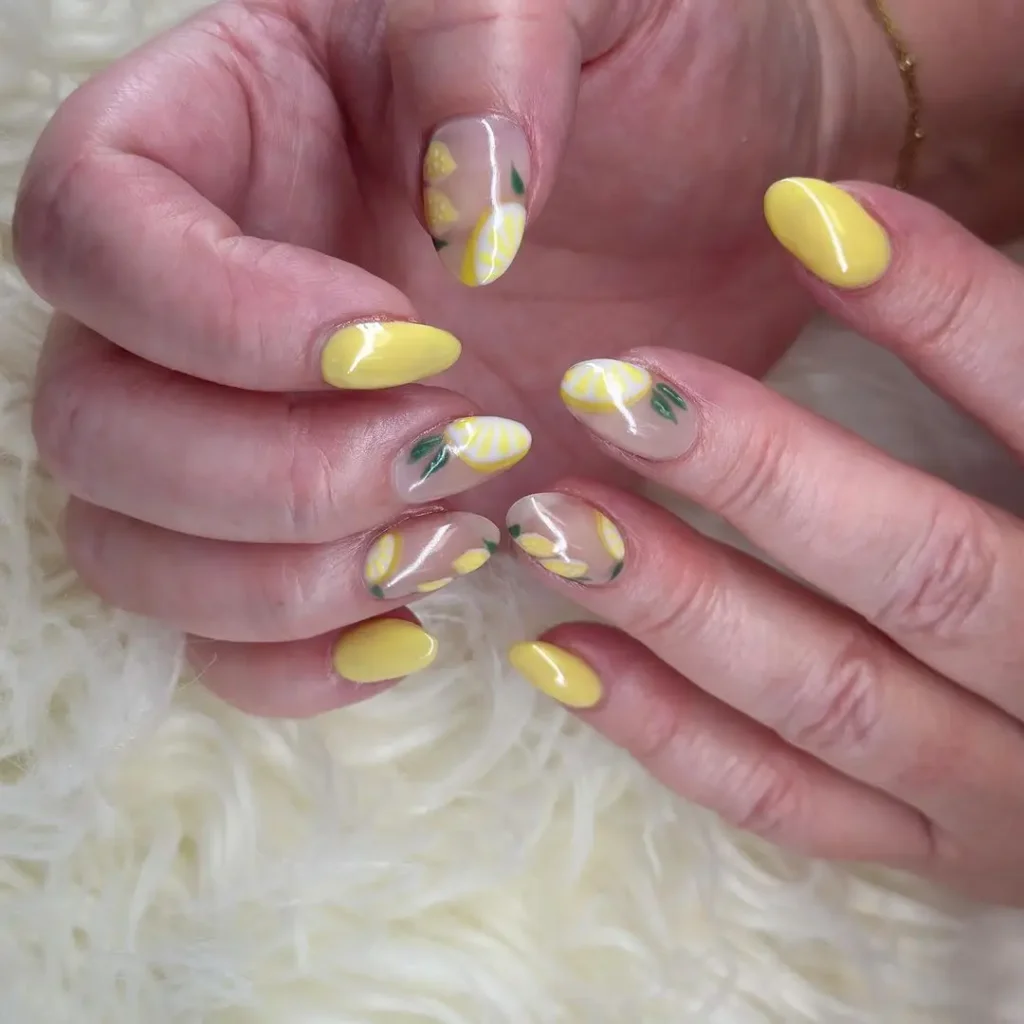
Lemon Zest Floral Nails is a vibrant and refreshing nail design that combines the cheerful brightness of lemon yellow with delicate floral patterns. This design is perfect for adding a burst of color and a touch of whimsy to your manicure. Here’s how to achieve this lively and beautiful look:
Materials Needed:
- Lemon Yellow Nail Polish: For the base color.
- White or Contrasting Colored Nail Polish: For the floral details.
- Base Coat: To protect your natural nails.
- Top Coat: To seal the design and add shine.
- Nail Art Brushes: For creating floral patterns.
- Dotting Tool: For detailed floral accents.
- Cuticle Oil: To keep your cuticles healthy.
Steps to Achieve the Look:
- Prepare Your Nails:
- Clean and shape your nails into your desired shape, such as square, oval, or almond.
- Apply a base coat to protect your natural nails and let it dry completely.
- Apply the Base Color:
- Lemon Yellow Base: Paint your nails with the lemon yellow nail polish. Apply one or two coats for full coverage and a vibrant, sunny color. Allow the polish to dry completely.
- Create the Floral Design:
- Floral Patterns: Use nail art brushes or a dotting tool to create delicate floral designs in white or a contrasting color.
- Flowers: Paint small, simple flowers with rounded petals. Use a contrasting color for the petals and a small dot in the center of each flower.
- Leaves: Add small leaf shapes around the flowers to enhance the floral design.
- Placement: You can create floral designs on all nails or use them as accents on one or two nails. For a balanced look, consider placing flowers on accent nails or alternating patterns.
- Floral Patterns: Use nail art brushes or a dotting tool to create delicate floral designs in white or a contrasting color.
- Add Final Touches:
- Top Coat: Apply a top coat over the entire design to seal in the floral patterns and add a glossy finish. This will also help to protect your manicure and keep it looking fresh.
- Drying: Allow your nails to dry completely before touching anything to avoid smudging or denting the design.
- Final Touches:
- Cuticle Care: Apply cuticle oil around your nails to keep your cuticles healthy and moisturized. This will enhance the overall look of your manicure and keep your nails looking neat.
Tips:
- Color Coordination: If you want to add more depth to the design, consider using shades of yellow or adding subtle accents in green for leaves or stems.
- Design Variation: Experiment with different floral patterns such as daisies, roses, or wildflowers to find the design that best suits your style.
- Precision: For clean and detailed floral designs, use fine nail art brushes and take your time to ensure accurate and neat patterns.
Lemon Zest Floral Nails brings a burst of brightness and a touch of nature to your manicure with its cheerful yellow base and delicate floral accents. This design is perfect for spring, summer, or whenever you want to brighten up your look with a fresh and playful touch.
43. Eclectic Nail Art Extravaganza
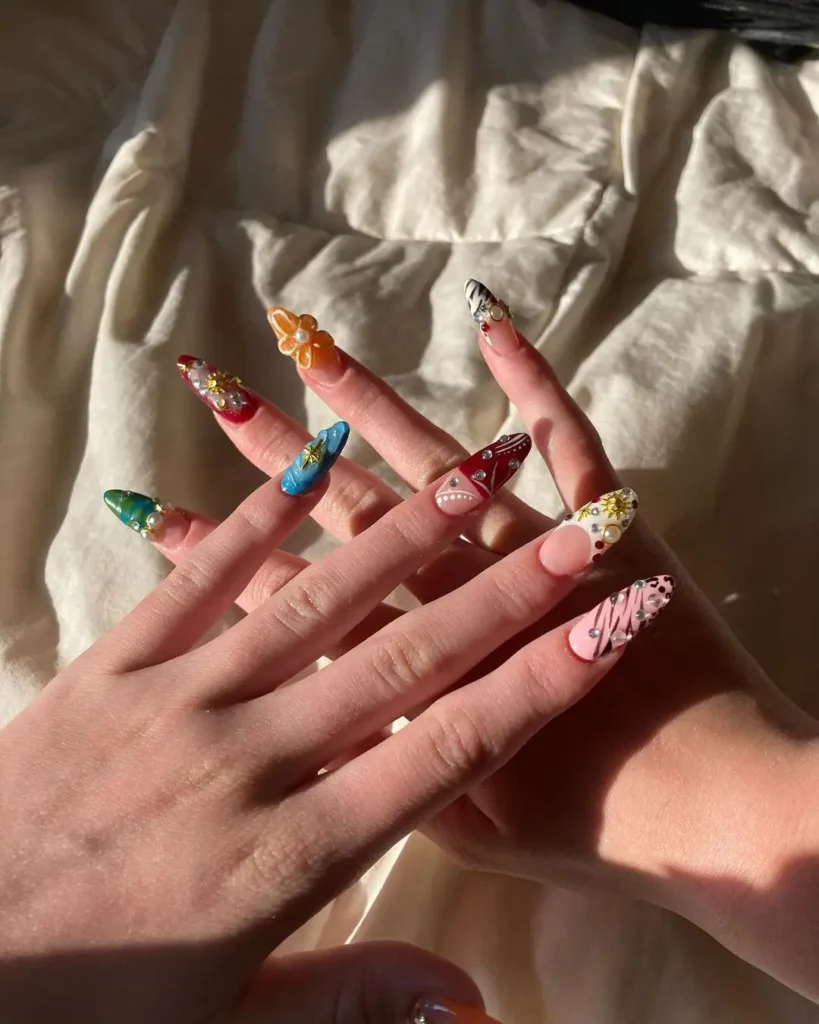
Eclectic Nail Art Extravaganza is a bold and vibrant nail design that embraces a mix of colors, patterns, and textures for a unique and eye-catching look. This design celebrates creativity and individuality, making it perfect for those who want to make a statement with their nails. Here’s how to achieve this dynamic and eclectic manicure:
Materials Needed:
- Base Colors: Choose a variety of bright and contrasting colors for your base.
- Nail Art Polishes or Acrylic Paints: For detailed patterns and designs.
- Glitter or Shimmer Polish: For added sparkle and texture.
- Base Coat: To protect your natural nails.
- Top Coat: To seal the design and add shine.
- Nail Art Brushes: For creating intricate patterns.
- Dotting Tools: For detailed designs and accents.
- Striping Tape or Nail Vinyls: For clean lines and geometric patterns.
- Cuticle Oil: To keep your cuticles healthy.
Steps to Achieve the Look:
- Prepare Your Nails:
- Clean and shape your nails into your desired shape, such as square, oval, or almond.
- Apply a base coat to protect your natural nails and let it dry completely.
- Apply the Base Colors:
- Base Colors: Paint your nails with a variety of bright and contrasting colors. You can use a different color for each nail or create sections on each nail with multiple colors. Allow the base coats to dry completely.
- Add Patterns and Designs:
- Patterns: Use nail art brushes or striping tape to create a mix of patterns such as stripes, polka dots, chevrons, or abstract designs. You can use contrasting colors or metallic shades to make the patterns stand out.
- Geometric Shapes: Use striping tape or nail vinyls to create geometric patterns and shapes. Paint over the tape or vinyls with contrasting colors, then remove them to reveal clean lines.
- Accents: Add glitter or shimmer polish to accentuate certain areas or to create a gradient effect. You can also use dotting tools to add small details or designs.
- Mix and Match:
- Eclectic Elements: Combine various design elements such as animal prints, florals, or abstract art. Feel free to mix different textures and finishes, like matte and glossy, to enhance the eclectic look.
- Creative Freedom: The key to an eclectic design is creativity and freedom. Experiment with different combinations and placements until you achieve a look that feels uniquely yours.
- Finish the Design:
- Top Coat: Apply a top coat over the entire design to seal in the patterns and add a glossy finish. This will also help to protect your manicure and keep it looking fresh.
- Drying: Allow your nails to dry completely before touching anything to avoid smudging or denting the design.
- Final Touches:
- Cuticle Care: Apply cuticle oil around your nails to keep your cuticles healthy and moisturized. This will enhance the overall look of your manicure and keep your nails looking neat.
Tips:
- Bold Choices: Don’t be afraid to use bold and unconventional color combinations. The more eclectic, the better!
- Layering: Apply multiple layers of different polishes or paints to create depth and dimension in your design.
- Pattern Placement: Play around with different pattern placements on each nail to create a cohesive yet varied look.
Eclectic Nail Art Extravaganza is all about embracing a mix of styles and colors to create a truly one-of-a-kind manicure. This design is perfect for those who enjoy experimenting with their look and want to showcase their creativity and individuality.
44. Minty Elegance: Almond-Shaped Spring Nails
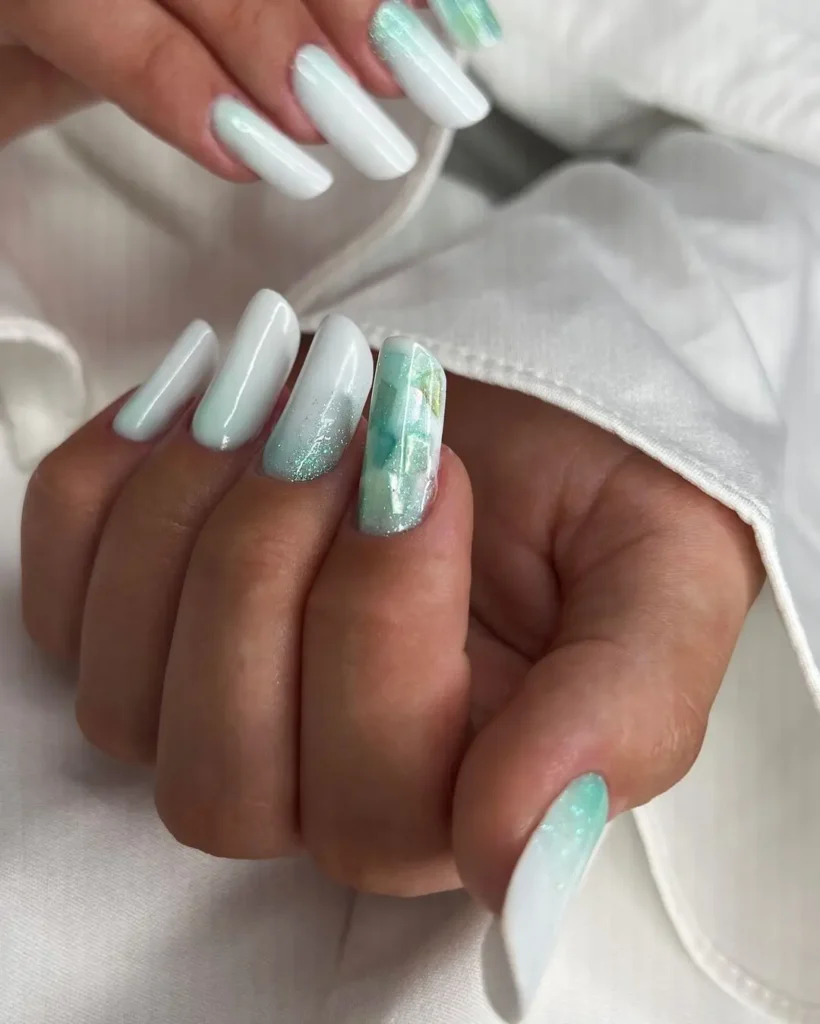
Minty Elegance: Almond-Shaped Spring Nails is a fresh and sophisticated nail design that combines a soft mint green base with elegant details, perfect for spring. The almond shape enhances the graceful and elongated look of the nails, making this design both chic and versatile. Here’s how to achieve this refined and stylish manicure:
Materials Needed:
- Mint Green Nail Polish: For the base color.
- White or Metallic Nail Polish: For accent details.
- Base Coat: To protect your natural nails.
- Top Coat: To seal the design and add shine.
- Nail Art Brushes: For creating detailed designs.
- Dotting Tools: For adding small accents.
- Cuticle Oil: To keep your cuticles healthy.
Steps to Achieve the Look:
- Prepare Your Nails:
- Clean and shape your nails into an almond shape, which is tapered at the tip and rounded at the edges. You can file your nails to achieve this elegant shape.
- Apply a base coat to protect your natural nails and let it dry completely.
- Apply the Base Color:
- Mint Green Base: Paint your nails with the mint green nail polish. Apply one or two coats for full coverage and a smooth finish. Allow the polish to dry completely.
- Add Elegant Details:
- Minimalist Patterns: Use white or metallic nail polish to create minimalist patterns such as thin lines, dots, or delicate geometric shapes. For example, you can add a thin line along the cuticle or create a subtle diagonal stripe.
- Lines: Use a nail art brush to paint thin, elegant lines or accents along the edge of the nails.
- Dots: Add small, evenly spaced dots at the base of the nail or near the tips for a refined touch.
- Floral Accents: If you prefer a touch of nature, paint small, delicate floral patterns using a fine brush. Choose simple flowers or leaves to keep the design understated yet sophisticated.
- Minimalist Patterns: Use white or metallic nail polish to create minimalist patterns such as thin lines, dots, or delicate geometric shapes. For example, you can add a thin line along the cuticle or create a subtle diagonal stripe.
- Finish the Design:
- Top Coat: Apply a top coat over the entire design to seal in the base color and patterns. This will add shine and help protect your manicure from chipping.
- Drying: Allow your nails to dry completely before touching anything to avoid smudging or denting the design.
- Final Touches:
- Cuticle Care: Apply cuticle oil around your nails to keep your cuticles healthy and moisturized. This will enhance the overall look of your manicure and keep your nails looking neat.
Tips:
- Color Harmony: Ensure that the mint green base and accent details complement each other well. White or metallic details will create a clean and sophisticated contrast.
- Pattern Placement: Focus on creating balance in your design. You can use accent nails for more intricate patterns or keep the other nails simple to maintain elegance.
- Precision: For clean lines and details, use fine brushes and take your time to ensure accuracy.
Minty Elegance: Almond-Shaped Spring Nails offers a fresh and stylish look with its mint green base and elegant details. This design is perfect for spring and adds a touch of sophistication to your look while maintaining a graceful and polished appearance.
45. Blossoming Blues: Floral Accent Nail Inspiration

Blossoming Blues: Floral Accent Nail Inspiration is a stunning nail design that combines various shades of blue with delicate floral accents. This design is perfect for adding a touch of sophistication and freshness to your manicure, making it ideal for both everyday wear and special occasions. Here’s how to create this elegant and blooming look:
Materials Needed:
- Different Shades of Blue Nail Polishes: Choose a range of blues, from light pastel to deep navy.
- White or Contrasting Nail Polish: For the floral details.
- Base Coat: To protect your natural nails.
- Top Coat: To seal the design and add shine.
- Nail Art Brushes: For creating detailed floral designs.
- Dotting Tools: For adding small details and accents.
- Cuticle Oil: To keep your cuticles healthy.
Steps to Achieve the Look:
- Prepare Your Nails:
- Clean and shape your nails into your desired shape, such as square, oval, or almond.
- Apply a base coat to protect your natural nails and let it dry completely.
- Apply Base Colors:
- Blue Base: Paint each nail with a different shade of blue. You can use a gradient of blues, or alternate between light and dark shades. Apply one or two coats for full coverage and allow the polish to dry completely.
- Add Floral Accents:
- Floral Designs: Use white or contrasting colored nail polish to create delicate floral patterns on some of your nails.
- Flowers: Paint small, simple flowers with rounded petals. Use a fine brush to add petals and a dotting tool for the center of each flower.
- Leaves and Stems: Add small leaf shapes and stems to enhance the floral design. You can create clusters of flowers or scatter them across your nails.
- Accent Nails: Choose one or two nails on each hand to feature the floral design, while keeping the other nails in solid blue. This creates a balanced and elegant look.
- Floral Designs: Use white or contrasting colored nail polish to create delicate floral patterns on some of your nails.
- Add Final Touches:
- Top Coat: Apply a top coat over the entire design to seal in the floral patterns and add a glossy finish. This will help to protect your manicure and keep it looking fresh.
- Drying: Allow your nails to dry completely before touching anything to avoid smudging or denting the design.
- Final Touches:
- Cuticle Care: Apply cuticle oil around your nails to keep your cuticles healthy and moisturized. This will enhance the overall look of your manicure and keep your nails looking neat.
Tips:
- Color Coordination: Ensure that the shades of blue you choose complement each other well. You can use a gradient effect or mix different tones to create depth.
- Pattern Placement: For a more refined look, apply floral accents sparingly or on specific nails. Consider using floral designs as accents rather than covering every nail.
- Precision: Use fine brushes and dotting tools for detailed floral patterns to ensure clean and intricate designs.
Blossoming Blues: Floral Accent Nail Inspiration brings a touch of elegance and freshness to your manicure with its combination of blue hues and delicate floral designs. This look is perfect for those who love a sophisticated and polished appearance with a hint of floral charm.
46. Elegant White & Pink Floral Accents

Elegant White & Pink Floral Accents is a refined and graceful nail design that combines soft white and pink tones with delicate floral patterns. This look is perfect for a sophisticated and romantic touch, ideal for any occasion where you want to add a hint of elegance to your style. Here’s how to create this chic and charming manicure:
Materials Needed:
- White Nail Polish: For the base and floral accents.
- Soft Pink Nail Polish: For the floral details.
- Base Coat: To protect your natural nails.
- Top Coat: To seal the design and add shine.
- Nail Art Brushes: For creating detailed floral designs.
- Dotting Tools: For adding small details and accents.
- Cuticle Oil: To keep your cuticles healthy.
Steps to Achieve the Look:
- Prepare Your Nails:
- Clean and shape your nails into your desired shape, such as square, oval, or almond.
- Apply a base coat to protect your natural nails and let it dry completely.
- Apply Base Color:
- White Base: Paint all your nails with a clean white polish. Apply one or two coats for full opacity and a smooth finish. Allow the polish to dry completely.
- Add Pink Floral Accents:
- Floral Designs: Use a soft pink polish to create delicate floral patterns on some of your nails.
- Flowers: Use a fine brush to paint small flowers with rounded petals. You can create simple blooms with a few petals or more intricate designs with additional layers.
- Leaves and Stems: Add small leaves and stems to complement the flowers. Use green or a slightly darker pink to create contrast and depth.
- Accent Nails: Choose one or two nails on each hand to feature the floral design, while keeping the rest of the nails in solid white. This creates a balanced and elegant look.
- Floral Designs: Use a soft pink polish to create delicate floral patterns on some of your nails.
- Add Final Touches:
- Top Coat: Apply a top coat over the entire design to seal in the floral patterns and add a glossy finish. This will help to protect your manicure and keep it looking fresh.
- Drying: Allow your nails to dry completely before touching anything to avoid smudging or denting the design.
- Final Touches:
- Cuticle Care: Apply cuticle oil around your nails to keep your cuticles healthy and moisturized. This will enhance the overall look of your manicure and keep your nails looking neat.
Tips:
- Color Harmony: Ensure that the white and pink colors complement each other well. Soft pinks can range from pastel to blush, depending on your preference.
- Pattern Placement: Apply floral accents sparingly or on selected nails for a sophisticated and understated look. You can use accent nails or feature flowers on the tips for added elegance.
- Precision: Use fine brushes and dotting tools for detailed floral patterns to ensure clean and intricate designs.
Elegant White & Pink Floral Accents creates a refined and romantic manicure with its blend of white and pink tones and delicate floral designs. This look adds a touch of sophistication and charm, making it perfect for special occasions or simply to enhance your everyday style.

