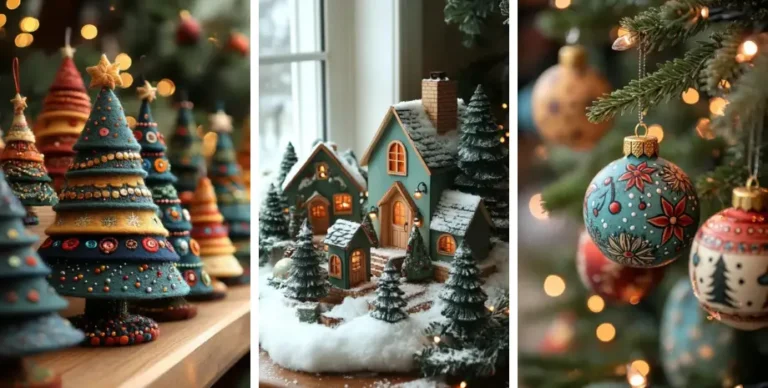
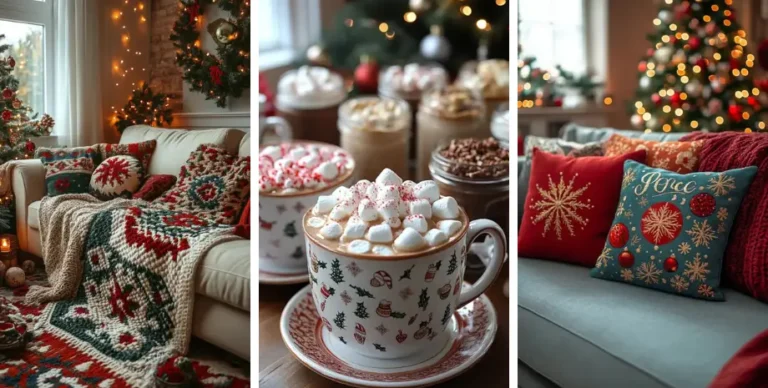
Decorating your home for Christmas is one of the most rewarding parts of the holiday season. As a man who’s all about practicality, I’ve come to appreciate that you don’t need to spend a fortune to create something festive and warm. The holiday spirit isn’t just about flashy displays or expensive decorations—it’s about making your home feel like a welcoming place where your loved ones can gather, even if you’re on a budget.
There’s something special about putting up those Christmas lights and seeing your space transform into a holiday haven. It’s not just about the decorations themselves, but the feeling they bring. You get a sense of pride when you can step back, look around, and know that you’ve created an inviting atmosphere without overdoing it. You want things to be just right—cozy, festive, and personal.
Most of all, there’s that deep satisfaction that comes with knowing you’ve done it yourself. Whether you’re hanging up handmade ornaments or stringing lights around the tree, it’s about more than just decorating. It’s about creating memories, making your space your own, and knowing that the holiday magic isn’t about the cost, but about the care you’ve put into it.
1. DIY Ornaments

DIY ornaments are a fun and creative way to add a personal touch to your Christmas tree without spending a lot of money. You can make them using inexpensive materials such as felt, paper, or even repurpose old fabric scraps from home. Here’s how you can do it:
- Materials: Gather basic crafting materials, such as:
- Felt or paper (for cutting out shapes)
- Old fabric scraps
- Paint, glitter, or ribbons for decoration
- Glue or sewing supplies
- Create Your Shapes: Cut out shapes or patterns like stars, hearts, or snowflakes from your chosen material. You can also use templates for a more consistent design.
- Personalize Your Ornaments:
- Use paint or markers to add designs, words, or festive patterns.
- Apply glitter for extra sparkle and shine.
- Add ribbons, bows, or even buttons for a more decorative look.
- Assembly: Once your ornaments are decorated and dry, use a hole punch to make a hole at the top and thread a ribbon or string through it, so it can hang on your tree.
This DIY project allows you to create unique Christmas decorations that reflect your personal style while also offering a fun, cost-effective activity for the holiday season.
2. Paper Snowflakes
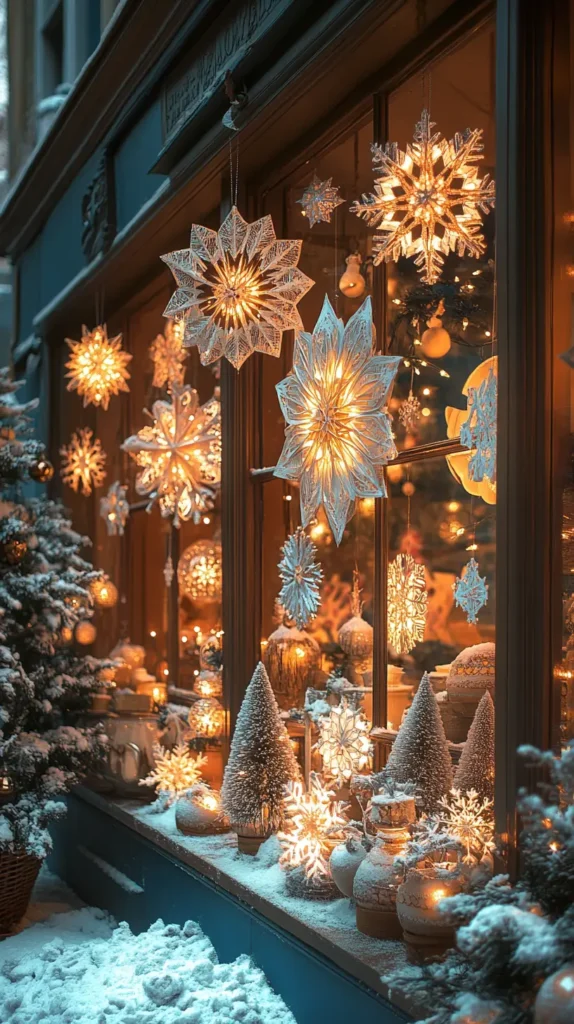
Paper Snowflakes are a timeless and easy way to add a festive, wintery charm to your Christmas decor. Here’s how to create these simple yet beautiful decorations:
- Materials:
- White paper (printer paper, construction paper, or recycled paper)
- Scissors
- Optional: Glitter, paint, or markers for extra decoration
- Folding the Paper:
- Start with a square piece of paper (you can easily cut rectangular paper into a square).
- Fold the square diagonally to form a triangle, then fold it again into a smaller triangle.
- Repeat this folding process to create multiple layers of paper, which will help create intricate designs.
- Cutting the Shapes:
- While the paper is folded, cut small shapes (like triangles, diamonds, or circles) along the edges. Be careful not to cut all the way through, as the folds will create the final snowflake pattern.
- Feel free to experiment with different cuts for more unique designs!
- Unfold and Decorate:
- Carefully unfold the paper to reveal your snowflake.
- If desired, add extra touches like glitter, paint, or markers to make the snowflake more festive.
- Display:
- Hang your paper snowflakes in windows, around doorways, or on the walls to create a winter wonderland effect throughout your home.
This classic DIY project brings a cozy, handmade feel to your Christmas Decor and can be enjoyed by everyone in the family.
3. Mason Jar Candle Holders
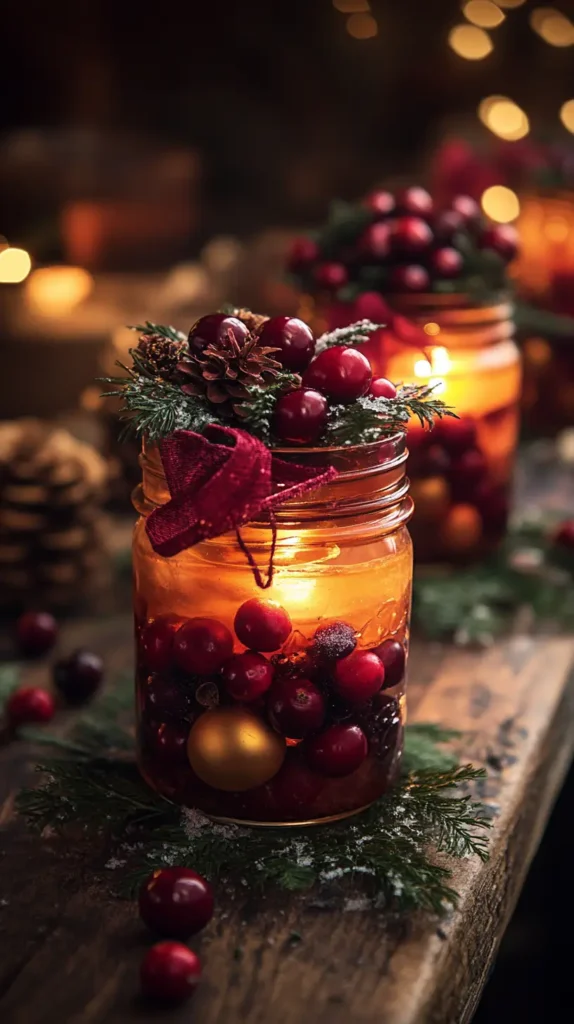
Mason Jar Candle Holders are a charming and versatile way to add a warm, festive glow to your Christmas decor. Here’s a simple guide to transform mason jars into beautiful holiday candle holders:
- Materials:
- Mason jars (any size)
- Faux snow, small ornaments, cranberries, or pinecones
- LED or tea light candles (for safety)
- Ribbon, twine, or decorative string
- Optional: Glitter, pine sprigs, or seasonal embellishments
- Prepare the Jar:
- Clean and dry the mason jars if they’ve been previously used.
- Fill the bottom of the jar with a layer of faux snow, cranberries, or small ornaments. You can mix and match depending on your style. The faux snow gives a wintery touch, while cranberries and ornaments add color and texture.
- Place the Candle:
- Insert a LED tea light or battery-operated candle on top of the snow or decorations inside the jar. For safety, it’s best to avoid real candles in this setup.
- Tie the Ribbon:
- Wrap a ribbon, twine, or decorative string around the top of the jar to secure it. You can tie it into a bow or leave it loose for a more rustic look.
- Add additional embellishments like small pinecones, sprigs of greenery, or a small ornament for a personalized touch.
- Display:
- Place your mason jar candle holders along the mantel, on tables, or as part of a centerpiece for a warm, festive ambiance. You can also line them up on the porch for a welcoming glow.
These mason jar candle holders bring a cozy, handmade feel to your Christmas decor and work beautifully in both modern and rustic holiday settings.
4. Upcycled Christmas Wreath
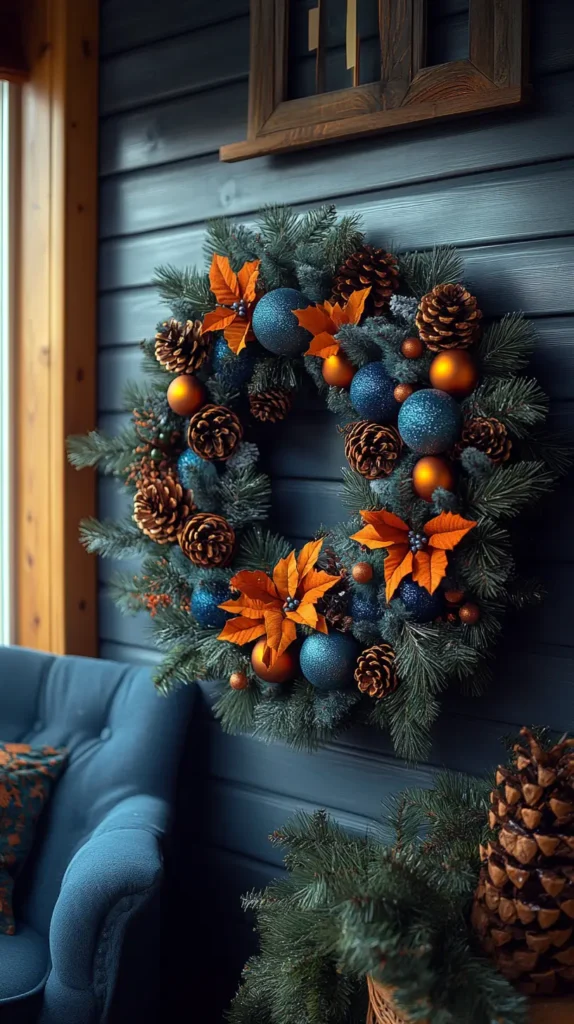
Upcycled Christmas Wreaths are a sustainable and creative way to bring festive charm to your home while reducing waste. Here’s how to make a beautiful and eco-friendly wreath using materials you already have:
- Materials:
- Simple wire wreath frame (or a DIY one made from a wire hanger)
- Old ornaments, fabric strips, pinecones, ribbon, or dried flowers
- Hot glue gun or floral wire
- Optional: Paint, glitter, or other embellishments for extra decoration
- Gather Your Supplies:
- Collect materials from around the house, such as:
- Broken or old ornaments
- Scraps of fabric or old sweaters (cut into strips)
- Pinecones, acorns, or dried flowers
- Ribbons, lace, or twine for tying
- Any other old holiday decorations you’re no longer using
- Collect materials from around the house, such as:
- Prepare the Wire Frame:
- If you don’t have a pre-made wreath frame, bend a wire hanger into a circular shape to create the base. You can also use a foam wreath form if you prefer.
- Wrap the wire frame in burlap, fabric strips, or greenery if you want a base layer before decorating.
- Assemble the Wreath:
- Start by attaching larger items (such as pinecones or big ornaments) to the wreath using a hot glue gun or floral wire. Arrange them evenly around the frame.
- Fill in any gaps with smaller items like fabric strips, smaller ornaments, or twigs to add texture and dimension.
- If you’re using fabric, consider tying it in small knots or loops for a cozy, rustic look.
- Add a Finishing Touch:
- Tie a ribbon or twine in a bow at the top of the wreath for a festive finish. You can also add glitter, paint, or even small bells for extra sparkle and cheer.
- Display Your Wreath:
- Hang the wreath on your front door, in the entryway, or on a wall to bring an eco-friendly touch to your Christmas decor.
Creating an upcycled wreath is a perfect way to use old materials and give them a second life, all while adding a personal and sustainable decoration to your holiday home.
5. Pinecone Decor
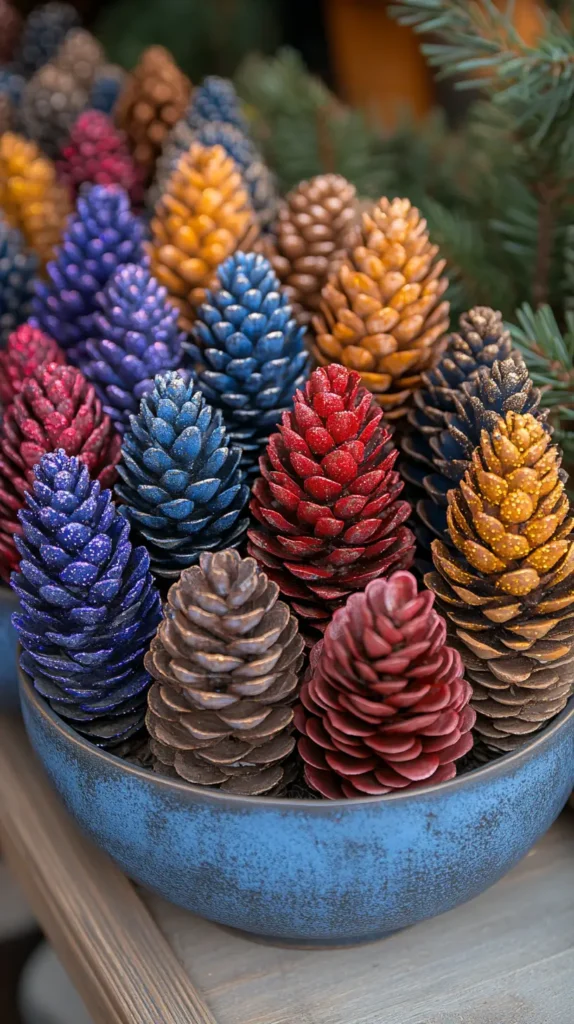
Pinecone Decor is an easy and rustic way to add natural beauty to your Christmas decor. Here’s how to incorporate pinecones into your holiday setup with a few simple ideas:
- Materials:
- Pinecones (fresh or dried)
- Paint (white, gold, or any color of your choice)
- Glitter, glue, or spray adhesive
- Ribbon or twine (for garlands)
- Bowls, trays, or decorative containers for displaying
- Optional: Small ornaments, berries, or greenery for embellishing
- Painted Pinecones:
- Paint the pinecones in traditional holiday colors such as white, gold, silver, or red for a festive touch. You can dip them in paint or use a paintbrush for more detailed designs.
- To add sparkle, sprinkle glitter on the wet paint or apply glue and dust them with glitter afterward.
- Painted pinecones can be displayed in bowls or used as part of a centerpiece.
- Natural Pinecone Decor:
- Leave pinecones in their natural state for a rustic look. Display them in clear glass jars, bowls, or wooden trays.
- You can also create a simple garland by stringing pinecones together using twine or ribbon and hanging them along railings, mantels, or doorways.
- Pinecone Garlands:
- Attach pinecones to a long piece of ribbon or twine, spacing them evenly. You can mix them with small ornaments or greenery to enhance the garland’s appearance.
- Hang your garland around the tree, on a mantel, or across the walls for a natural, woodland-inspired decoration.
- Pinecone Table Decor:
- Scatter pinecones on dining tables or side tables for an earthy, cozy touch.
- Place a few in glass vases, combine them with candles for a centerpiece, or add them to trays with other seasonal decorations.
Pinecone decor is simple, versatile, and adds a natural element to your Christmas Decor, making it both rustic and festive.
6. String Light Displays
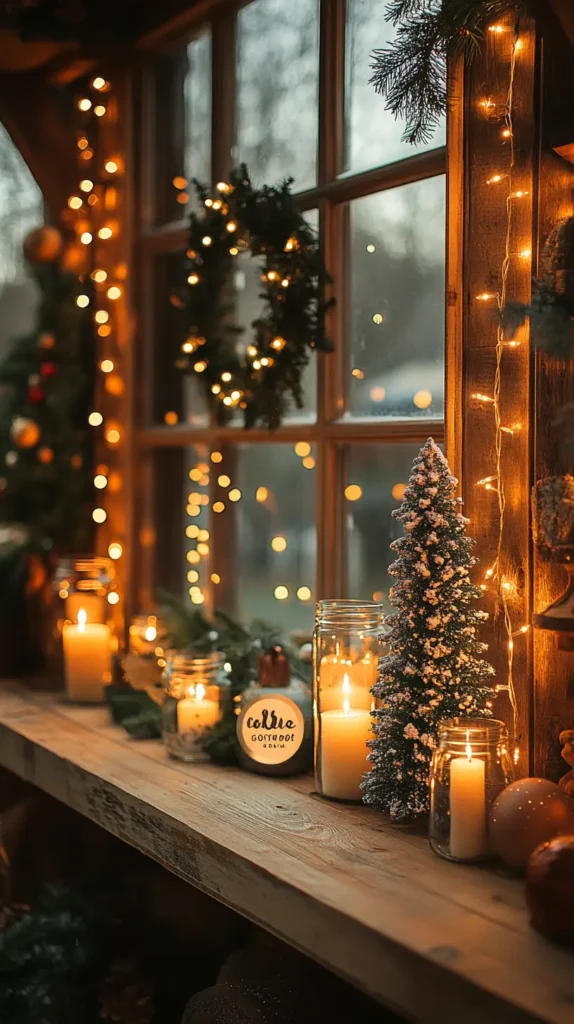
String Light Displays are an easy and magical way to spread warmth and holiday cheer throughout your home. Here’s how to creatively incorporate string lights into your Christmas decor:
- Materials:
- String lights (LED or battery-operated for safety)
- Decorative items like pinecones, greenery, or ornaments (optional)
- Command hooks, adhesive strips, or twine for hanging
- Bowls, vases, or jars for placing the lights (optional)
- Mantels:
- Drape string lights across the front of your mantel for a cozy, twinkling effect.
- You can combine lights with garlands, candles, or stockings to create a festive focal point.
- Consider wrapping the lights around a garland or arranging them within decorative items like bowls or vases for added texture.
- Windows:
- Hang string lights across windows inside your home to create a soft, glowing look.
- You can drape them along the window frame, use them to outline the window, or hang them vertically for a curtain-like effect.
- Combine lights with paper snowflakes or wreaths for an extra festive touch.
- Shelves and Bookcases:
- String lights can be woven through bookshelves or decorative shelving to highlight your holiday decorations and create a warm ambiance.
- Place them in jars or around plants for a more intimate display.
- Christmas Tree Alternative:
- Instead of a traditional tree, you can hang string lights in a Christmas tree shape on a wall. Add a star at the top for the perfect finishing touch.
- This is a great option if you’re short on space or looking for something different.
- Table Centerpieces:
- Create a stunning table centerpiece by arranging string lights in a glass vase, bowl, or tray, and surround them with small ornaments, pinecones, or greenery.
- For an added effect, place the lights under a glass dome or cloche for a more elegant display.
- Outdoor Displays:
- Don’t forget about your porch or outdoor spaces! Wrap string lights around railing posts, hang them in trees, or drape them across fences for a festive outdoor ambiance.
String light displays add a soft, warm glow to your Christmas Decor, making your home feel extra cozy and inviting during the holiday season.
7. Homemade Garlands
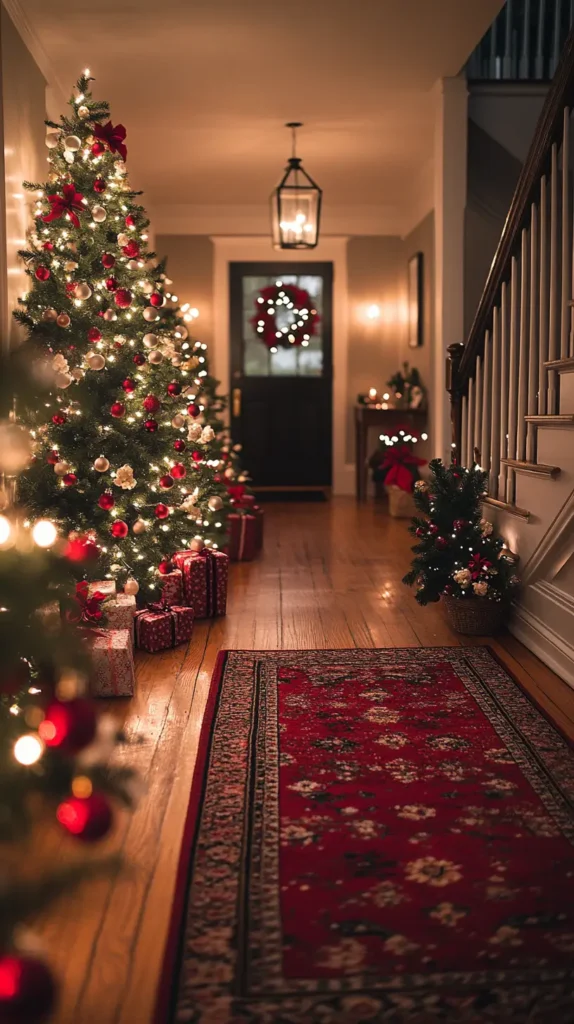
Homemade Garlands are a delightful and budget-friendly way to add a personal, crafty touch to your Christmas decor. You can create them using simple materials, and they can be displayed in many creative ways throughout your home. Here’s how to make different types of homemade garlands:
- Materials:
- Popcorn, cranberries, or dried fruit for traditional garlands
- Paper (construction paper, old book pages, or recycled paper) for paper chains
- Needle and thread, twine, or fishing line for stringing
- Glue, scissors, or craft supplies for extra embellishments
- Popcorn and Cranberry Garland:
- Step 1: Pop a batch of plain popcorn (without butter or salt). You can also dry cranberries to make them easier to string.
- Step 2: Using a needle and thread (or twine), alternate threading popcorn and cranberries onto the string.
- Step 3: Once you’ve made a garland of your desired length, drape it around the tree, along mantels, or across doorways for a rustic, traditional holiday look.
- Paper Chain Garland:
- Step 1: Cut strips of paper (in festive colors like red, green, gold, or silver). You can use old book pages, wrapping paper, or construction paper.
- Step 2: Form loops with the paper strips, gluing or taping the ends to secure them. Continue linking the loops together until you’ve created a chain.
- Step 3: Hang your paper chain garland on the tree, around doorways, or along stair railings for a colorful and playful touch.
- Dried Fruit Garland:
- Step 1: Slice fruits like oranges, lemons, or apples and dry them in the oven or by air drying.
- Step 2: Once dried, use a needle and thread to string the fruit slices together, spacing them evenly along the garland.
- Step 3: Hang your dried fruit garland on your tree, along mantels, or use it to decorate a festive tablescape.
- Cinnamon Stick Garland:
- Step 1: Tie cinnamon sticks together in small bundles using twine or string.
- Step 2: Hang the bundles along the garland, interspersing them with dried oranges, cranberries, or greenery.
- Step 3: Drape this garland across the mantel, doorways, or along the tree for a fragrant and rustic display.
- Fabric Scrap Garland:
- Step 1: Cut strips of old fabric, such as flannel, burlap, or even old Christmas pajamas.
- Step 2: Tie the strips in knots along a piece of twine or string, or sew them together for a longer garland.
- Step 3: Hang your fabric scrap garland along your tree or around doorways for a cozy, handmade look.
Homemade garlands are a creative and personal way to enhance your Christmas Decor. They can be customized to fit your theme and add a handmade charm that store-bought decorations can’t match.
8. Dollar Store Finds

Dollar Store Finds are an excellent way to create budget-friendly, festive Christmas decor without sacrificing style. Many dollar stores offer a wide range of holiday supplies, including ornaments, wrapping paper, craft materials, and more. Here’s how you can make the most of these affordable finds to enhance your Christmas Decor:
- Ornaments:
- Look for: Basic ornaments like plastic baubles, glass globes, or mini figurines.
- DIY Idea: Personalize the ornaments with paint, glitter, or stickers to match your color scheme. You can also create a custom ornament by filling clear glass ornaments with fake snow, beads, or small seasonal items.
- Wrapping Paper and Gift Bags:
- Look for: Beautiful wrapping paper, gift bags, and bows in festive patterns.
- DIY Idea: Use the wrapping paper to create paper chains, garlands, or as decorative accents around the house. You can also repurpose gift bags into gift tags or holiday signs.
- Craft Supplies:
- Look for: Ribbon, glue guns, glitter, paint, and other basic craft supplies.
- DIY Idea: Use these materials to create DIY wreaths, garlands, or personalized ornaments. Ribbons can also be tied around gifts or used to add extra flair to centerpieces.
- Holiday-Themed Fabric or Burlap:
- Look for: Small holiday-themed fabric pieces or burlap rolls.
- DIY Idea: Use the fabric for making homemade wreaths, stockings, or garlands. Burlap can also be used to create rustic bows or even a tree skirt.
- Candles and Candle Holders:
- Look for: Simple glass candle holders, LED candles, or tealight candles.
- DIY Idea: Fill the holders with festive decorations like cranberries, faux snow, or pinecones. You can also paint the candle holders or wrap them in twine for a more rustic look.
- Seasonal Signs and Wall Decor:
- Look for: Small wooden signs, wreaths, or holiday-themed prints.
- DIY Idea: Paint over signs to customize them, or add a coat of glitter to make them sparkle. You can also repurpose them into new home decor items.
- Ribbon and Garland:
- Look for: Holiday ribbon, tinsel, or garlands.
- DIY Idea: Wrap ribbon around gifts, use it as a garland for the tree, or tie it onto wreaths and garlands for extra flair.
- Faux Snow and Greenery:
- Look for: Faux snow, mini trees, pine branches, or poinsettias.
- DIY Idea: Add faux snow to mason jars, centerpieces, or around the base of trees. Mini trees and pine branches can be arranged into charming table centerpieces or window displays.
- Tableware:
- Look for: Holiday-themed plates, cups, and napkins.
- DIY Idea: Use plates and napkins for festive table settings, or repurpose them into wall art or holiday-themed trays.
By shopping at the dollar store, you can stock up on affordable holiday items that can be customized or repurposed to fit your style. Dollar Store Finds allow you to create high-impact Christmas Decor without breaking the bank.
9. Christmas Card Displays

Christmas Card Displays are a heartfelt and creative way to showcase the love and holiday wishes you receive during the season. Instead of letting the cards gather dust in a drawer, you can turn them into festive decor by incorporating them into your Christmas Decor. Here’s how to create a beautiful and personal card display:
- Materials:
- Christmas cards from family and friends
- String, twine, or ribbon
- Clothespins or decorative clips
- Wall hooks, nails, or adhesive strips (for hanging)
- Optional: Garland, greenery, or ornaments for extra decoration
- Simple String and Clothespin Display:
- Step 1: Stretch a piece of string or twine across a wall, mantel, or doorway.
- Step 2: Use clothespins or decorative clips to hang your Christmas cards along the string. Space them out evenly, or cluster them together for a fuller look.
- Step 3: For added charm, you can decorate the string with greenery, ribbon, or small ornaments that complement your holiday theme.
- Framed Christmas Card Display:
- Step 1: Use a large frame (or multiple smaller frames) and remove the glass.
- Step 2: String ribbon or twine across the back of the frame.
- Step 3: Attach the Christmas cards with clothespins, and hang the framed display on a wall or in a hallway.
- Step 4: Optionally, you can add a festive wreath or bow on top of the frame for a decorative touch.
- Mantel Card Garland:
- Step 1: Drape string or ribbon across your mantel in a zigzag pattern or in a straight line.
- Step 2: Attach the Christmas cards to the string with clothespins, allowing the cards to hang slightly.
- Step 3: Add extra holiday elements, such as pinecones, small ornaments, or mini stockings, to enhance the festive look.
- Wreath of Cards:
- Step 1: Create a wreath form from a wire hanger or use a pre-made wreath frame.
- Step 2: Attach the cards to the wreath form using clothespins or tape.
- Step 3: Embellish the wreath with ribbon, faux greenery, or small ornaments for a complete Christmas look. Hang it on a door or wall.
- Hanging Ladder Display:
- Step 1: Use a decorative ladder or old wooden ladder and lean it against a wall.
- Step 2: Attach string or ribbon horizontally between the rungs.
- Step 3: Hang your Christmas cards with clothespins on each string, creating a unique and festive display.
- Card Display Tree:
- Step 1: Use a large piece of cardboard, a foam board, or a wooden frame to create the outline of a Christmas tree.
- Step 2: Attach string or ribbon across the tree shape, starting at the top and working your way down in a tiered pattern.
- Step 3: Hang your Christmas cards on the ribbon with clothespins, creating a tree-shaped card display.
- Window or Door Display:
- Step 1: Stretch a string or ribbon horizontally or vertically across a window or door.
- Step 2: Hang the cards from the string with clothespins, creating a festive card garland that can be admired from both inside and outside.
Christmas Card Displays not only show off the love and holiday wishes you’ve received, but they also add a personal and meaningful element to your decor. This simple, yet effective idea allows you to use cards as part of your Christmas Decor, making the space feel warm, personalized, and festive.
10. Christmas Tree Cutouts
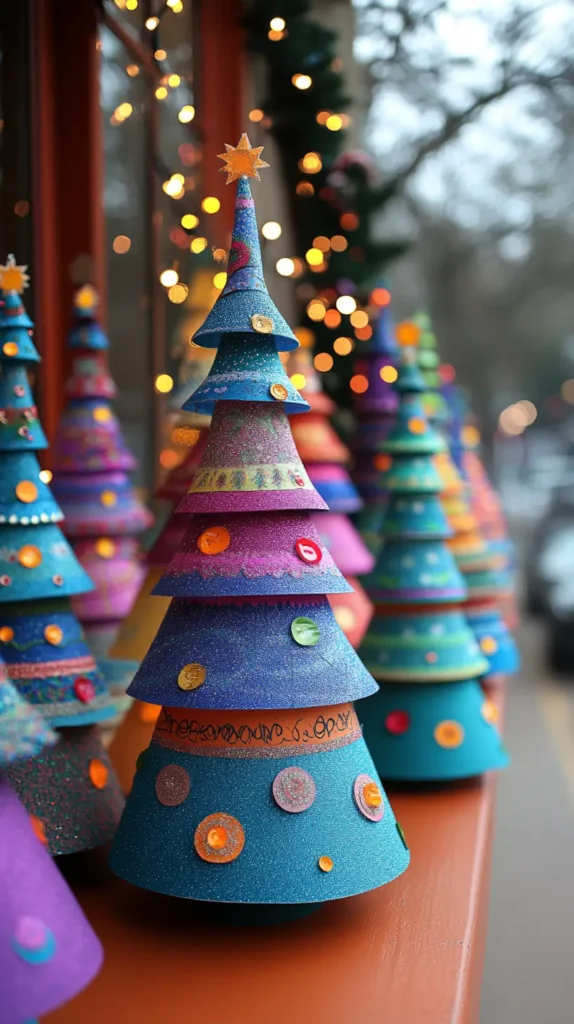
Christmas Tree Cutouts are a fun and creative way to incorporate some DIY charm into your Christmas Decor. They are easy to make, affordable, and can be personalized to fit your holiday theme. Here’s how you can create and display these festive cutouts:
Materials:
- Cardboard, construction paper, or even old cereal boxes
- Scissors
- Markers, stickers, glitter, paint, or other decorative items
- String, tape, or adhesive for hanging
- Optional: Ribbons, buttons, or mini ornaments for embellishments
Steps to Create and Display Christmas Tree Cutouts:
- Creating the Tree Shape:
- Step 1: Start by cutting out Christmas tree shapes from cardboard or construction paper. You can freehand the design or use a template to get the perfect triangle shape.
- Step 2: Make a base for each tree by cutting out a small rectangle or triangle to resemble the trunk.
- Decorating the Cutouts:
- Step 1: Use markers or paint to color the trees. You can create traditional green trees or use unconventional colors like gold, silver, or even pastel shades for a unique twist.
- Step 2: Add fun decorations such as glitter, stickers, buttons, or even small bits of fabric to resemble ornaments.
- Step 3: You can also outline the trees with ribbon or washi tape to give them a polished look.
- Hanging the Cutouts:
- Step 1: Once decorated, you can hang the trees on walls, windows, or doors using string, tape, or adhesive hooks.
- Step 2: For a dynamic look, hang the trees in a staggered arrangement on a wall to mimic a tree forest. Or, hang them on a string across a window or along a staircase railing.
- Step 3: Another idea is to create a large “tree” by grouping multiple smaller cutouts together in a triangular pattern on a wall, giving the illusion of a full Christmas tree.
- Extra Decorative Ideas:
- Step 1: Use small twine loops or paper clips to turn the cutouts into ornaments. Hang them on a garland or from the ceiling to create a floating tree forest.
- Step 2: Attach mini lights to the cutouts for an extra touch of sparkle.
- Step 3: Combine the tree cutouts with other holiday elements like snowflakes, stars, or reindeer to create a full scene on the wall.
Christmas Tree Cutouts are a fun, easy, and inexpensive way to add a handmade touch to your Christmas Decor. Perfect for homes with kids, classrooms, or even as party decorations, they bring a festive spirit to any room in a playful, creative way!
11. Festive Pillow Covers
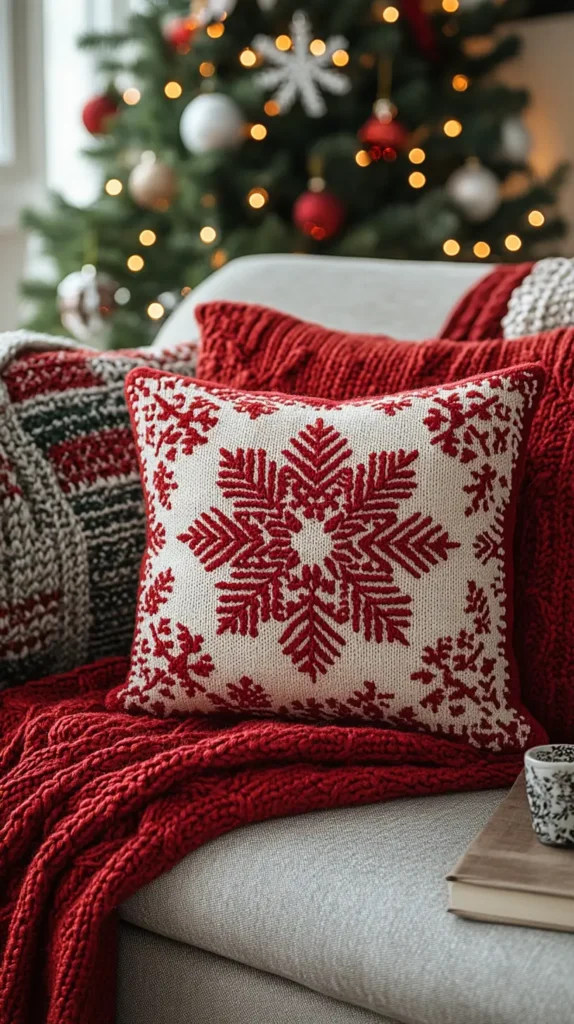
Festive Pillow Covers are a simple and affordable way to refresh your Christmas Decor without the need for entirely new pillows. By swapping out your regular pillow covers with Christmas-themed designs, you can instantly create a cozy, festive atmosphere in your home. Here’s how you can go about creating and using these covers to enhance your holiday decor:
Materials:
- Christmas-themed fabric (or plain fabric if you want to DIY your own design)
- Sewing machine (or needle and thread for hand-sewing)
- Pillow inserts (if you need to replace existing pillows)
- Iron-on transfers, fabric paint, or decorative appliqué (optional for DIY designs)
- Sewing pins, scissors, or fabric glue (for no-sew options)
Steps to Create or Use Festive Pillow Covers:
- Buying Ready-Made Pillow Covers:
- Step 1: Head to stores like home goods retailers, online marketplaces, or local boutiques for ready-made Christmas-themed pillow covers. Look for designs with festive patterns, such as snowflakes, Christmas trees, reindeer, or holiday phrases like “Merry & Bright” or “Ho Ho Ho.”
- Step 2: Swap out your regular pillow covers with these holiday designs. Mix and match different patterns and textures (like velvet, plaid, or burlap) to create a warm and inviting look.
- Step 3: Use pillows in various sizes for couches, chairs, and even your bed to add festive touches to each room.
- DIY Pillow Covers:
- Step 1: If you want a more personalized touch, purchase fabric that fits your holiday theme (e.g., red, green, plaid, or white with snowflakes).
- Step 2: Measure and cut the fabric to fit your pillow inserts, leaving about 1-2 inches for seams on each side.
- Step 3: Sew the edges together, leaving one side open for the pillow insert, or use fabric glue for a no-sew option. Turn the fabric inside out and stuff the pillow inside.
- Step 4: Decorate the cover by adding designs such as appliqué Christmas trees, embroidered snowflakes, or fabric paint stenciled messages like “Let It Snow.”
- Step 5: Add embellishments like tassels, pom-poms, or ribbon for extra flair.
- Iron-On Transfers and Fabric Paint:
- Step 1: For a simple DIY option, purchase iron-on transfers with holiday designs (like reindeer, snowmen, or Christmas greetings) or use fabric paint to create your own custom designs.
- Step 2: Follow the instructions to apply the transfers to your pillow covers, or use stencils and fabric paint to create a personalized design.
- Step 3: Once dry, fit the covers over your pillows and enjoy the festive look!
- Mix and Match:
- Step 1: Combine solid-colored pillow covers with patterned ones to create a balanced look. For example, pair a Christmas-themed pillow with a simple red or green pillow cover for a classic, cohesive design.
- Step 2: Play with textures like velvet, linen, or faux fur to add depth and richness to your holiday setup.
- Storage for Off-Season:
- Step 1: Once the holiday season is over, pack up your festive pillow covers in a storage bin for next year. Keep your regular pillows in rotation, or simply swap out the covers as needed.
Festive Pillow Covers provide a quick and affordable way to infuse holiday cheer into your Christmas Decor. Whether you buy them or make your own, they’re the perfect way to add warmth, comfort, and a festive touch to your home without breaking the bank!
12. Natural Greenery
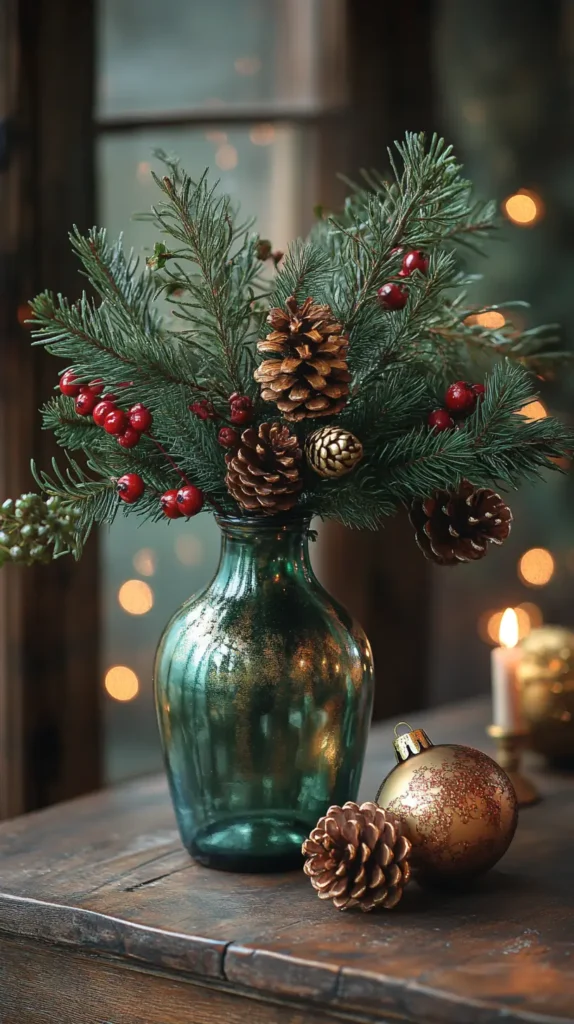
Natural Greenery is a timeless and eco-friendly way to add an organic, festive touch to your Christmas Decor. Bringing the outdoors inside with fresh branches, evergreen sprigs, or holly can instantly transform your space into a winter wonderland. Here’s how to incorporate natural greenery into your holiday decor:
Materials:
- Fresh branches, evergreen sprigs (like pine, fir, or cedar), or holly
- Vases, jars, or pitchers
- Floral foam or oasis (optional for arranging)
- Ribbon, twine, or decorative bows (optional)
- Pinecones, berries, or other natural embellishments (optional)
Ways to Use Natural Greenery:
- Table Centerpieces:
- Step 1: Gather sprigs of evergreen or holly and arrange them in a low, wide vase or jar. This simple arrangement will add a rustic, festive feel to your dining table.
- Step 2: Mix in pinecones, red berries, or small decorative ornaments for extra holiday flair.
- Step 3: Wrap a piece of twine or ribbon around the vase for a cozy, farmhouse-inspired look.
- Mantel or Shelf Displays:
- Step 1: Place large sprigs of evergreen along your mantel or on shelves for a natural, woodsy look.
- Step 2: Tuck in some holly or mistletoe for added color and texture.
- Step 3: Add candles, lanterns, or small Christmas figurines among the greenery for a warm and inviting display.
- Door Wreaths:
- Step 1: Create a simple wreath using a wire frame, and add fresh greenery, pinecones, and berries. Secure the branches with floral wire or hot glue.
- Step 2: Add a bow or ribbon at the top for a finishing touch.
- Step 3: Hang it on your front door or inside near the entryway for a welcoming touch.
- Greenery Garlands:
- Step 1: Drape a garland of evergreen sprigs across your mantel, staircase railing, or around doorways.
- Step 2: Add small ornaments, lights, or bows to enhance the look. You can also incorporate faux snow for a wintry vibe.
- Step 3: Mix in natural materials like holly or pinecones to keep it earthy and festive.
- Vase Arrangements:
- Step 1: Use mason jars, vases, or pitchers to create small, simple arrangements of greenery. This works well as accent pieces on tables, windowsills, or counters.
- Step 2: For a more rustic look, wrap the jars with burlap, twine, or festive ribbon.
- Step 3: Place small pinecones or decorative berries inside the jar for added texture and color.
- Hanging Greenery:
- Step 1: Hang sprigs of greenery, like mistletoe or holly, from the ceiling or chandelier with twine or ribbon.
- Step 2: This can create a charming focal point, especially in entryways or dining areas.
- Step 3: Combine the greenery with small ornaments or dried flowers for a more personalized look.
- Greenery Around the Tree:
- Step 1: Place fresh sprigs of evergreen around the base of your Christmas tree for an extra touch of nature.
- Step 2: You can also add holly or pinecones between the tree branches for a cohesive, natural theme.
- Window or Mirror Displays:
- Step 1: Decorate your windowsills or mirrors with small, simple arrangements of greenery.
- Step 2: Tuck in a few berries or small ornaments for a festive look.
- Step 3: For a larger display, wrap greenery around the window frame or mirror for a fuller effect.
Benefits of Using Natural Greenery:
- Freshness: Natural greenery adds a lovely fragrance to your home that artificial decorations can’t replicate.
- Eco-Friendly: You’re bringing in materials that are biodegradable and sustainable.
- Personal Touch: Each piece of greenery is unique, giving your decor a personal, natural feel.
Natural Greenery is an effortless yet elegant way to enhance your Christmas Decor. Whether used in centerpieces, garlands, wreaths, or simple vase arrangements, it brings a refreshing, organic beauty to your home during the holiday season.
13. DIY Advent Calendar
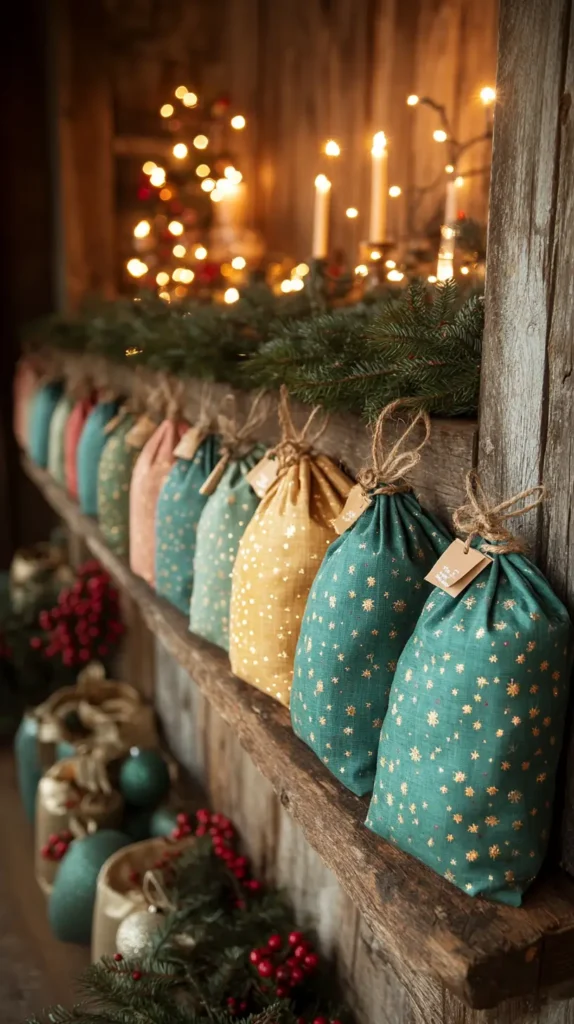
DIY Advent Calendar is a creative and personalized way to count down the days until Christmas. By making your own, you can customize it to fit your style and add special touches, like small treats or meaningful notes. Here’s how to create your own Advent Calendar to enhance your Christmas Decor:
Materials:
- Small paper bags, envelopes, or boxes (you can also use mini pouches, cloth bags, or jars)
- Twine, ribbon, or string
- Small clips, clothespins, or hooks for hanging (optional)
- Small treats (candies, chocolates, cookies, etc.) or notes
- Numbers (stickers, stamps, or hand-written) to mark each day
- Decorations (optional: glitter, stickers, washi tape, etc.)
Steps to Create a DIY Advent Calendar:
- Choose Your Containers:
- Option 1: Use small paper bags or envelopes. These can be decorated with stamps, stickers, or drawn designs.
- Option 2: Use small boxes, mini jars, or fabric pouches for a more unique look. These can also be personalized with paint, fabric, or embellishments.
- Number the Containers:
- Assign numbers 1 through 24 (or 25 if you include Christmas Day) to each bag or envelope. You can use numbered stickers, handwrite the numbers, or stamp them for a more decorative touch.
- Fill the Calendar:
- Treats: Fill each bag or envelope with small treats like chocolates, candies, cookies, or nuts. For a healthier option, you can add dried fruit, mini granola bars, or small packs of nuts.
- Notes: Add fun surprises like holiday quotes, small challenges (e.g., “Watch a Christmas movie”), or tiny gifts like stickers or ornaments.
- Personalized Touches: For a more meaningful experience, add personal notes, holiday jokes, or mini coupons (e.g., “One free hug” or “Make a hot cocoa together”).
- Arrange and Hang:
- Option 1: Arrange the bags or envelopes on a string, twine, or ribbon, hanging them on a wall, across a fireplace mantel, or along a staircase railing. You can hang them using small clothespins or clips.
- Option 2: Create a more structured display by attaching the bags to a wooden frame, tree branches, or a large board. Use hooks or nails to hang each bag in a row or festive pattern.
- Add Decorations:
- Enhance the look by adding ribbons, bows, or small ornaments to the bags or envelopes.
- You can also wrap the bags in holiday paper or add washi tape around the edges for a festive touch.
- Personalize the Calendar:
- Choose a theme for your calendar, like a rustic farmhouse look with natural materials or a more elegant design with metallic colors.
- Consider using a mix of traditional red, green, and gold for a classic Christmas look, or opt for pastels and whites for a soft winter theme.
- Final Touches:
- Make sure your calendar is displayed in a place where you and your family can easily access it daily. It can become a wonderful tradition to open a new surprise each day!
- If you have young children, consider adding activities that the whole family can enjoy together, such as baking cookies, crafting decorations, or going for a winter walk.
Benefits of a DIY Advent Calendar:
- Customization: You can personalize it with treats, notes, or mini gifts that are meaningful to you and your loved ones.
- Creative Bonding: It’s a fun way to involve the whole family in the Christmas countdown.
- Cost-Effective: You can make the calendar as simple or elaborate as you like, keeping it affordable.
DIY Advent Calendar is a delightful addition to your Christmas Decor, creating daily moments of joy and anticipation as you count down the days to Christmas!
14. Gift-Wrapped Wall Art
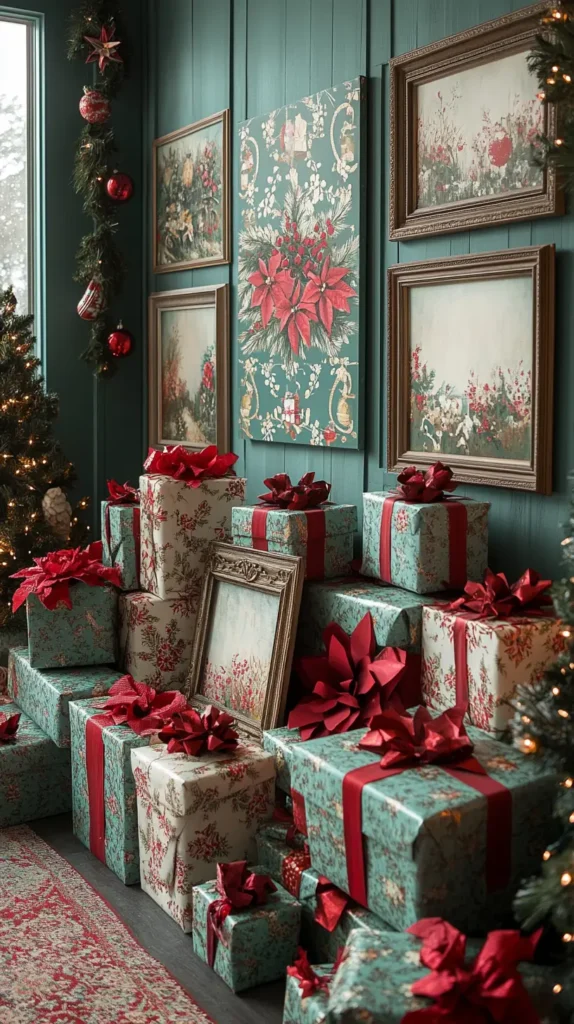
Gift-Wrapped Wall Art is a creative and festive way to reuse leftover wrapping paper and transform your walls into holiday masterpieces. This simple DIY project adds a touch of charm and a sense of excitement to your Christmas Decor, making it feel like every piece of art is a present waiting to be opened.
Materials:
- Leftover wrapping paper (preferably in holiday-themed patterns)
- Picture frames, canvases, or artwork
- Ribbon, bows, or twine
- Tape, glue, or push pins (for securing)
- Scissors
- Optional: Holiday-themed tags or decorations (e.g., mini ornaments)
Steps to Create Gift-Wrapped Wall Art:
- Select Your Art Pieces:
- Choose frames, canvases, or any artwork you already have hanging on your walls. If you want to change the art itself, you can use inexpensive prints or create DIY artwork that suits the holiday theme.
- Wrap the Frames or Canvases:
- Step 1: Cut pieces of leftover wrapping paper large enough to cover the frame or canvas completely.
- Step 2: Wrap the wrapping paper around the edges of the frame or canvas as you would a gift. Fold the edges neatly and secure them with tape or glue.
- Step 3: If the canvas has visible staples or edges that aren’t as neat, use some ribbon or twine to cover the seams for a cleaner look.
- Add a Bow or Ribbon:
- Step 1: Once the wrapping paper is in place, tie a festive ribbon, twine, or string around the frame or canvas. You can make a bow or simply tie a knot for a more minimalist look.
- Step 2: For extra flair, consider using a contrasting color ribbon or a holiday-themed ribbon, like one with snowflakes or reindeer.
- Decorate with Tags or Mini Ornaments (Optional):
- Step 1: Attach a small holiday tag or mini ornament to the bow or ribbon. This could be something personalized with a name or holiday message, adding a playful touch.
- Step 2: You could also use tiny bells or holiday charms for added sparkle and festive spirit.
- Hang Your Gift-Wrapped Art:
- Step 1: Once your frames or canvases are wrapped and adorned, hang them back on the wall. You can cluster them together for a gallery wall effect or space them out for a more refined look.
- Step 2: If you’re using canvases without frames, you can use push pins to attach the wrapped art to the wall.
- Mix and Match:
- Play with different types of wrapping paper, from traditional reds and greens to more neutral or metallic options, depending on your existing holiday decor.
- Combine multiple wrapped pieces to create a cohesive holiday look on one wall or throughout your space.
Benefits of Gift-Wrapped Wall Art:
- Creative Use of Leftovers: It’s an excellent way to repurpose leftover wrapping paper from gifts, reducing waste.
- Festive Vibe: The wrapped art looks like presents, which immediately brings excitement and joy to your holiday decor.
- Easy and Affordable: This is a simple DIY project that doesn’t require buying anything new—just use what you already have on hand.
Gift-Wrapped Wall Art adds a creative and joyful twist to your Christmas Decor, turning everyday artwork into festive holiday surprises that brighten up your home!
15. Tinsel Accents

Tinsel Accents are a quick and affordable way to add sparkle and holiday cheer to your Christmas Decor. Whether you’re decorating banisters, mirrors, shelves, or even small trees, tinsel brings a festive, shimmering touch that’s sure to brighten up any room. Here’s how to make the most of tinsel in your holiday decorating:
Materials:
- Tinsel garland or strands (available in various colors, including silver, gold, red, green, or multicolored)
- Scissors (if trimming is needed)
- Ribbon, twine, or hooks (optional for securing)
- Decorative items like ornaments, bows, or small lights (optional)
Steps to Use Tinsel Accents in Your Decor:
- Wrap Around Banisters or Railings:
- Step 1: Start by wrapping tinsel around your staircase banister, railing, or any vertical posts in your home.
- Step 2: Twist the tinsel tightly to ensure it stays in place. You can use ribbon or small hooks to secure it at the ends if necessary.
- Step 3: For a fuller look, layer tinsel over itself to create more volume and sparkle.
- Frame Mirrors or Windows:
- Step 1: Wrap tinsel around the edges of mirrors, window frames, or doors. This adds a reflective shine and highlights the features of the room.
- Step 2: For a neat look, secure the tinsel at the corners with small pieces of tape, or weave it through curtain rods or hooks.
- Accentuate Shelves or Mantels:
- Step 1: Drape tinsel along shelves or mantels. Let it hang slightly over the edges for a draped effect, or wrap it around the objects displayed on the shelf.
- Step 2: Combine tinsel with other holiday decorations like small candles, ornaments, or figurines for a festive arrangement.
- Add to Holiday Wreaths or Garlands:
- Step 1: Incorporate tinsel into a wreath or garland to enhance its sparkle. Wrap a strand of tinsel around the greenery, or tuck it in between branches.
- Step 2: Pair with other accents like pinecones, berries, or small lights for a beautiful, shimmering display.
- Embellish Christmas Trees:
- Step 1: If you have a Christmas tree, drape tinsel around the branches, layering it between your ornaments or lights.
- Step 2: For a more dramatic effect, wrap tinsel around the trunk of the tree, letting it cascade down like a shimmering waterfall.
- Use as a Table Runner or Centerpiece:
- Step 1: Spread a strand of tinsel across your dining table as a makeshift table runner or under a centerpiece.
- Step 2: Add candles, small ornaments, or other seasonal decorations on top of the tinsel for a magical effect.
- Create Tinsel Curtains or Backdrops:
- Step 1: Hang strands of tinsel from the ceiling or from a curtain rod to create a shimmering backdrop for parties or family gatherings.
- Step 2: This works especially well for entryways or around doorways for an extra bit of sparkle as guests enter.
Benefits of Using Tinsel Accents:
- Affordable and Accessible: Tinsel is inexpensive and easy to find, making it a great option for last-minute decorating.
- Instant Festive Feel: The reflective properties of tinsel immediately add a festive and glamorous feel to any space.
- Versatile: Tinsel can be used in a variety of ways—wrapping, draping, layering, or tacking—to suit different areas of your home.
Tinsel Accents are a classic way to enhance your Christmas Decor with an effortless, sparkling glow. Whether used on banisters, mirrors, shelves, or even around a Christmas tree, tinsel brings joy and brightness to your holiday home!
16. Holiday Scent Jars

Holiday Scent Jars are a simple and charming way to infuse your home with the warm, cozy aromas of the holiday season. These easy-to-make jars not only add a delightful fragrance but also serve as a festive decoration. Here’s how to create your own Holiday Scent Jars for an extra touch of Christmas Decor.
Materials:
- Small mason jars, glass jars, or decorative containers
- Cinnamon sticks
- Whole cloves
- Dried orange slices or fresh orange peels
- Other optional additions: star anise, pine needles, nutmeg, or cranberries
- Ribbon, twine, or tags (for decorating)
- Optional: small battery-operated tea lights for added ambiance
Steps to Create Holiday Scent Jars:
- Choose Your Containers:
- Select small jars or decorative containers with lids, like mason jars or vintage glass jars. These can be found at craft stores, or you can repurpose old jars you have at home.
- Prepare the Ingredients:
- Gather your chosen scent ingredients: cinnamon sticks, cloves, and dried orange slices or peels.
- Optional Additions: You can also add star anise, cranberries, nutmeg, or pine needles for a more layered fragrance.
- Assemble the Jars:
- Step 1: Start by placing a few cinnamon sticks in each jar.
- Step 2: Add several cloves and a few dried orange slices or peels. Mix and match according to your scent preferences.
- Step 3: If you’re using additional ingredients like star anise or cranberries, layer them in the jar for a decorative look.
- Seal and Decorate the Jars:
- Step 1: Close the jars tightly to help retain the fragrance inside.
- Step 2: Tie a ribbon, twine, or decorative string around the jar’s lid for an added festive touch.
- Step 3: Optionally, attach a holiday tag or label with a personalized message or scent description (e.g., “Cinnamon & Clove Bliss”).
- Display the Scent Jars:
- Place the jars around the house in areas that will benefit from a cozy, holiday fragrance. Ideal spots include:
- On mantelpieces, side tables, or shelves
- Near windowsills or entryways
- In the kitchen, as a welcome scent when guests arrive
- On dining tables or as part of a centerpiece arrangement
- Place the jars around the house in areas that will benefit from a cozy, holiday fragrance. Ideal spots include:
- Optional Ambient Touch:
- For extra ambiance, place a small battery-operated tea light underneath the jar (if the jar design allows it) to create a warm, glowing effect.
- Refresh the Scent:
- If the scent starts to fade after a few days, simply open the jar and allow fresh air to enhance the aroma. You can also refresh the jars by adding a few more cinnamon sticks or orange slices as needed.
Benefits of Holiday Scent Jars:
- Warm, Inviting Fragrance: The combination of cinnamon, cloves, and orange creates a classic holiday smell that fills your home with warmth and comfort.
- Customizable: You can easily adjust the ingredients to suit your personal scent preferences or the ambiance you want to create.
- Affordable: This project uses simple, inexpensive materials that are often readily available.
- Decorative and Festive: The jars themselves can be part of your holiday décor, adding a rustic or vintage charm to your space.
Holiday Scent Jars are an affordable, delightful way to enhance your Christmas Decor with the comforting scents of the season. Perfect for gifting, or simply enjoying the cozy atmosphere they create, these jars bring a festive, homey touch to any room.
17. Burlap Bows
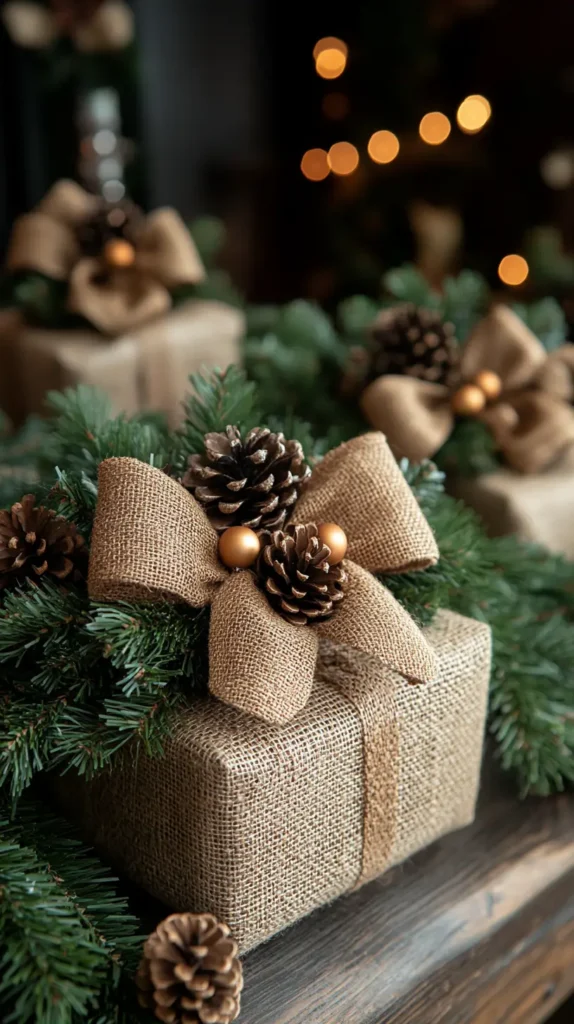
Burlap Bows bring a rustic, homespun charm to your Christmas Decor without breaking the bank. Burlap is an affordable material that adds texture and warmth to your holiday decorations, making it a perfect choice for wreaths, garlands, gifts, and more. Here’s how to create and use Burlap Bows in your holiday decorating.
Materials:
- Burlap ribbon (available in various widths, often with wire edges for easy shaping)
- Scissors
- Floral wire, twist ties, or a hot glue gun (optional for securing)
- Optional: Christmas-themed embellishments like pinecones, berries, or small ornaments
Steps to Create Burlap Bows:
- Cut the Burlap Ribbon:
- Measure and cut a piece of burlap ribbon to the desired length. A good starting length for a bow is about 24 inches, but this can vary depending on how large or small you want the bow to be.
- Form the Loops:
- Step 1: Make a loop with one end of the ribbon. Pinch the center together and hold it tightly.
- Step 2: Continue making additional loops by folding the ribbon back and forth, working towards the center.
- Step 3: Keep the loops even in size for a symmetrical bow. The number of loops depends on how full you want your bow to look.
- Secure the Bow:
- Step 1: Once you have your loops, pinch the center of the bow and secure it with floral wire, twist ties, or a hot glue gun.
- Step 2: If you want the bow to hold its shape better, wrap the wire around the center tightly and twist it in place.
- Add Tails (Optional):
- Step 1: Cut two long strips of burlap ribbon to create the “tails” of your bow. The tails can be as long as you like, depending on where you plan to display the bow.
- Step 2: Attach the tails to the center of the bow, either by tying them directly to the bow or securing them with glue or wire.
- Embellish the Bow (Optional):
- For a more festive look, add small holiday-themed decorations to the center of the bow, such as:
- Pinecones
- Berries
- Small ornaments
- A sprig of evergreen or holly
- For a more festive look, add small holiday-themed decorations to the center of the bow, such as:
- Display Your Burlap Bows:
- Wreaths: Attach a burlap bow to the top or side of a Christmas wreath for a cozy, rustic touch.
- Garlands: Tie burlap bows to sections of garland, either on banisters, mantels, or along stair rails.
- Gifts: Use a burlap bow as a finishing touch for wrapping Christmas gifts.
- Home Decor: Hang burlap bows on door handles, light fixtures, or window sills for a subtle festive accent.
Benefits of Burlap Bows:
- Budget-Friendly: Burlap is inexpensive and often readily available at craft stores or online.
- Rustic Appeal: The natural texture of burlap adds a rustic and cozy vibe to your holiday decor, perfect for a country or farmhouse-style Christmas.
- Customizable: You can easily adjust the size, shape, and embellishments of your burlap bows to match your decorating style.
- Easy to Make: With just a few simple materials, you can quickly create charming bows to enhance your decor.
Burlap Bows offer a simple yet elegant way to elevate your Christmas Decor with rustic charm. Whether you’re decorating a wreath, garland, or gift, these bows add warmth and a handmade feel to your holiday celebrations.
18. Printable Wall Art
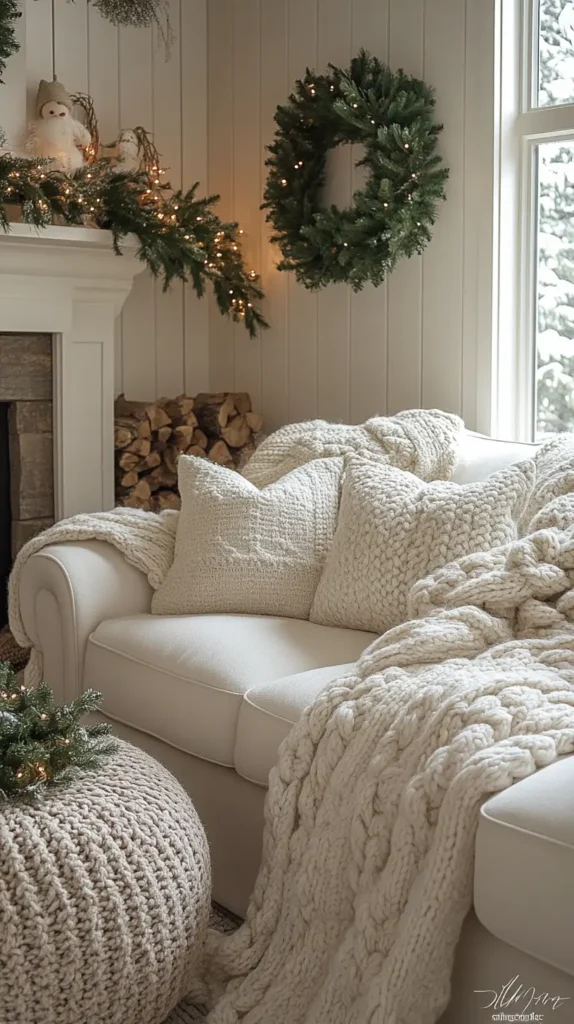
Printable Wall Art is a budget-friendly and effortless way to bring festive cheer to your Christmas Decor. With just a few clicks, you can find beautiful, printable Christmas-themed artwork online, print it out, and frame it to add a personalized touch to your walls. Here’s how to create stunning holiday wall art with minimal effort and expense.
Materials:
- Computer or tablet with internet access
- Printer (ideally color printer for the best results)
- High-quality paper or cardstock (matte or glossy finish)
- Frames (optional, depending on the size of the print)
- Scissors (if resizing the print is needed)
- Tape or adhesive (optional for hanging without a frame)
Steps to Create Printable Wall Art:
- Find Printable Christmas Art:
- Search online for free or low-cost Christmas printable wall art. Many websites and platforms offer downloadable files, such as:
- Etsy (for affordable prints)
- Free printables websites (like Canva, Creative Market, or Google Images)
- Holiday blogs or craft websites
- Choose designs that fit your decor style—whether it’s classic holiday quotes, Christmas trees, snowflakes, or minimalist artwork.
- Search online for free or low-cost Christmas printable wall art. Many websites and platforms offer downloadable files, such as:
- Download the Print:
- Once you’ve found a design you love, download the file to your computer or device. Be sure to check the print quality and resolution to ensure it will look good when printed (300 DPI is ideal for high-quality prints).
- Print the Art:
- Step 1: Open the file on your computer and select the print option. Choose the appropriate paper size (8×10, 11×14, etc.) depending on the size of your frame.
- Step 2: Make sure to select “High Quality” or “Best” print settings for the best color and clarity.
- Step 3: Print the artwork on high-quality paper or cardstock. If you want a more professional look, consider using photo paper or a textured cardstock.
- Cut to Size (Optional):
- If your printout is larger than your frame or needs to be adjusted, carefully cut around the edges using scissors or a paper cutter for a precise fit.
- Frame the Print:
- Step 1: Select a frame that matches the dimensions of your print. You can find affordable frames at stores like IKEA, Target, or even craft stores. Choose a style that complements your overall decor—whether it’s a simple black frame, a rustic wood frame, or a festive gold or silver one.
- Step 2: Insert the print into the frame and secure it in place. If you prefer a no-fuss approach, you can also hang the print directly on the wall using adhesive strips or a decorative clip.
- Display Your Christmas Wall Art:
- Place your framed artwork on walls in living rooms, dining areas, or entryways. Group several prints together for a gallery wall effect or hang them individually in key spots like above the mantel, near the tree, or in the hallway.
- You can also add small decorations or garlands around the frames for an extra touch of holiday spirit.
Benefits of Printable Wall Art:
- Cost-Effective: Many printable art pieces are free or very low-cost, offering a stylish solution for holiday decorating without spending much.
- Instant Gratification: You can create beautiful, custom wall art in just a few minutes—no waiting for shipping or expensive gallery prints.
- Customizable: Print art in any size or style to fit your space perfectly. Whether you want a festive holiday quote, winter scene, or abstract Christmas design, you have endless options.
- Eco-Friendly: By printing at home, you can reduce the need for excessive packaging and shipping waste.
- Personalizable: You can even add your own touches, like adding a family name, a special message, or incorporating holiday colors to match your decor.
Printable Wall Art is a fantastic way to enhance your Christmas Decor in a quick, easy, and affordable way. It allows you to express creativity and add a personal touch to your home during the holiday season. Whether you print out traditional Christmas sayings or modern holiday graphics, this method brings festive charm to any wall!
19. Gift Box Displays

Gift Box Displays offer a simple yet festive way to enhance your Christmas Decor. By wrapping empty boxes in beautiful wrapping paper and adding ribbons, you can create the illusion of presents without spending extra money. These decorative boxes can be stacked under the tree, displayed on shelves, or incorporated into centerpieces to create a magical, holiday atmosphere.
Materials:
- Empty boxes (any size or shape)
- Christmas wrapping paper or patterned paper
- Ribbons, bows, or decorative twine
- Scissors
- Tape or glue
- Optional: tags, stickers, or embellishments
Steps to Create Gift Box Displays:
- Collect Empty Boxes:
- Gather empty boxes from around the house, such as old shoe boxes, gift boxes, or small storage boxes. Any size will work depending on the area where you want to display them.
- Alternatively, purchase plain cardboard boxes from a craft or office supply store if you don’t have any at home.
- Wrap the Boxes:
- Step 1: Choose your wrapping paper. For a cohesive look, pick a Christmas-themed paper in colors that match your holiday decor (red, gold, green, or silver are classic choices).
- Step 2: Measure and cut the paper to fit each box. Be sure to leave enough paper to cover the sides completely and fold them neatly.
- Step 3: Wrap the paper around the box and secure it with tape. Make sure the corners are folded crisply for a polished finish.
- Add Decorative Ribbons:
- Step 1: Choose a ribbon or twine that complements the wrapping paper. This could be a wide satin ribbon, a jute twine for a rustic look, or a sparkly tinsel ribbon for extra holiday shine.
- Step 2: Tie a bow or knot the ribbon around the box to add a decorative touch. For a more festive effect, you can layer different types of ribbons.
- Step 3: If you want to add an extra detail, consider adding a gift tag, small ornament, or Christmas-themed sticker to the ribbon.
- Display Your Gift Boxes:
- Under the Tree: Stack the wrapped boxes neatly around the base of your Christmas tree. Mix up the sizes and shapes to create a layered look that mimics a pile of gifts.
- On Shelves or Mantels: Arrange the boxes on shelves, mantels, or in entryway displays for a whimsical and festive touch.
- As a Table Centerpiece: Stack a few boxes in the center of your dining or coffee table for a charming holiday centerpiece. You can surround the boxes with candles, greenery, or small pinecones to enhance the display.
- Window Displays: Place them near windows or in front of a porch for a lovely holiday touch that can be seen from outside.
- Optional Embellishments:
- You can add additional decorations like:
- Small ornaments on top of the boxes
- Holiday-themed tags with messages like “Merry Christmas” or “Happy Holidays”
- Sparkling garlands or faux snow sprinkled around the base of the boxes
- You can add additional decorations like:
Benefits of Gift Box Displays:
- Cost-Effective: This is a low-cost decorating option, especially if you repurpose boxes you already have at home.
- Customizable: You can personalize the wrapping paper, ribbons, and decorations to match your specific holiday theme or color scheme.
- Versatile: Gift box displays work well in any area of the home—from under the tree to a centerpiece on the table to decorations on bookshelves.
- Easy to Set Up: With just a few materials, you can quickly transform empty boxes into beautiful decor pieces in a matter of minutes.
- Reusable: These gift boxes can be stored and reused for future holidays, making them an eco-friendly and durable decorating option.
Gift Box Displays are a charming and simple way to create a festive atmosphere in your home for the holidays. Whether you use them to add visual interest around your Christmas tree or as part of a creative table arrangement, these decorative boxes help bring the spirit of gift-giving into your Christmas Decor.
20. Scrap Fabric Banners
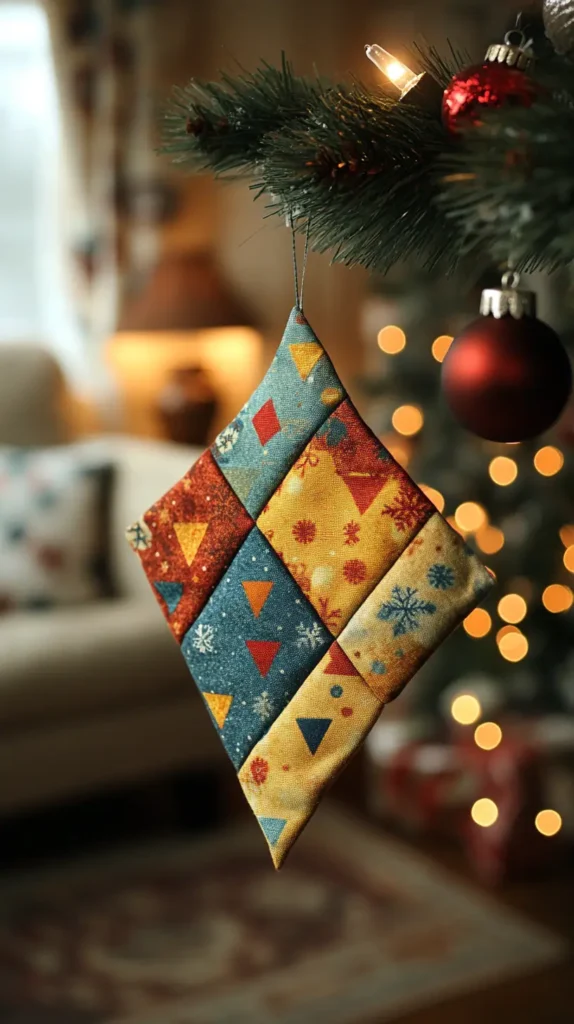
Scrap Fabric Banners are a creative and eco-friendly way to add festive charm to your Christmas Decor. By repurposing leftover fabric scraps, you can create a colorful and customizable banner that adds a touch of homemade warmth to your holiday space. These banners can be hung along mantels, windows, doorways, or even wrapped around a tree for a unique and personalized look.
Materials:
- Leftover fabric scraps (old clothing, curtains, or fabric remnants)
- Scissors
- Twine, string, or ribbon (for hanging)
- Hot glue gun or sewing kit (optional)
- Small wooden dowels (optional, for a more polished look)
Steps to Create Scrap Fabric Banners:
- Collect Fabric Scraps:
- Gather fabric scraps that you have lying around from previous projects or old clothes that are no longer in use. You can mix and match different colors, patterns, and textures to create a fun and eclectic look.
- Use a variety of Christmas-themed fabrics (red, green, gold, plaid, etc.) to add holiday spirit to the banner.
- Cut the Fabric Pieces:
- Step 1: Cut your fabric scraps into shapes like triangles, squares, or pennant-style flags. The size of the pieces can vary, but a standard size for fabric flags is about 4-6 inches wide and 6-8 inches long.
- Step 2: If you want a more uniform look, use a ruler to make sure the edges are straight. You can also fray the edges slightly for a more rustic and casual vibe.
- Attach the Fabric to the Twine/String:
- Step 1: Lay the twine or ribbon flat and arrange your fabric pieces along the string, spacing them evenly. You can overlap them slightly, or leave space for a more airy look.
- Step 2: Secure the fabric pieces to the twine using hot glue or sewing. If you’re using glue, apply a small dot to the top of each fabric piece and press it firmly onto the string. If sewing, stitch a small seam along the top of each fabric piece.
- Step 3: Once all the fabric pieces are attached, trim any excess string or twine from the ends of the banner.
- Hang Your Banner:
- Step 1: Choose where you want to hang your banner—whether it’s draped across a mantel, hanging in front of windows, or across doorways.
- Step 2: Attach the ends of the twine to nails, hooks, or adhesive strips to hold it securely in place.
- Step 3: If you want a more polished look, you can attach the ends of the twine to small wooden dowels, creating a more structured appearance. The dowels can be decorated with paint or holiday-themed ornaments for extra flair.
- Add Final Touches (Optional):
- You can add small embellishments to your banner, such as:
- Christmas-themed charms, bells, or buttons.
- Small sprigs of holly, pinecones, or artificial berries.
- Paint or fabric markers to write festive messages like “Merry Christmas” or “Happy Holidays” directly on the fabric.
- You can add small embellishments to your banner, such as:
Benefits of Scrap Fabric Banners:
- Eco-Friendly: Repurposing fabric scraps is an environmentally friendly way to create holiday decor without wasting materials.
- Cost-Effective: Since you’re using leftover materials, this project is very budget-friendly.
- Customizable: You can easily tailor the colors, patterns, and size of the banner to match your home’s decor and holiday theme.
- Creative: A scrap fabric banner adds a personal, handmade touch that stands out among store-bought decorations.
- Easy to Make: With just a few simple steps, you can quickly create a festive and cheerful banner in no time.
Scrap Fabric Banners are a wonderful way to incorporate a handmade, rustic feel into your Christmas Decor. Whether you hang it on the wall, drape it over the fireplace, or adorn your Christmas tree with it, this festive garland brings a warm and personal touch to your holiday home.
21. Recycled Bottle Decorations

Recycled Bottle Decorations are a fantastic way to repurpose glass bottles into beautiful Christmas Decor. This eco-friendly project not only helps reduce waste but also adds a unique, homemade touch to your holiday decorations. Whether you use the bottles as vases for winter greenery or as charming candle holders, they’re sure to bring a festive and creative flair to your home.
Materials:
- Empty glass bottles (wine, beer, soda, etc.)
- Paint (spray paint or acrylic)
- Winter greenery (evergreen sprigs, holly, pinecones, etc.) or candles
- Ribbons, twine, or burlap (optional for extra decoration)
- Glue (optional, for embellishments)
- Scissors (if cutting ribbon or twine)
Steps to Create Recycled Bottle Decorations:
- Clean and Prepare the Bottles:
- Wash the bottles thoroughly to remove any labels or residue. You can soak them in warm soapy water to easily peel off labels.
- Dry the bottles completely before moving to the next step.
- Paint the Bottles:
- Step 1: Decide on your color scheme. Classic Christmas colors like red, gold, white, or green work well, but you can also use metallic colors like silver or copper for a more elegant look.
- Step 2: Use spray paint or acrylic paint to coat the outside of the bottles. You may want to paint the whole bottle or leave part of it exposed for a more rustic or vintage effect. If you choose spray paint, apply a few light coats to ensure smooth coverage.
- Step 3: Let the paint dry completely before proceeding. You can add additional coats if necessary for a solid color.
- Decorate the Bottles (Optional):
- Step 1: Wrap the neck of the bottles with twine, ribbon, or burlap to add texture and extra charm. You can tie a bow or create a simple knot for a rustic look.
- Step 2: Add embellishments like small ornaments, pinecones, or even Christmas tags to give the bottles a personalized touch. Use glue to secure these items if needed.
- Turn the Bottles into Vases or Candle Holders:
- Vases:
- Fill the bottles with water and place winter greenery like evergreen sprigs, holly, or pinecones inside. The greenery will add a festive touch, and the bottle’s rustic look will complement the natural elements.
- You can also add a few sprigs of artificial berries or small flowers to enhance the arrangement.
- Candle Holders:
- If you prefer to use the bottles as candle holders, place a small candle inside the bottle. For safety, you can use battery-operated LED candles if you don’t want to deal with open flames.
- For larger bottles, you can even use pillar candles or tea lights, which can sit securely inside the bottle opening.
- Vases:
- Display Your Recycled Bottle Decorations:
- On the Mantel: Line up the decorated bottles along your fireplace mantel for a festive, eye-catching display.
- On the Table: Place the bottles as part of a centerpiece on your dining or coffee table. Arrange them in the center and scatter some small ornaments, greenery, or candles around them for a complete look.
- By the Door: Group them together by the door or on an entryway table for a welcoming and festive touch.
- On the Shelf: Display the bottles on shelves, adding a mix of different heights for visual interest.
- Optional Additions:
- Snow Effect: For an extra wintery touch, spray the bottles with fake snow or sprinkle some faux snow around the base of the bottles.
- Glitter: Add some sparkle by applying glitter to certain areas, such as the neck of the bottle or the base.
- Personalization: Add holiday messages or initials using a paint pen or chalkboard paint for a more personalized touch.
Benefits of Recycled Bottle Decorations:
- Eco-Friendly: Repurposing glass bottles helps reduce waste and gives items a second life.
- Budget-Friendly: This project uses items you already have at home, making it a very cost-effective decorating option.
- Customizable: You can choose your own colors, materials, and embellishments to match your holiday theme.
- Versatile: Recycled bottle decorations can serve multiple purposes, from vases to candle holders to centerpieces.
- Creative: These upcycled decorations are a fun and creative way to add a unique, handcrafted look to your holiday decor.
Recycled Bottle Decorations are a stylish and sustainable way to bring a festive, personal touch to your Christmas Decor. Whether you choose to turn them into elegant vases or whimsical candle holders, they’re sure to make a memorable statement in your home this holiday season.
22. Seasonal Throw Blankets
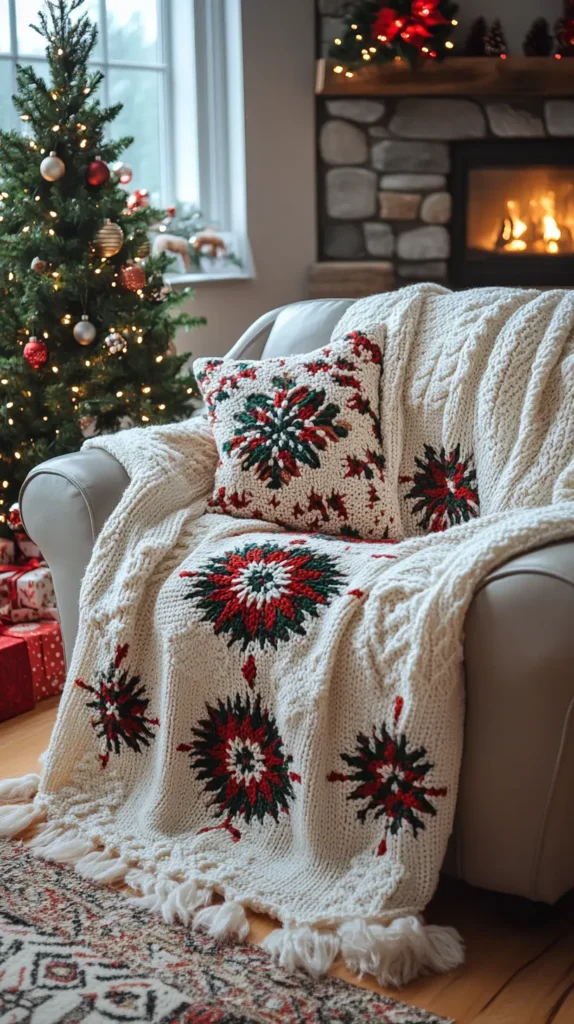
Seasonal Throw Blankets are an easy and affordable way to add warmth and festive charm to your Christmas Decor. Swapping out regular blankets for cozy Christmas-themed throws can instantly make a room feel cozier and more inviting, perfect for the winter season.
Materials:
- Christmas-themed throw blankets (available at most home decor stores or online)
- Neutral-colored throw pillows (optional, for added comfort)
- Cozy holiday accessories (candles, ornaments, etc.)
Steps to Create a Cozy Christmas Vibe with Seasonal Throw Blankets:
- Choose the Perfect Throw Blanket:
- Look for blankets that feature classic Christmas patterns such as plaid, snowflakes, reindeer, or festive stripes. You can find inexpensive options at many stores, especially during the holiday season.
- If you prefer a more subtle touch, opt for solid colors in traditional Christmas hues like red, green, gold, or silver.
- Layer for Extra Comfort:
- For a cozy and layered look, drape the throw blanket over your couch, armchair, or bed, and fold it neatly for a stylish finish.
- You can also layer multiple throws for added warmth and texture, mixing patterns and colors for a playful and inviting atmosphere.
- Pair with Throw Pillows:
- To complete the look, add Christmas-themed or matching throw pillows. Look for ones with festive designs like snowmen, Christmas trees, or holiday greetings to enhance the seasonal feel.
- Alternatively, use neutral-colored pillows that complement your throw blanket for a more understated, elegant touch.
- Add Holiday Accents Around the Blanket:
- Place candles, small ornaments, or seasonal greenery (like holly or pinecones) nearby to enhance the holiday vibe.
- You can also add a small holiday-themed tray with a mug of hot cocoa or a festive book for extra warmth and charm.
- Strategic Placement:
- Living Room: Drape a throw blanket over the back of your couch or chair for easy access during chilly evenings. It adds both function and style.
- Bedroom: Swap out your usual bedding with a Christmas-themed throw blanket at the foot of your bed for a subtle festive touch.
- Entryway: Place a throw blanket over a bench or in a decorative basket near the door for an inviting look.
- Optional Additions:
- If you prefer to DIY, consider making your own holiday throw blanket using fabric that fits your style. Whether it’s a soft fleece or knitted fabric, you can create a custom piece that reflects your home’s aesthetic.
- For extra coziness, use throws made from warm materials like fleece or wool, ideal for cold winter nights.
Benefits of Seasonal Throw Blankets:
- Instant Coziness: A Christmas-themed throw instantly transforms the ambiance of a room, making it feel more comfortable and festive.
- Affordable: You can find budget-friendly options at various stores, making it an inexpensive way to update your home for the season.
- Versatile: Throw blankets can be easily moved and used in various areas of your home, from the living room to the bedroom, to suit your needs.
- Easy to Store: After the season ends, simply fold them up and store them for next year, saving you space and money on decorations.
Seasonal Throw Blankets are a simple yet effective way to elevate your Christmas Decor. With their cozy feel and festive designs, they help create a warm and welcoming atmosphere, perfect for celebrating the holidays.
23. Simple Centerpieces
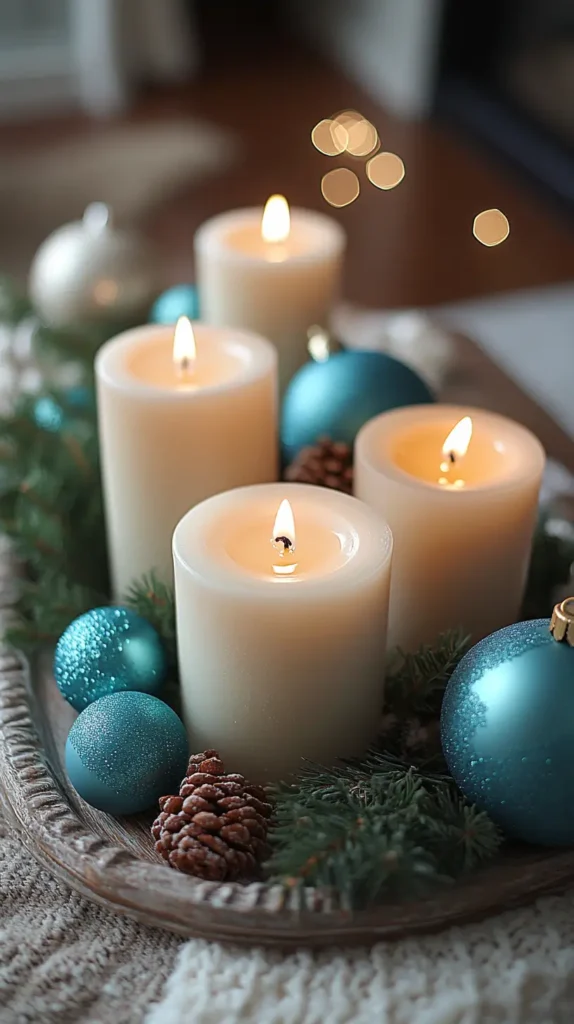
Simple Centerpieces are a quick and affordable way to bring festive elegance to your table for the holidays. With just a few items that you likely already have at home, you can create a stunning and sophisticated display that adds charm to your Christmas Decor without breaking the bank.
Materials:
- Candles (pillar, tea lights, or LED)
- Ornaments (old or new)
- Greenery (fresh evergreen sprigs, holly, or faux greenery)
- Tray, platter, or decorative bowl
- Optional: ribbons, pinecones, or small holiday accents
Steps to Create a Simple Centerpiece:
- Select a Base:
- Choose a tray, platter, or bowl to serve as the base for your centerpiece. This can be something you already own—an old serving tray, a decorative dish, or even a large plate. Opt for a neutral color to let the other elements stand out or a holiday-themed one for a more festive look.
- Arrange the Greenery:
- Lay fresh greenery such as evergreen sprigs, holly leaves, or artificial pine branches as a base layer on your tray or platter. This creates a natural, wintery foundation for the centerpiece.
- You can also incorporate pinecones, twigs, or dried flowers if you have them on hand for added texture and dimension.
- Add Candles:
- Place a few candles (pillar, tea lights, or LED) in the center or along the edges of the platter. The soft glow from the candles will add warmth and create a cozy ambiance.
- Be mindful of placement for safety if using real candles—keep them away from flammable materials like dry greenery.
- Incorporate Ornaments:
- Scatter ornaments around the candles and greenery for a festive touch. Use a mix of different sizes and colors—classic red and gold ornaments work well, but you can also mix in silver, white, or even DIY ornaments.
- Alternatively, cluster the ornaments together in small groups for a more minimal, modern effect.
- Final Touches:
- Add a few additional elements like ribbons, small holiday figurines, or even a few sprigs of berries to fill in any gaps and enhance the overall look.
- If you want to give it a personal touch, add small framed photos or holiday cards as part of the centerpiece arrangement.
- Display Your Simple Centerpiece:
- Place the centerpiece in the center of your dining table, coffee table, or on a sideboard to create a focal point.
- For smaller tables, you can create individual mini centerpieces using smaller trays or plates, each with a few candles and ornaments.
- If you’re using this on a kitchen counter or entryway table, consider adding a few more candles or seasonal accents like a small wreath or festive placemats.
Benefits of Simple Centerpieces:
- Affordable: Since you’re using items you already have, this is a cost-effective option for decorating your table.
- Customizable: You can adjust the size, color scheme, and style of the centerpiece to match your home’s existing decor.
- Quick to Assemble: Simple centerpieces are easy to put together and can be done in just a few minutes, leaving you with more time to focus on other holiday activities.
- Versatile: This type of centerpiece can work for dining tables, coffee tables, or even as part of your mantel or buffet display.
- Effortlessly Elegant: With just a few elements—candles, greenery, and ornaments—you can create a stunning and festive atmosphere.
Simple Centerpieces are an excellent way to enhance your Christmas Decor with minimal effort. This DIY project not only looks beautiful but also adds a personal touch to your holiday tablescapes.
24. DIY Christmas Village
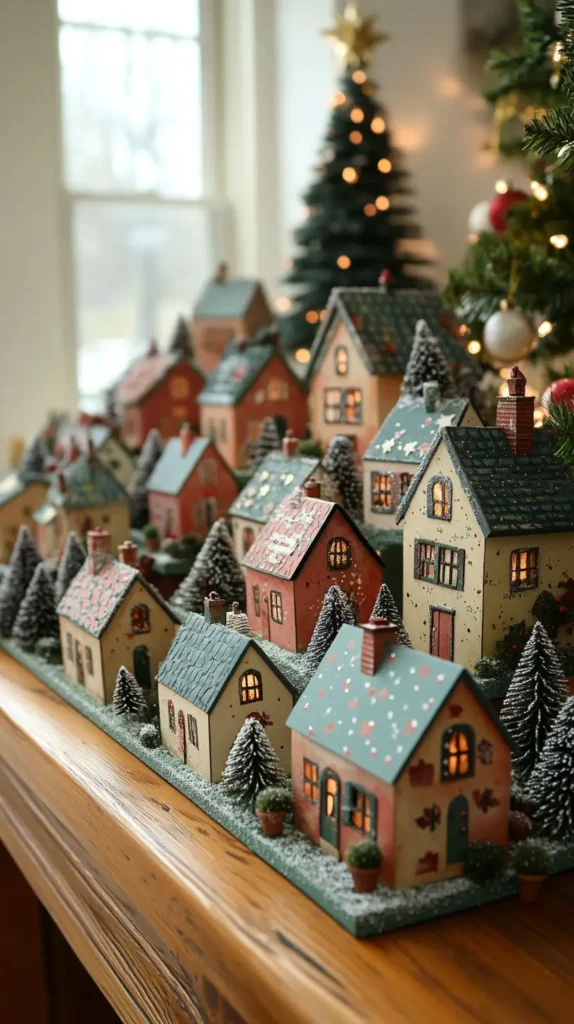
DIY Christmas Village is a delightful and affordable way to bring a charming, whimsical feel to your Christmas Decor. By crafting your own miniature village with basic materials like cardstock, paint, or cardboard, you can create a personalized and festive display that adds warmth and magic to your holiday setting.
Materials:
- Cardstock, cardboard, or paper
- Paint (acrylic or craft paint)
- Glue or tape
- Scissors
- Small embellishments (optional: glitter, faux snow, buttons, etc.)
- Markers, stickers, or other decorative elements
- Optional: battery-operated tea lights for added glow
Steps to Create Your DIY Christmas Village:
- Design the Houses:
- Start by sketching out the designs for your little houses. You can create simple geometric shapes (rectangles and triangles for the roofs) or more intricate designs with chimneys, windows, and doors.
- If you prefer templates, search online for printable Christmas village patterns that you can use as guides for cutting.
- Cut and Assemble the Houses:
- Once you’ve designed your houses, cut out the shapes from your cardstock or cardboard. Fold them along the edges and glue or tape the sides to create 3D houses.
- If you want a variety of buildings, consider making different shapes, such as a church, schoolhouse, or small shops.
- Decorate the Houses:
- Use paint to give each house a festive look. Paint them in traditional Christmas colors like red, green, white, and gold. You can also add details like snow-covered rooftops, wreaths on the doors, or icicle designs hanging from the eaves.
- Decorate with stickers, glitter, or markers for extra festive flair. You can add windows, doors, or trees on the houses to make each one unique.
- Add Extra Holiday Touches:
- Once the houses are painted and dried, embellish them with faux snow or cotton balls to simulate snow-covered roofs. You can also use white paint to add small snowflakes or patterns to the walls of the houses.
- If you want to add a glowing effect, place battery-operated tea lights or fairy lights inside the houses to create a warm, cozy glow.
- Create a Scenic Base:
- To make your village come to life, set up a base for your display. You can use a large tray or wooden board as the foundation.
- Cover the base with faux snow or white fabric to simulate a snowy landscape. Arrange the houses, along with miniature trees, people, or animals, around the base. Add some small decorations like pinecones or small ornaments to enhance the scene.
- Display Your Christmas Village:
- Place your DIY village on a mantel, table, or console for all to admire. You can also incorporate it as part of your holiday table centerpiece or in the center of a dining room table.
- If you want to get creative, you can make your village spread across multiple surfaces or create small sections that connect like streets or pathways.
Benefits of DIY Christmas Village:
- Affordable: This project is very budget-friendly, especially since you’re using inexpensive materials you likely already have at home.
- Customizable: You can personalize the village with colors, shapes, and styles that suit your home’s decor.
- Fun to Create: This project can be a great family activity or an enjoyable solo craft that brings out your creativity.
- Nostalgic: A homemade Christmas village brings a sentimental and cozy vibe, perfect for evoking cherished holiday memories.
- Interactive: You can add little surprises, like small figurines or hidden details, to encourage guests or family members to explore the village.
Optional Additions:
- Miniature Accessories: Add small holiday decorations like tiny Christmas trees, figurines, or little benches and lampposts to create a more immersive village scene.
- Motion: If you’re feeling extra creative, you can incorporate a small battery-powered carousel or spinning decoration to add movement to the village.
- Interactive Lights: Create paths of LED lights between the houses or use light-up houses for extra brightness.
The DIY Christmas Village is a creative and heartwarming way to enhance your Christmas Decor. With just a few materials, you can craft a charming holiday scene that adds personality and warmth to your home.
25. Gingerbread House Display
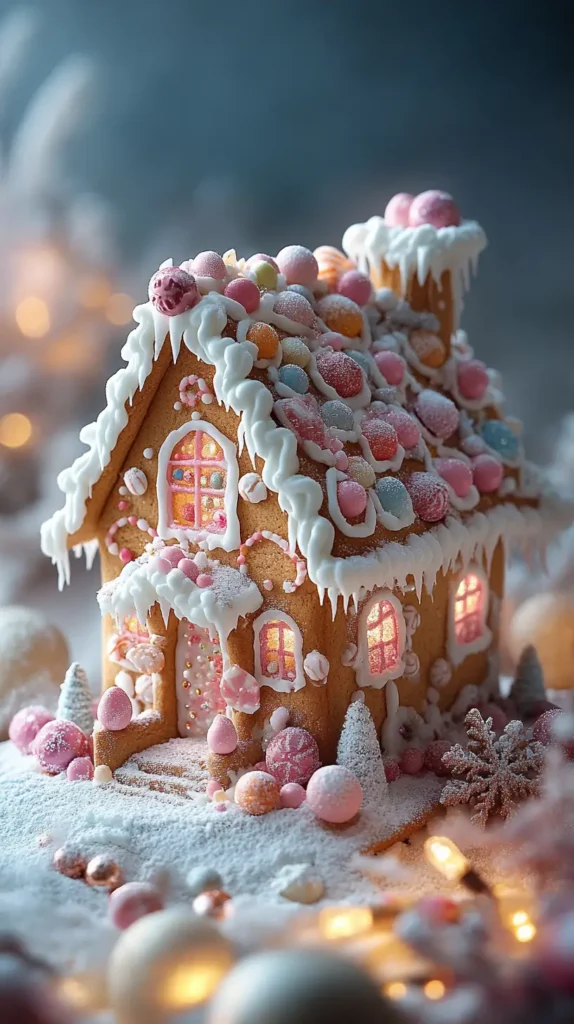
Gingerbread House Display is a timeless and festive DIY project that brings a sweet touch to your Christmas Decor. Whether you decide to bake your own gingerbread house or assemble one from a kit, it’s a charming and nostalgic addition to your holiday setup. With its whimsical design and candy-covered details, a gingerbread house creates a cozy, magical atmosphere in any room.
Materials:
- Gingerbread house kit or homemade gingerbread pieces (gingerbread dough, royal icing, candy decorations)
- Royal icing (or store-bought icing)
- Assorted candy decorations (gumdrops, candy canes, sprinkles, chocolate chips, etc.)
- Sprinkles, edible glitter (optional)
- Small lights (optional, for illumination)
Steps to Create Your Gingerbread House Display:
- Choose Your Base:
- You can either buy a gingerbread house kit or bake your own gingerbread pieces using a gingerbread house template.
- If you’re baking, roll out the dough, cut out the shapes for the walls and roof, and bake them according to the recipe.
- Assemble the House:
- Once the gingerbread pieces are baked and cooled, use royal icing to glue the walls together. For added stability, you can place the house in the refrigerator for a short time while the icing hardens.
- For a kit, simply follow the instructions to assemble the pieces with the included icing.
- Decorate the House:
- Get creative with decorating the house! Use candies like gumdrops, candy canes, chocolate chips, and sprinkles to embellish the roof, windows, and doors.
- Add details like a candy “front door,” piped icing icicles on the roof, or a pathway made from small candies or crushed graham crackers.
- If you want to make your gingerbread house extra festive, use edible glitter or snow-like decorations such as coconut flakes for a frosty effect.
- Add Lights (Optional):
- For a warm, inviting glow, you can place small battery-operated LED lights around the house, inside, or beneath it. This will enhance the cozy, festive feel, especially when displayed at night.
- Create a Display Base:
- Place the gingerbread house on a decorative platter or tray for a polished display. Surround it with faux snow, mini Christmas trees, or small holiday figurines to add to the scene.
- You could also create a “village” by placing several gingerbread houses next to each other on a large tray, with pathways made of candy canes or sprinkles.
- Display Your Gingerbread House:
- Set your gingerbread house display on a dining table, coffee table, or mantel as part of your Christmas decor. It’s a festive centerpiece that will bring smiles to anyone who sees it.
- For a more interactive display, consider making small gingerbread house kits for family or friends to decorate themselves.
Benefits of Gingerbread House Display:
- Festive and Fun: A gingerbread house brings instant holiday cheer and is perfect for both kids and adults to enjoy.
- Customizable: Whether you make your house colorful with candy or go for a more traditional gingerbread look, the design is completely customizable.
- Nostalgic: Building and decorating gingerbread houses is a beloved holiday tradition that adds a sense of warmth and joy to the season.
- Edible: You can even enjoy the house after the holidays! Though it may be best to keep it on display for a bit first.
- Interactive: This project can be a great group activity, especially if you create multiple houses for family or friends to decorate together.
Optional Additions:
- Miniature Accessories: Add tiny figures, miniature trees, or small ornaments to create a more elaborate scene.
- Edible Details: For a truly delicious touch, consider adding edible details like gingerbread cookies shaped like people or animals to go along with your display.
The Gingerbread House Display is a delightful way to enhance your Christmas Decor with a blend of creativity, tradition, and sweetness. Whether simple or elaborate, this display will create a heartwarming and festive atmosphere in your home.
26. Tea Light Holders
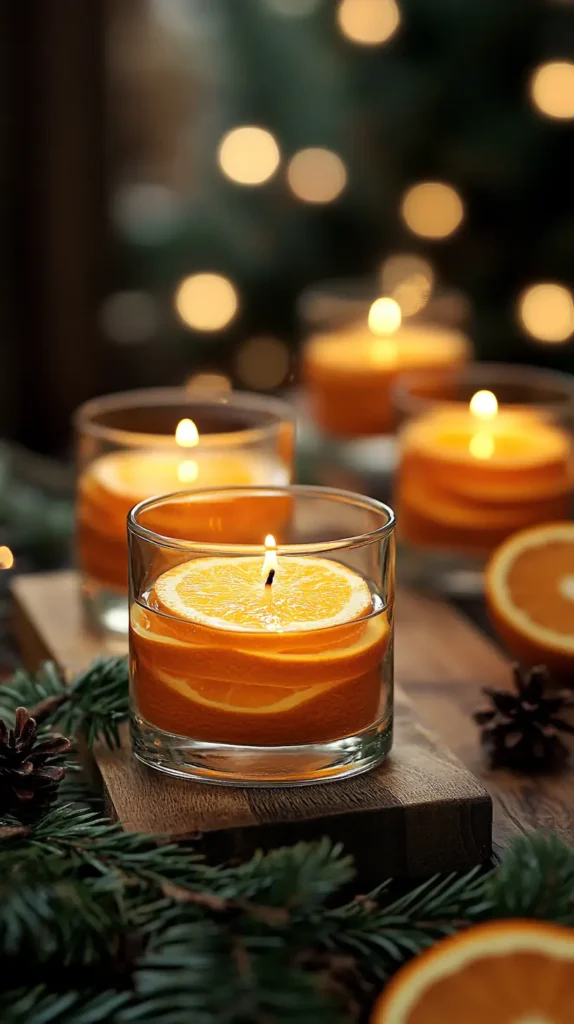
Tea Light Holders are a simple yet effective way to add a warm, cozy glow to your Christmas Decor. These inexpensive and versatile holders can be crafted from everyday items like small jars, glasses, or even hollowed-out oranges, making them a perfect budget-friendly option for enhancing your holiday atmosphere.
Materials:
- Tea light candles (real or battery-operated)
- Small jars, glasses, or containers (mason jars, votive holders, old cups, etc.)
- Hollowed-out oranges, apples, or other fruits (optional)
- Ribbon, twine, or string (optional, for decoration)
- Faux snow, glitter, or small ornaments (optional, for extra flair)
Steps to Create Your Tea Light Holders:
- Choose Your Container:
- Select small jars, glasses, or other containers for your tea light holders. Mason jars or small glass vases work well for a rustic or farmhouse style, while elegant votive holders can add a touch of sophistication.
- For a more natural look, you can hollow out oranges, apples, or other fruits to create unique and eco-friendly tea light holders.
- Prepare the Containers:
- If using glass containers or jars, you can decorate them with ribbon, twine, or lace to add a festive touch. Wrap the ribbon around the neck of the jar and tie a bow, or glue it in place for a more permanent look.
- For fruit holders, carefully hollow out the center of an orange, apple, or pear using a spoon or knife, leaving a sturdy base for the tea light. Be sure the fruit is stable and can hold the candle securely.
- Decorate the Holders:
- If desired, add a layer of faux snow or glitter to the outside of the containers to create a frosty, winter wonderland effect. You can also add small holiday-themed decorations like mini pinecones, holly leaves, or tiny ornaments around the base of the jar.
- For a more rustic style, wrap the jars with burlap or twine, and glue small pinecones or berries to the ribbon for a natural look.
- Place the Tea Lights:
- Place a tea light inside each holder. If you’re using real candles, make sure to monitor them closely when lit. Alternatively, battery-operated tea lights are a safe and long-lasting option that can be placed inside any container without the worry of an open flame.
- For hollowed-out fruits, place a small tea light or LED candle in the center where you’ve removed the fruit’s core.
- Arrange the Holders:
- Group several tea light holders together to create a cozy centerpiece for a table or mantel. You can also scatter them around the house—on shelves, window sills, or near the tree— to create a soft, inviting glow throughout your space.
- If you want to add an extra layer of charm, place them on trays with a few small evergreen branches or holiday greenery around them.
Benefits of Tea Light Holders:
- Affordable: These holders are inexpensive to make and can often be created from items you already have around your home.
- Customizable: You can tailor the look of your tea light holders to match your personal style, whether rustic, elegant, or whimsical.
- Cozy Atmosphere: The soft, flickering light from tea candles instantly creates a warm and inviting ambiance, perfect for the holiday season.
- Eco-Friendly: Using natural materials like fruit or repurposing old jars is an eco-conscious way to decorate for Christmas.
- Versatile: These holders can be used throughout your home, from the dining table to the bathroom, or even as part of your outdoor decor.
Optional Additions:
- Colorful Ribbons or Bows: You can add pops of color by tying vibrant red or green ribbons around your tea light holders for a festive touch.
- Hanging Lanterns: If using glass jars, you could attach small handles and hang them from trees, hooks, or even on a porch for an enchanting outdoor display.
- Floating Candles: Instead of using regular tea lights, try placing floating candles in glass containers filled with water or decorative elements like cranberries or evergreen sprigs.
The Tea Light Holders are an easy, affordable, and beautiful way to brighten up your Christmas Decor. Whether simple or elaborately decorated, they bring warmth and a magical glow to any holiday setting.

